Frontend Component Development: Navigating Key Features in XM Cloud
These key features will help you communicate with other Sitecore developers. You will be able to debug and request faster requirements you’ll need to develop your frontend code. You will be able to understand how things flow and get a better understanding in solving complex issues and requirements your project might need from you. Three main parts inside XM Cloud that are beneficial when developing your components are the following:
- Rendering
- Templates
- Data sources
Renderings — Our Component
The reusable Sitecore components we develop in the frontend are called the renderings. In Sitecore, the component itself is separated into different parts but the presentation and functionality are grouped as one which is called the Rendering.
In the rendering, we setup most of the needed important bits of our component. We initially create the empty husk of the component here which can even be directly added on a page. Without the need of dynamic data and customization, this functions as simply the look and behavior of a component. In Frontend Development, this is simply the file of our component. anything rendered or returned on the file when added on the page will be seen.
Understanding the Json Rendering item will be
useful on debugging your frontend code when integrating it with the sitecore component setup. This item is
located at /sitecore/layout/Renderings/Feature/… which will contain some subfolders which are
best
structured depending on your project.
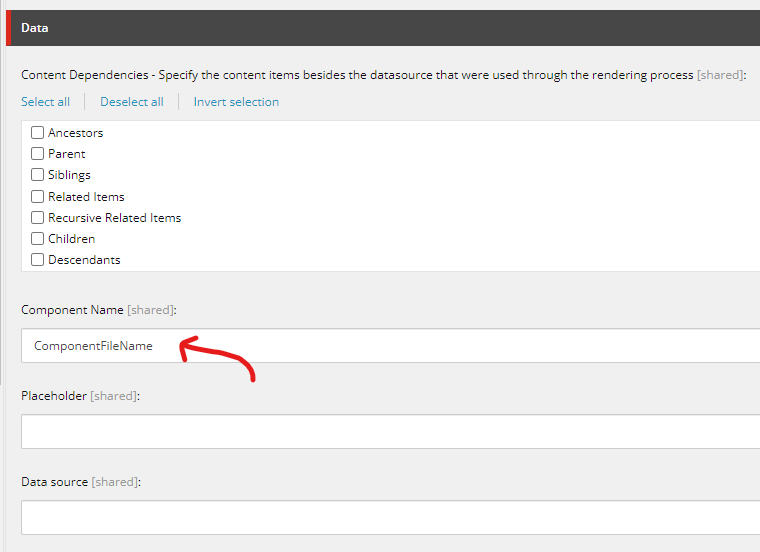
Component Name — under the Data section, you
will find the Component Name. This is the file name we’ll need to set on our frontend component. Based on the
example below, you would be naming your file ComponentFileName.tsx .
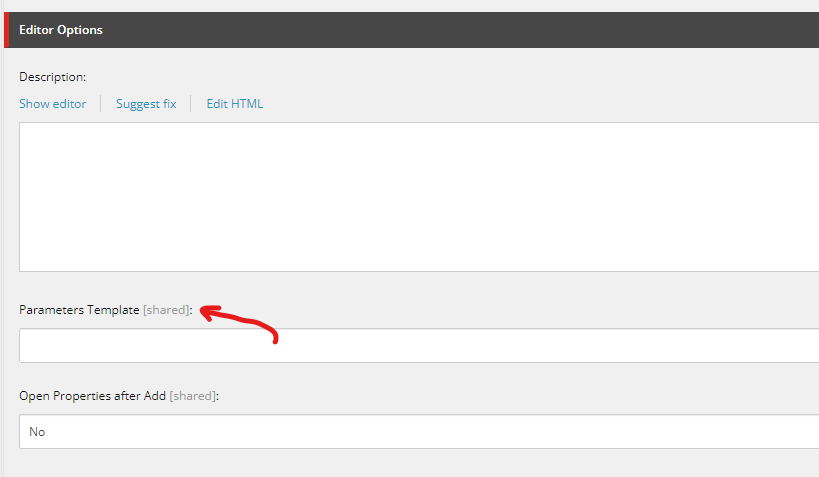
Parameters Template — under the Editor Options section, you will find Parameters Template. This is used to add the templates you want on the Rendering Parameters. This is not required, you can leave it empty and Sitecore will use the default template.
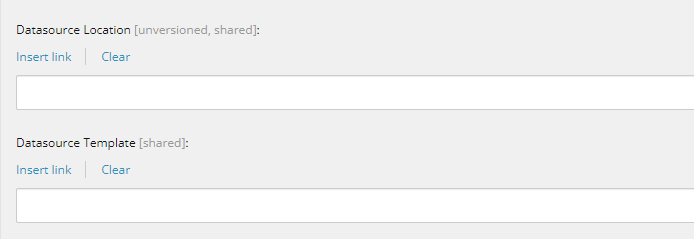
Datasource Location & Template — this is under the Editor Options section, the Datasource Location will define where your rendering will allow you to create and find the associated datasources. Datasource Template will restrict what template is allowed as your datasource for your rendering.
The Datasource Location also accepts queries that will help
make the location more dynamic based on the criteria on your query. Here’s
a lost of the different query syntax, you’ll notice you can reference different items from the page
itself, to items of a specific template. An example of a query would look like this
query:$site/*[@@name='Home']//*[@@templatename='Page'] , this
query means all items of the Page template under the Home item of the current site. This is a powerful tool to
master.
Templates — The Skeleton of our Component
Sitecore templates are the fundamental building blocks used to define the structures of different content. In our templates, we create fields which help make a lot of the component dynamic and authorable. These fields can be single-line text, rich text, images, date, boolean, etc. In Frontend Development, we usually refer to templates as two parts of our component, they are the Rendering Fields or the Rendering Parameters.
Rendering Fields
Without going into too much detail (we will go deeper into this in Data sources), rendering fields are usually associated with contextual data. These are usually information which are stored independent to a component’s design.
On the Json rendering, we usually add this on the Datasource Template. This will restrict what templates of datasources are accepted on the rendering.
Examples of Rendering Fields are the ff:
- Title text of a banner
- Richtext of a blog
- Images used on a card
- Date Published
Rendering Parameters
Templates used for Component Parameters on the other hand, are
mostly used to manipulate the presentation on a page. The fields defined here are directly on the rendering
itself which makes it add more variations on how the component will look.
On the Json rendering, we usually
add this on the
Rendering Parameters. when we check the presentation settings of a
rendering item we can directly see these fields.
Examples of Rendering Parameters are the ff:
- Selecting from a list of possible classes to add to the component that will change a specific styling of that component.
- A Boolean field which decides whether the component is visible on mobile.
- Defining whether the component is visible depending on certain conditions.
When debugging your code on integration, you can check whether
the fields are using the right field type and are set to the right key as well. You can find the templates at
/sitecore/templates/Feature . This will come in handy when we do our typing for the fields of our
components.
It’s a good way to practice how you’ll be accessing the fields on your component. When collaborating with the developers responsible for constructing the Sitecore items for the component knowing the common field types is important. The usual field types used are the ff:
- Single-Line Text - a simple text input field, you can use this for simple text data.
- Rich Text
- Image
- Droplink — this pulls all the data associated with the selected option
- Multilist — a mutliselect Droplink, this usually only opens one level of options, but allows you to Select/Deselect all.
- Treelist — a multiselect Droplink, this includes all the subitems on the specific source. This does not allow to Select/Deselect all.
- General Link - this link can be set to different kinds of links, you can have it set to relative links on the site, external links, mailto links, etc.
- Checkbox - basically used to set a boolean field
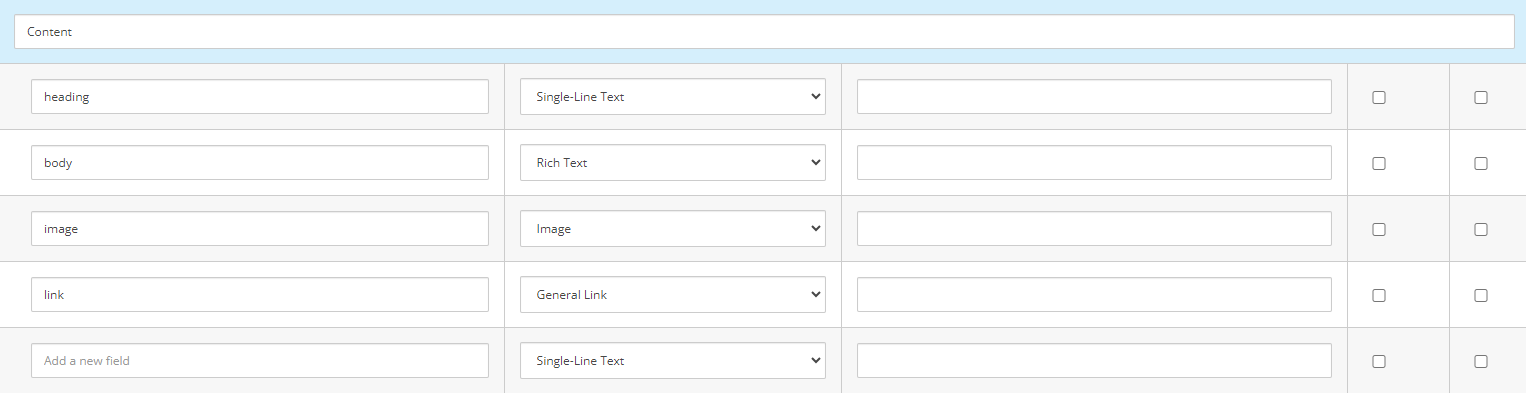
Here is a simple example of how it will look like to have a
template have it’s fields set. As you can see we have 4 fields, heading, body,
image, and link .
We can then use this information to help type the fields in our component. You can refer to the guide below for developing your components.
Datasources — Content of our Component
Datasources are where all the data are stored separately from the page. It’s also a good way for data to be structured for the purpose of re-usability. Datasources can be used on both creating new templates (as sources for multilists, droplists, etc.) and presenting contextual data on a page.
Template Fields
Some template fields require predefined data as options for authoring. These are pretty useful for fields that are the ff:
- Categories/Status — These are the normal options of task management or progress tracking like “In Progress” or “Completed”. Statuses as well like “Warning”, “Success”, etc.
- Locations — these can be lists of countries, provinces, states, or any list that would help narrow down what the author needs without having to manually type it. It’s also good for uniformity of data as well.
- Related Entities — there might be some business processes that fit in this category. You can base it off of another template of employee positions, or a list of employees who can be direct supervisors.
Contextual Data
These are basically the data we usually associate with what is presented on the page. Two possible locations of this is based on “are they going to be re-used” or “do we just need them on a single page?”. These are mostly for how clean you would want the data to be organized.
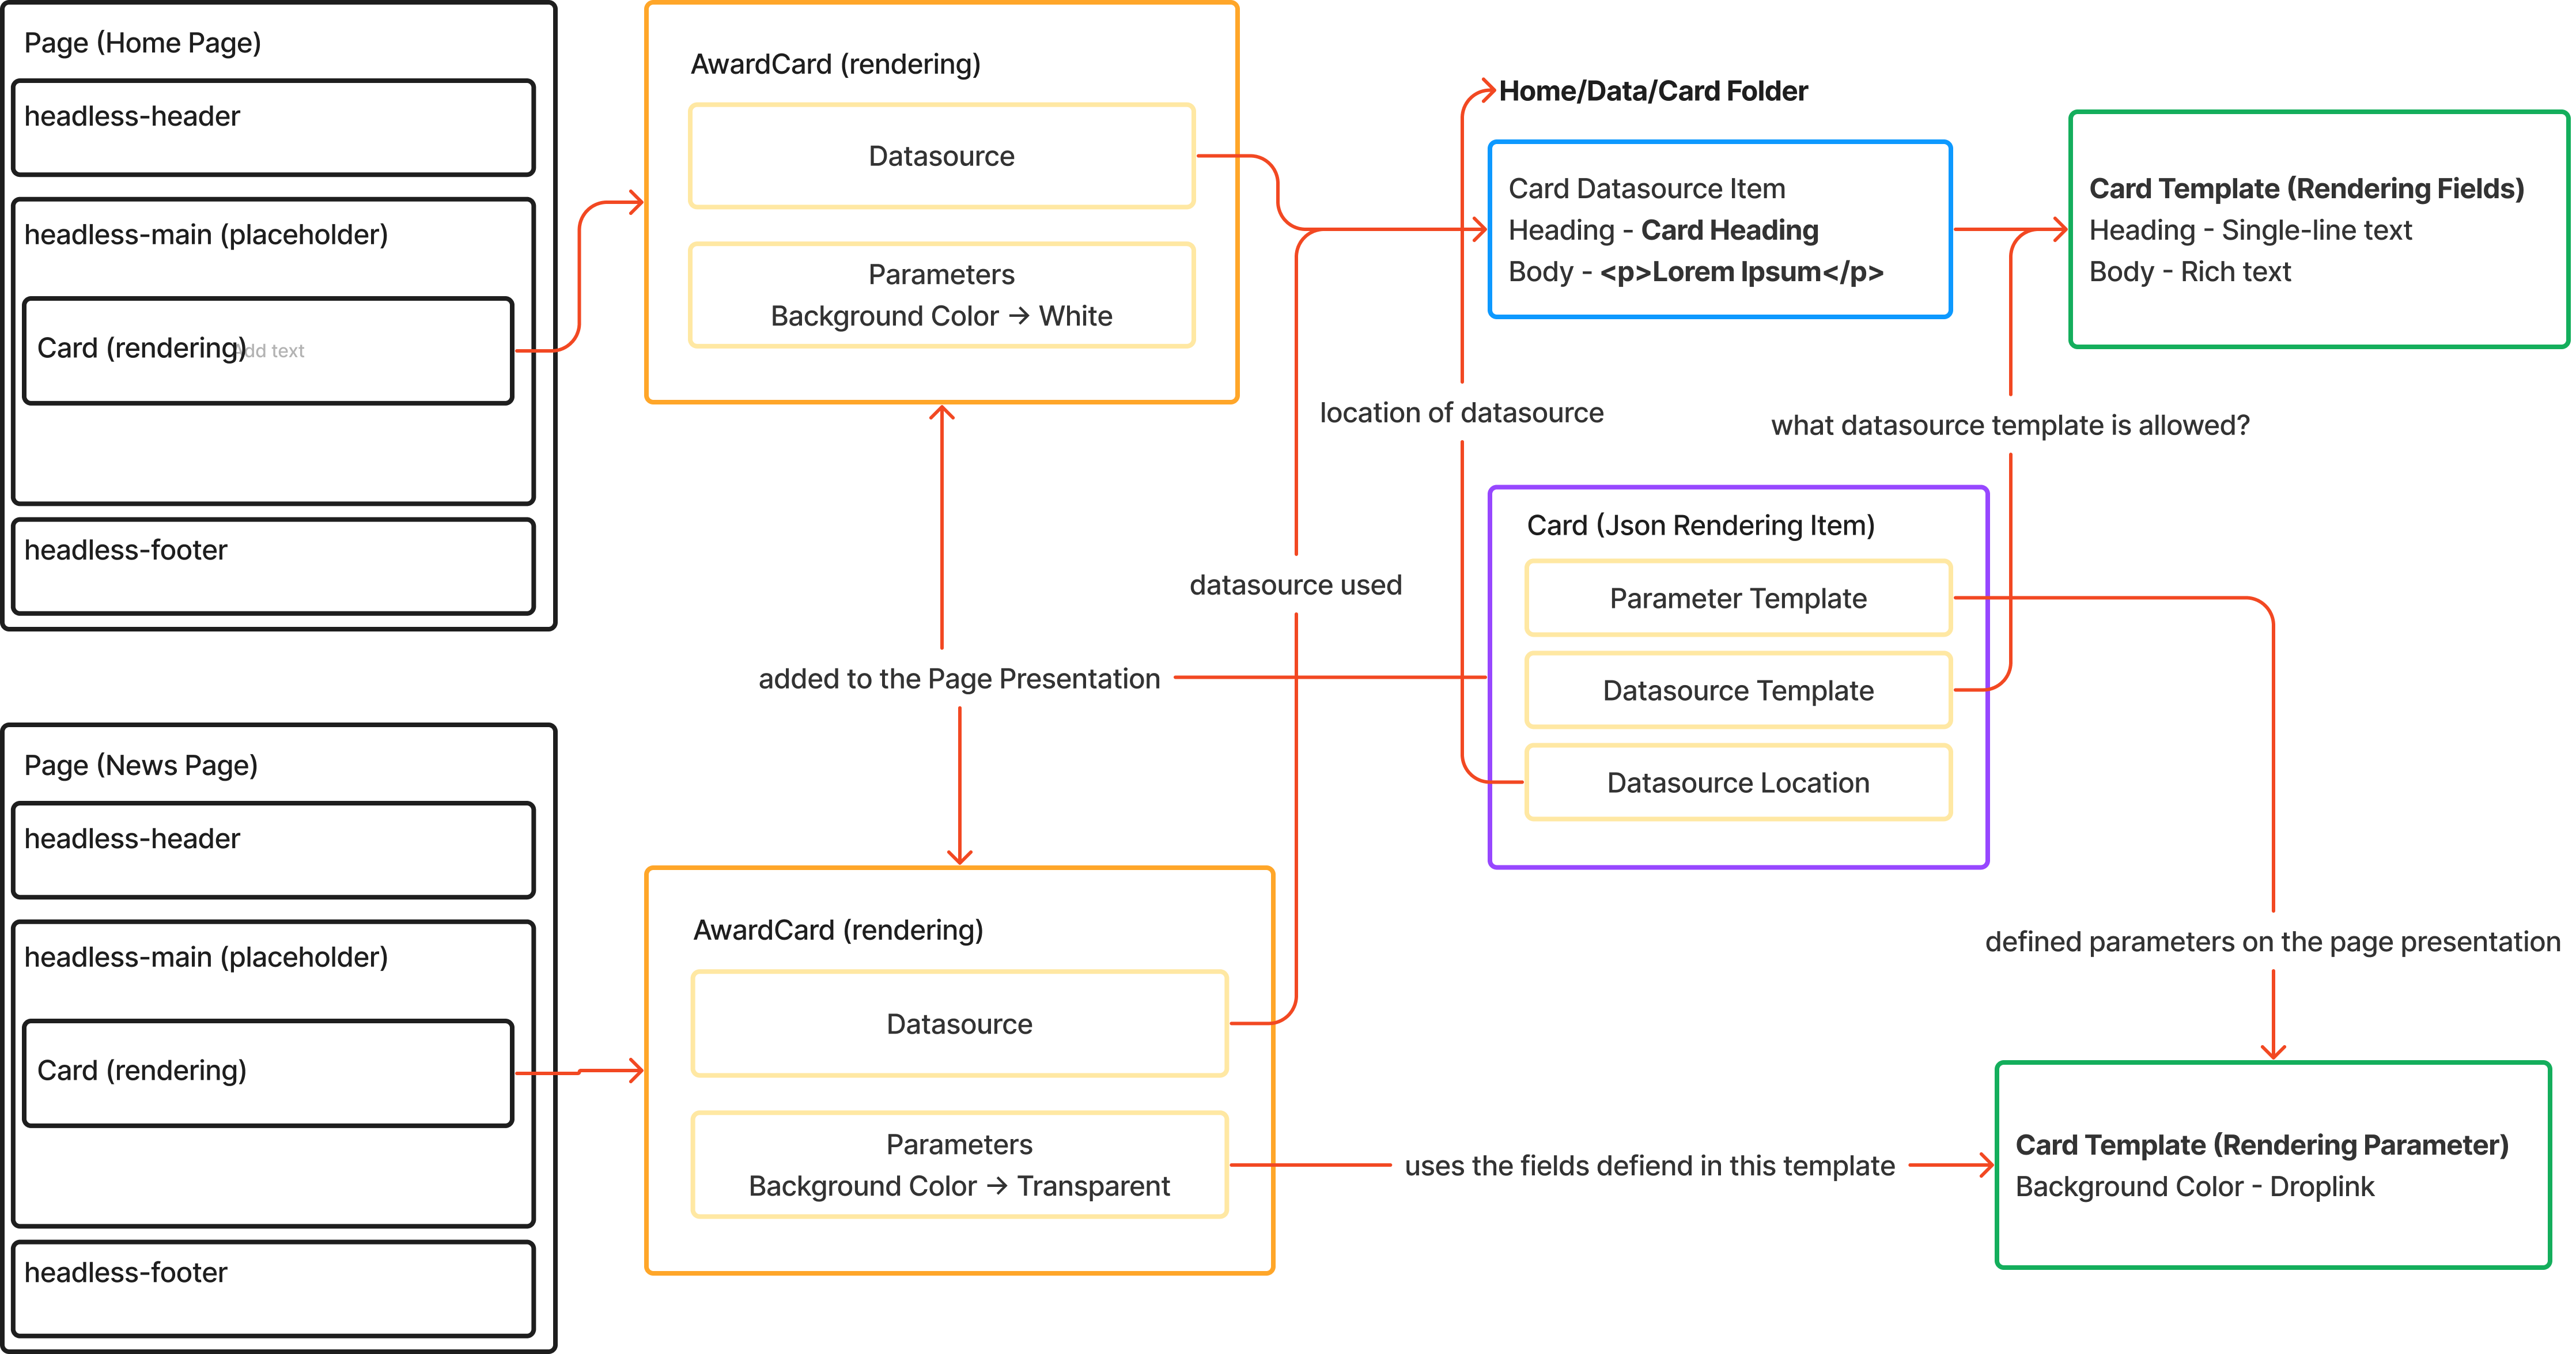
The Start of Your Frontend Journey in XM Cloud
These key parts of how the components are made will help you navigate on creating your frontend components. They will help you in communicating with the team on the necessary requirements you’ll need in development. Investigating a bug on your components will be easier when you are more comfortable with navigating on the Content Editor. Here’s a quick visual representation on everything talked about in this article. You’ll find that everything is interconnected and you’ll be able to track every piece of the component both frontend and Sitecore side.

Meet John Flores
Front-End Developer
🪴🐩📷
John is a Front-End Developer who is passionate about design and development. Outside of work, John has wide range of hobbies, from his plant collection, being a dog daddy, and a foodie.