Server-Side Tracking In Google Tag Manager
Server-side tagging allows us to move measurement tag processing from your website to a server-side container on the Google Cloud Platform (GCP). This has added benefits over client-side tagging such as improved website speed and better data security.
This blog will walk you through:
- How to set up a new Server container in Google Tag Manager
- Create its associated GCP Server
- And then configure a new URL with your domain registrar to point to this newly created GCP server
Creating A Server Container In Google Tag Manager
The first thing we need to do is create a Tag Manager server container.
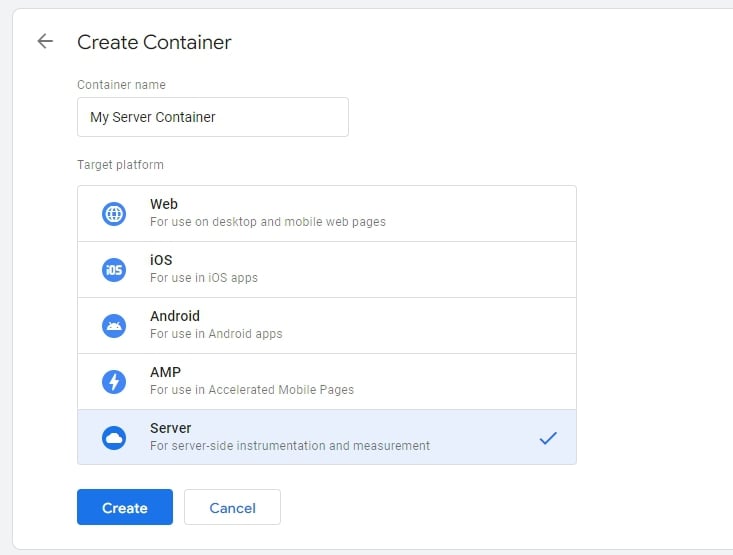
- From your Tag Manager account, create a new container
- Click accounts, the three dots next to the account name
- Choose Create Container
- Give it a name
- Under target Platform, choose Server and click Create
Setting Up A Google Cloud Platform (GCP) Tagging Server
On the window that opens after clicking create:
- Select Automatically provision your tagging server.
- Select or create a GCP billing account and create a server
- Your organization may already have a billing account set up. If you do and are not seeing anything in the drop-down then you likely don’t have access to it.
- Once this has been done, you can start using the server-side container
Setting Up A Custom URL
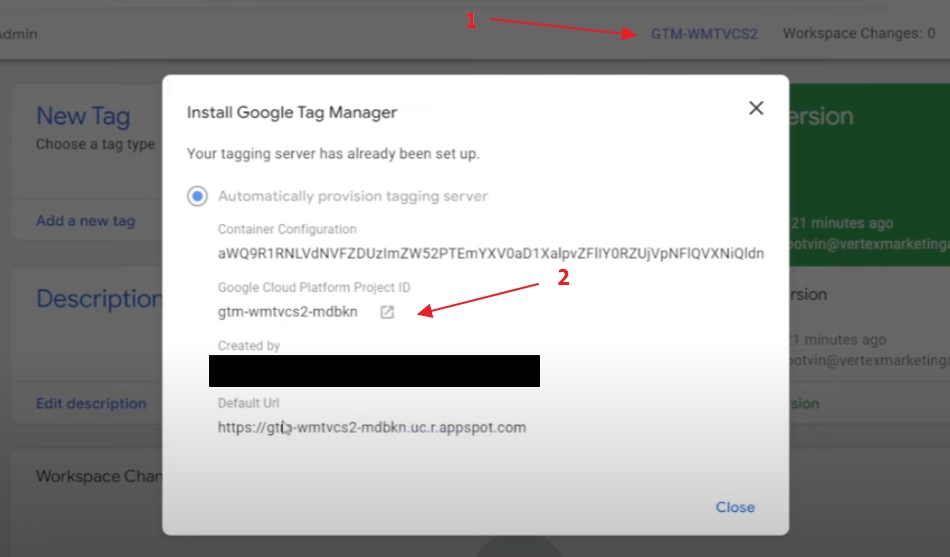
Once you have created a new GCP tagging server, you will see that Google has given us our own Server with a somewhat random looking URL. However, we are doing server side tracking to have our own tagging in a first-party context. What we want to do next is add our own server URL. You can bring up the server details by clicking on the GTM id in the top right hand corner of the screen (1 in screenshot). Then you can open up the server by clicking on the icon next to the Google Cloud Platform Project ID (2 in screenshot).
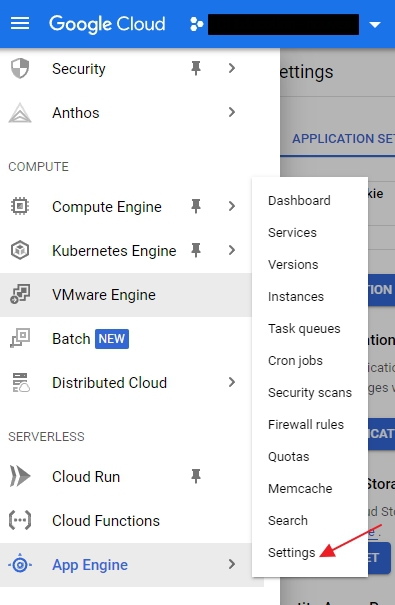
Clicking on this icon will navigate us to the GCP (https://console.cloud.google.com/…) and we will be looking at the server associated with the newly created Server container. Click on the three dashes in the top left corner to bring up the navigation menu. Then scroll down to the App Engine item, hover it, and select Settings.
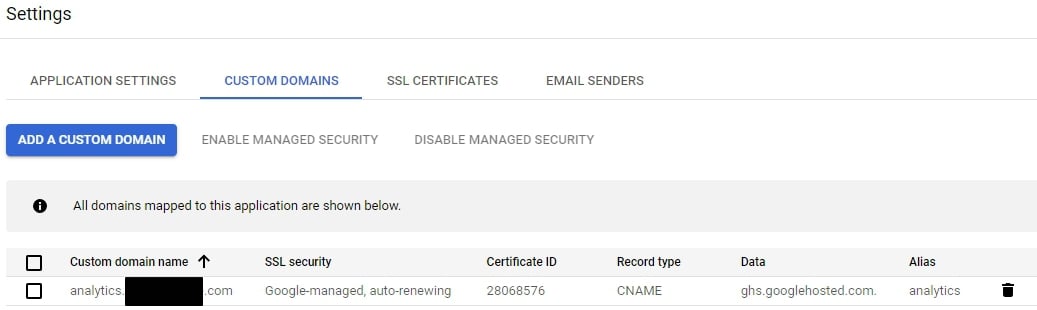
Once you see the settings window, click on the CUSTOM DOMAINS tab and select ADD A CUSTOM DOMAIN.


You will be adding a new domain to the GCP by selecting Verify a new domain… from the drop down list and entering the domain name in the field below it. Once that is done, click VERIFY.


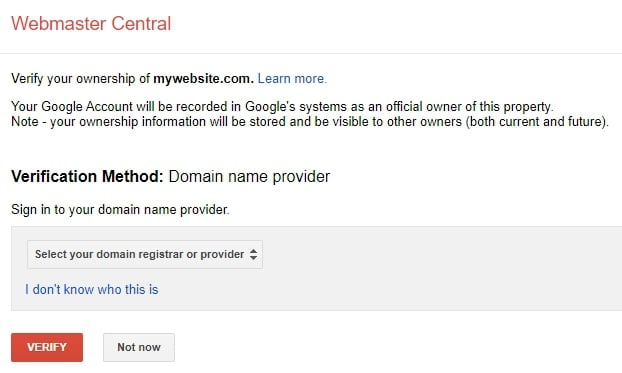
This will then bring you to the screen to start the verification process. From the drop down list, select your domain registrar or provider. Once you have done this, you will get instructions on how to verify ownership of that domain.

The next step is to create a subdomain, using the newly verified domain, that points to the GCP server. This is done on the previous window where we clicked VERIFY on the domain (see below screenshot). Add this newly created subdomain to the domain registrar and have it point it to: ghs.googlehosted.com


Once the URL has been verified you will see that GCP has generated a Certificate ID for it.
👋 Hey Sitecore Enthusiasts!
Sign up to our bi-weekly newsletter for a bite-sized curation of valuable insight from the Sitecore community.
What’s in it for you?
- Stay up-to-date with the latest Sitecore news
- New to Sitecore? Learn tips and tricks to help you navigate this powerful tool
- Sitecore pro? Expand your skill set and discover troubleshooting tips
- Browse open careers and opportunities
- Get a chance to be featured in upcoming editions
- Learn our secret handshake
- And more!


Meet Mike Payne
Development Team Lead
🎶🚴♂️⛰
Mike is a Development Team Lead who is also Sitecore 9.0 Platform Associate Developer Certified. He's a BCIS graduate from Mount Royal University and has worked with Sitecore for over seven years. He's a passionate full-stack developer that helps drive solution decisions and assist his team. Mike is big into road cycling, playing guitar, working out, and snowboarding in the winter.