Why Should We Export an Audience?
We’re going to walk through the process of creating an Audience Export. For demonstration purposes, we’re going to create an export for our Mythical Burger website. What might be the use of such a feature? Well, there are a number of potential uses. These are just a few.
- Data Integration: Integration with third-party systems or platforms for targeted marketing campaigns.
- Custom Analysis: Marketers can perform custom analysis and reporting on the exported audience data using tools like Microsoft Excel, Google Sheets, or data analysis software.
- Personalized Messaging: Marketers can use the exported audience lists to create highly personalized and targeted messaging campaigns.
- Campaign Optimization: Exported audience lists can be used to optimize marketing campaigns by targeting specific segments with relevant offers, promotions, or content.
- Cross-Channel Marketing: The exported audience lists can be used for cross-channel marketing campaigns across various digital channels, including email, social media, display advertising, and more.
- Compliance and Governance: Exporting audience lists in a structured format like JSON or CSV can help ensure compliance with data privacy regulations, such as GDPR or CCPA.
Creating an Audience Export
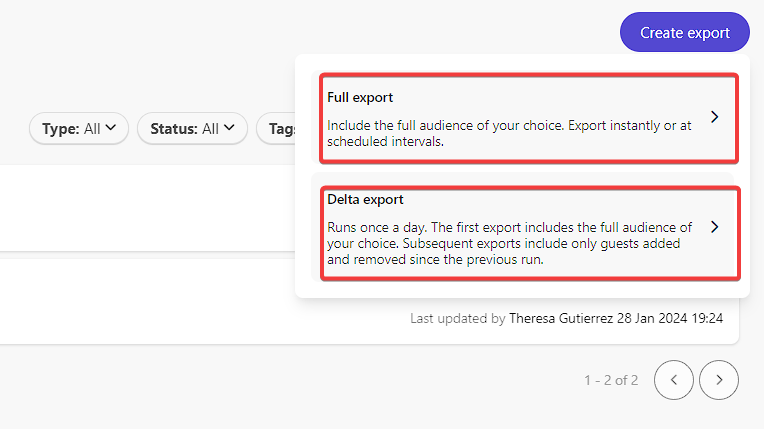
As you’ll see below, we have two options. First is a Full export and secondly is a Delta export.
Setting Up a Delta Export
For the first run, we’re going to setup a Delta export.
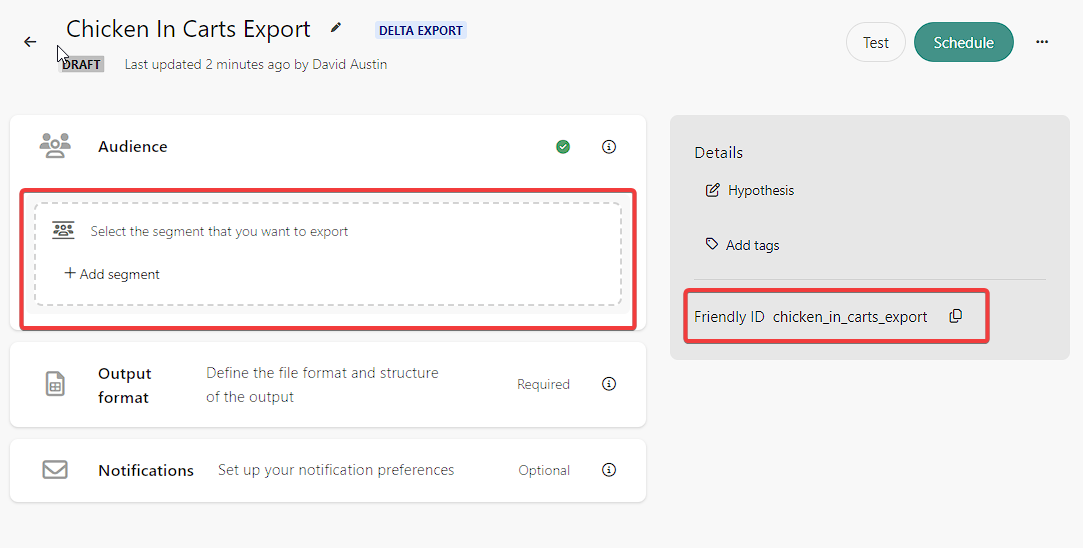
After clicking Create we’re presented with an interface that walks us through the process of setting up
an audience export. We first will need to connect an existing segment to the export. I also want to point out the
Friendly ID as it’s this ID developers will use to retrieve the export itself such that it can be used in
external systems.
Selecting the Segment
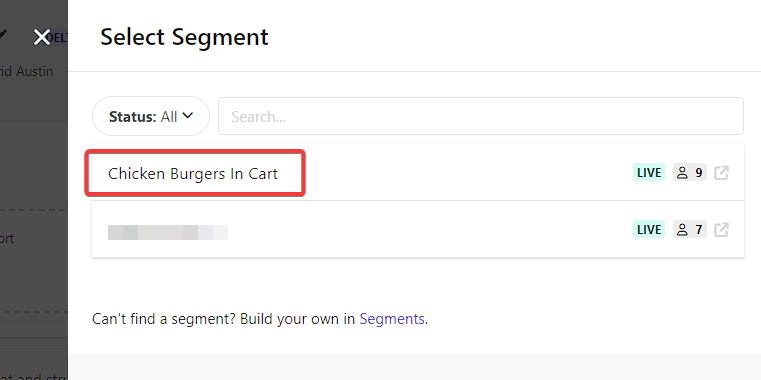
We’re going to select a previously setup Segment to be used as part of this export. It conveniently tells us how many people are in that segment at that time. Because we’re only running a Delta audience export, we won’t get all 9 but only the change.
Defining the Output Format
Before we can go much further, we actually need to define the output format. This can be either JSON or CSV and we are able to define the data incorporated in that format.
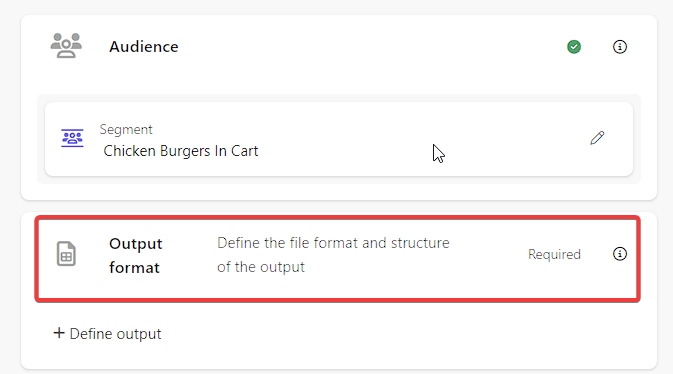
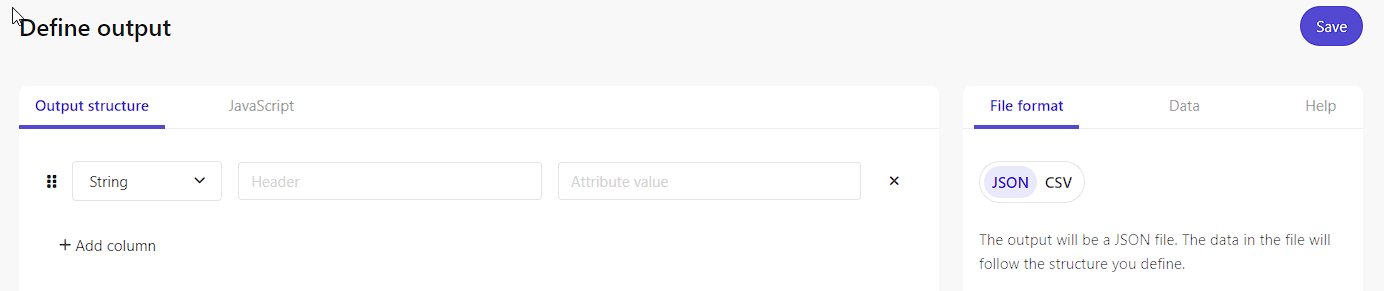
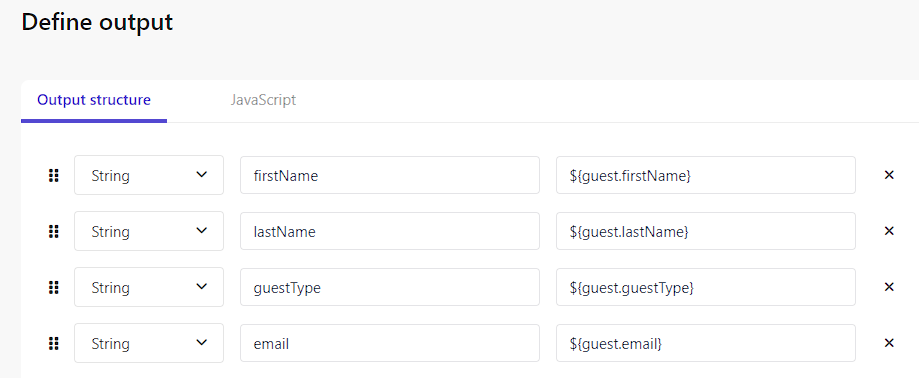
Clicking Define output opens up this modal pop-out where we can add columns and the corresponding data
points. We’re going to keep it set to JSON format.
For simplicity, we’re just going to grab the first name and last name, if they exist along with the
We will need to create a column name and then the value that will go in that column.
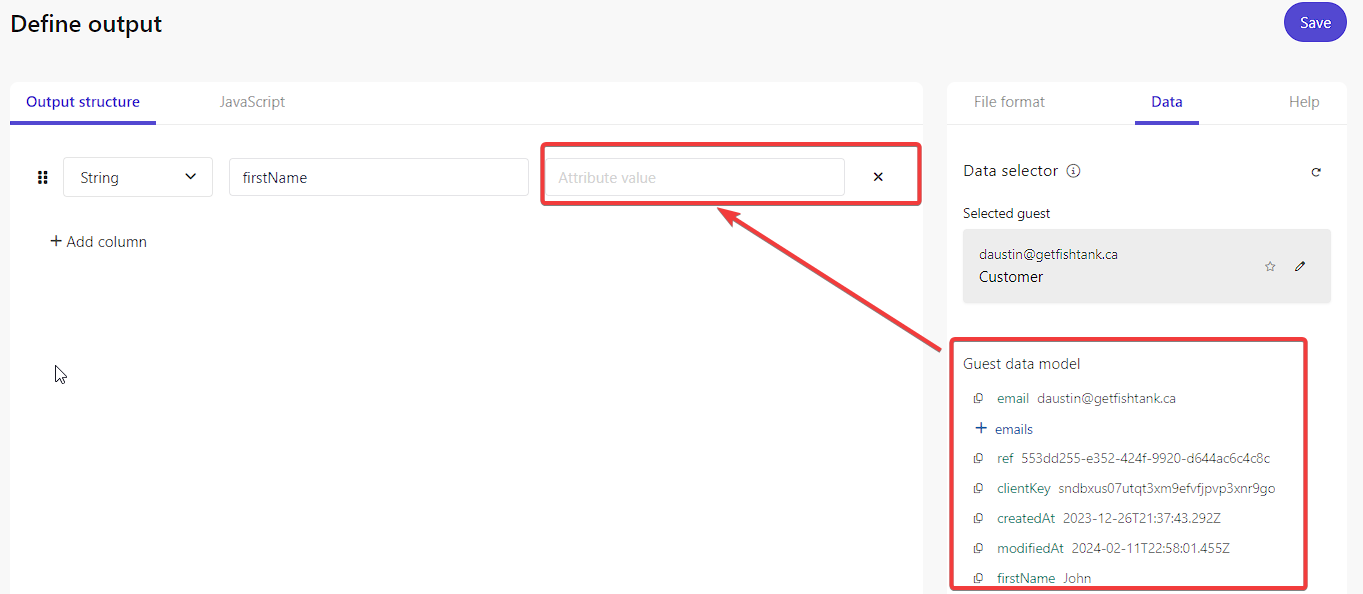
To simplify the process, you can click the Copy icon next to the data point and paste it in the
attribute field. Once pasted, it should look something like this.
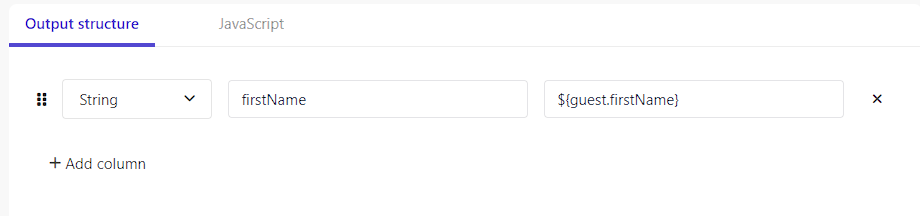
Once completed it now looks like this and we can then go-ahead and click save.
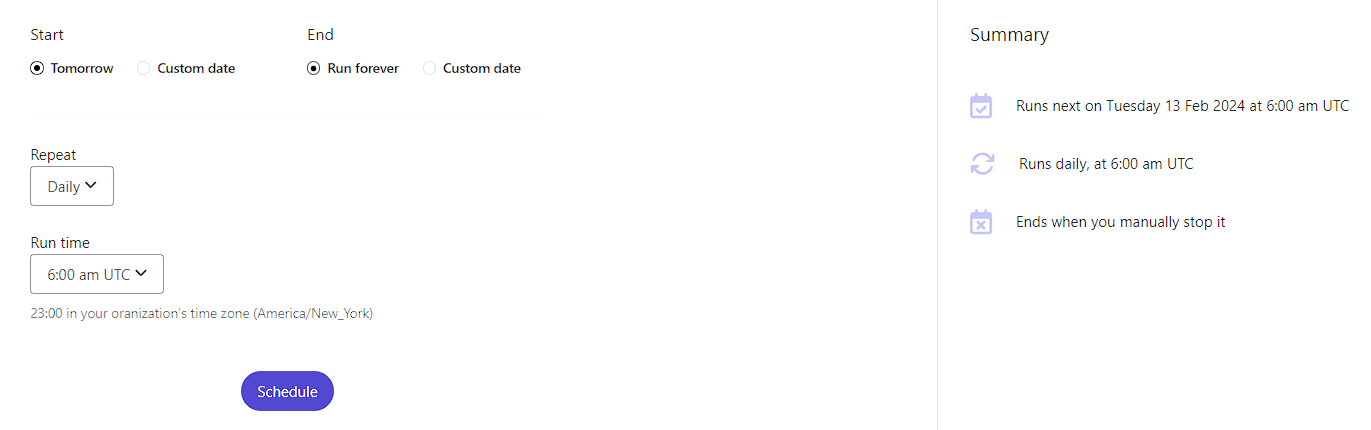
Once we are ready, we can click Schedule and pick our run times.
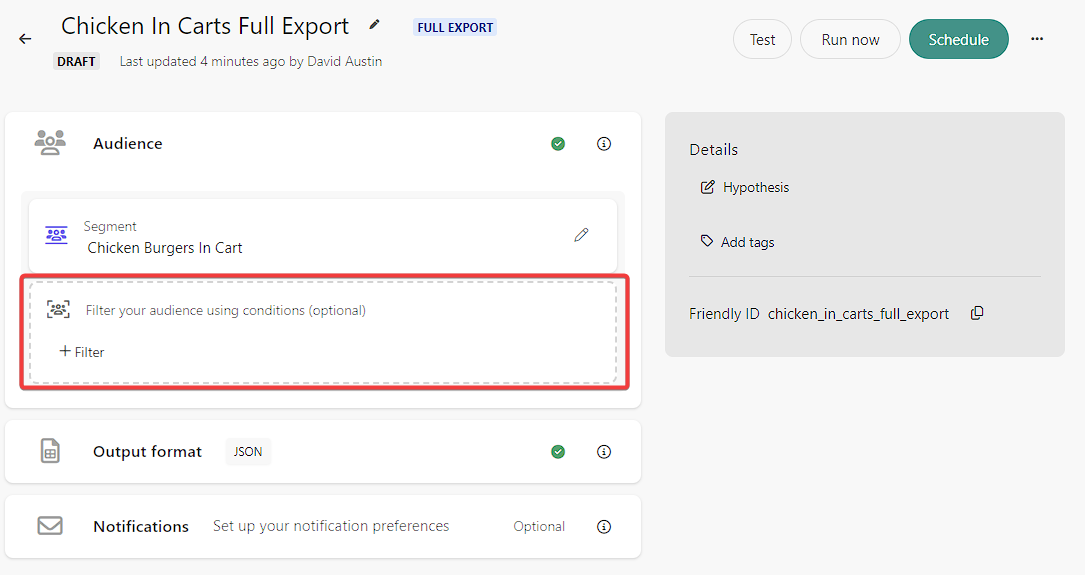
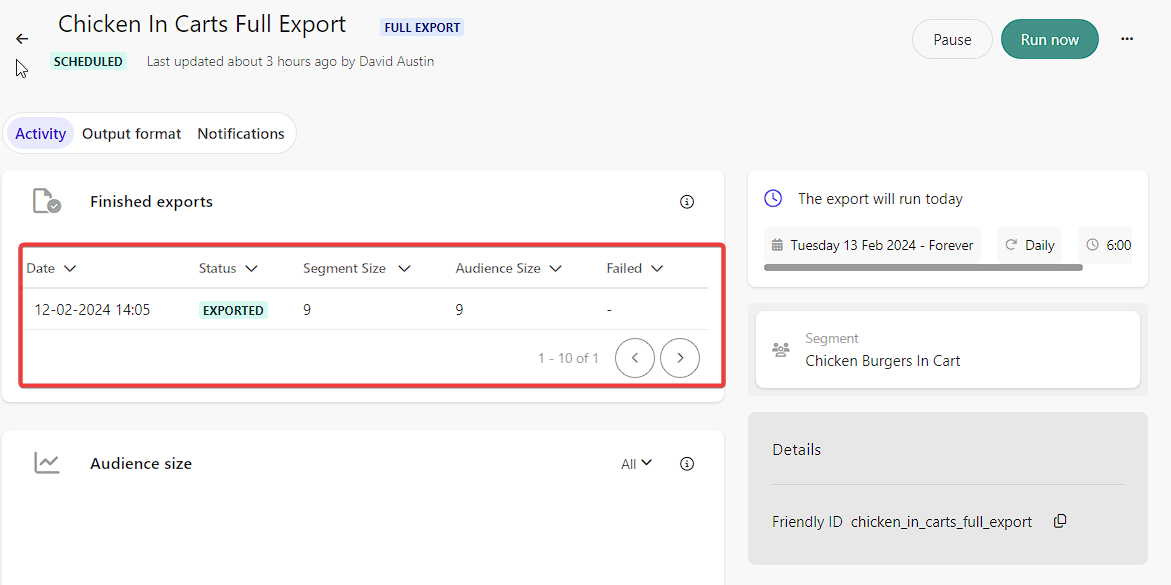
Setting Up a Full Export
Running through the same process, we can see that selecting the Full export gives us an additional option. We can further filter our results if we wanted to do so. This is especially handy if the Segment we chose is broad and holds a large number of individuals.
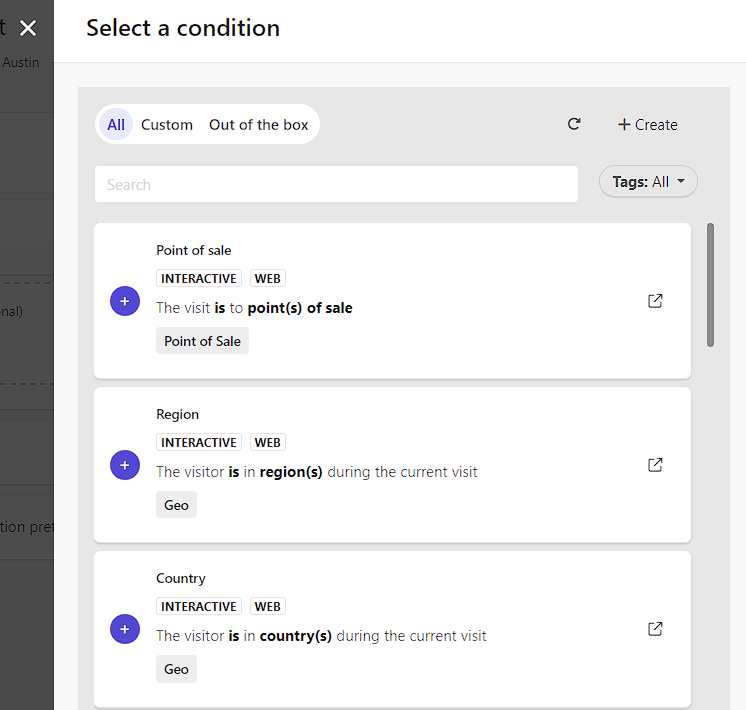
Filter conditions can almost be anything from within CDP. From filtering on the Point of sale to whether
they’re a new or returning user. It’s nearly endless.
We set up the Full export using the same column structure. We can either schedule the export to run at a
specific time or we can also click Run Now. Let’s click that.

Clicking on the Activity tab, we can see that our export is running. Finished exports will appear below.
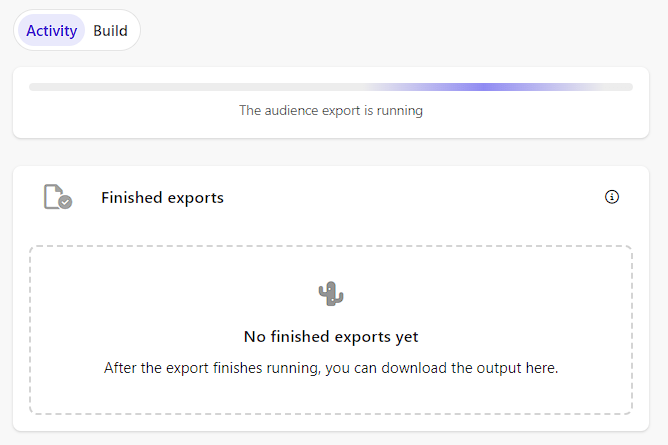
It’s not instant, but once it completes you’ll see it listed below.
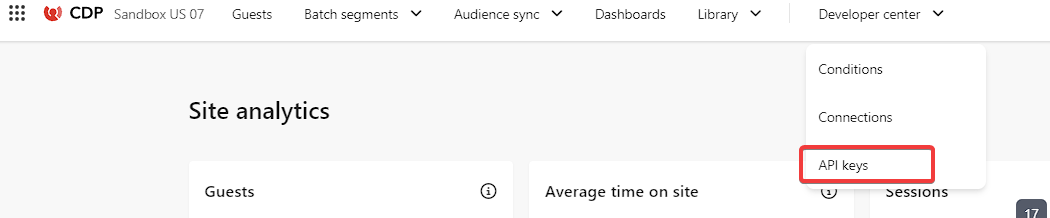
Configuring Your API
You will need to obtain a Client ID and Client Secret in order to pull the Audience Export from CDP.
Within CDP, navigate to the Developer center and then API keys.
Click Create API key. Give it a name and click the Audience export download. It may not be
immediately obvious you can click it, but until you do you won’t be able to click Save.
Once complete it will give you a new prompt where you will need to copy the Client key and
Client secret.
Obtain Your Auth Token
With the Client key and Client secret you can now obtain your Auth Token using the below
Curl command.
curl -X POST "https://auth.sitecorecloud.io/oauth/token" --header "Content-Type: application/x-www-form-urlencoded" --data-urlencode "client_id=<client key here>" --data-urlencode "client_secret=<client secret>" --data-urlencode "grant_type=client_credentials" --data-urlencode "audience=https://api.sitecorecloud.io"
If all is working properly, you will receive your auth token in a similar format.
{"access_token":"<very large auth token here>","scope":"cdp.aud_exports:r","expires_in":86400,"token_type":"Bearer"}
By default the access token will expire in 24 hrs.
Pulling the Audience Export
Next us is to run the audienceExport API call using the above access_token value.
It will be a GET call to the following URL:
https://api-engage-us.sitecorecloud.io/v2/audienceExports/definitions/<friendly id goes here>/latestExport
Depending on your location, your baseUrl might not be
https://api-engage-us.sitecorecloud.io but instead another host name based on your geographical region.
You will place the access_token in the Authorization header value after the word
Bearer .
Upon submitting, the result will look something like this:
{
    "executionRef": "39c2bba2-ef8c-4295-8023-4f3e97acf0c5",
    "definitionRef": "633bee59-4a03-4ea1-ae07-714ce83d8155",
    "friendlyId": "chicken_in_carts_full_export",
    "clientKey": "xxxxxxxxxxxxxxxxxxxxxxxxx",
    "expireAt": "2024-02-12T17:08:32.781Z",
    "numberOfFiles": 1,
    "totalSizeKB": 0,
    "exports": [
        {
            "url": "<an extremely long URL to the exported json or csv file>",
            "sizeKB": 0
        }
    ]
}
It will be returned as a gz zip file. Once extracted you will get the JSON file and the data within.
Because I didn’t create a filter to prevent empty results, you can see that my export is not exactly useful. I pulled
First Name and Last Name, but those only appear when a user has, in the case of Mythical Burger, filled out a cart or
completed the contact form.
{}
{"firstName":"David","lastName":"Austin"}
{}
{}
{}
{}
{"firstName":"John","lastName":"Wick"}
{}
{}
That said, this is something that could be utilized by other systems, if you incorporated additional customer data if you wanted to increase targeting for ads, etc.
Hopefully the above is useful to you and helps you take advantage of this extremely powerful feature to extend your marketing capabilities.

Meet David Austin
Development Team Lead | Sitecore Technology MVP x 3
📷🕹️👪
David is a decorated Development Team Lead with Sitecore Technology MVP and Coveo MVP awards, as well as Sitecore CDP & Personalize Certified. He's worked in IT for 25 years; everything ranging from Developer to Business Analyst to Group Lead helping manage everything from Intranet and Internet sites to facility management and application support. David is a dedicated family man who loves to spend time with his girls. He's also an avid photographer and loves to explore new places.