Maximizing Customer Engagement with Sitecore's Engage SDK
I want to note right off the bat that this implementation covers how CDP & Personalize work with the Engage SDK as it works prior to Sitecore JSS 21.6.0. We will cover how it changes post-JSS 21.6.0 in a future article.
What is the Sitecore Engage SDK
The Sitecore Engage SDK allows you to integrate with both Sitecore CDP and Personalize via the Stream API. You can utilize Engage even if you’re not using Sitecore, which is what I’ll be showing for the purposes of this example setup.
Using Sitecore Engage SDK
In order to integrate our application with Sitecore CDP we first need to setup an engage.ts file that will then act as our bridge between all of our components and CDP. I recommend storing it in the root of your app, but ultimately you can locate this anywhere. That file should look something like this:
'use client'
import { init, Engage } from "@sitecore/engage";

// Define an interface for the configuration object
interface InitConfig {
    clientKey: string;
    targetURL: string;
    pointOfSale: string;
    cookieDomain: string;
    cookieExpiryDays: number;
    forceServerCookieMode: boolean;
    includeUTMParameters: boolean;
    webPersonalization: boolean | object;
}

let engage: Engage | undefined;

const loadEngage = async (): Promise<void> => {
    const config: InitConfig = {
        clientKey: process.env.NEXT_PUBLIC_CDP_CLIENT_KEY || '',
        targetURL: process.env.NEXT_PUBLIC_CDP_TARGET_URL || '',
        pointOfSale: process.env.NEXT_PUBLIC_CDP_POINTOFSALE || '',
        cookieDomain: window.location.hostname.replace(/^www\./, ''),
        cookieExpiryDays: 365,
        forceServerCookieMode: false,
        includeUTMParameters: true,
        webPersonalization: true,
    };

    engage = await init(config);

    // Assuming `window.Engage` is an existing property or you have extended the Window interface to include it
    (window as any).Engage.exposedFunctions = engage;
};

loadEngage();

export { engage };
Some key points we should discuss. The following entries are not always present but will need to be included if you want to take advantage of Sitecore Personalize.
cookieExpiryDays: 365,forceServerCookieMode: false,includeUTMParameters: true,webPersonalization: true,
So to give this example some meat, I’ve set this site up with help from our Sitecore Strategist, Theresa. Welcome to Mythical Burger, which you can find at https://www.mythicalburger.com/
The site itself is still a work in progress, but we’re using it as a playground of sorts to demonstrate both CDP and Personalize behavior.
It takes advantage of the CDPPageView.tsx component like most Sitecore sites, but we’ve also added some
Engage functionality to it. For example: Any time you add an item to your cart, using the Add to Cart
button.
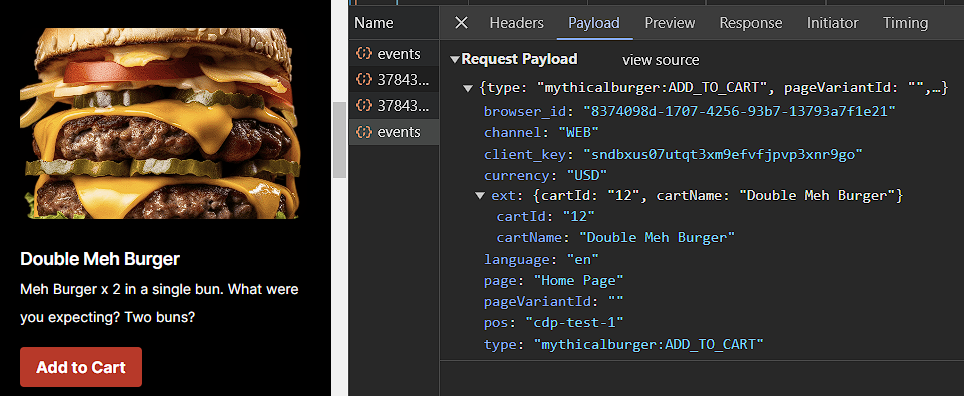
You’ll notice that not only are we sending the event type, a custom value called
mythicalburger:ADD_TO_CART that we can use in the future, but we also included
extention data which in our case contains the following:
cartIdcartName
By sending in this data, we can actually see in the Data Browser inside of Sitecore CDP, what popular cart options have been.
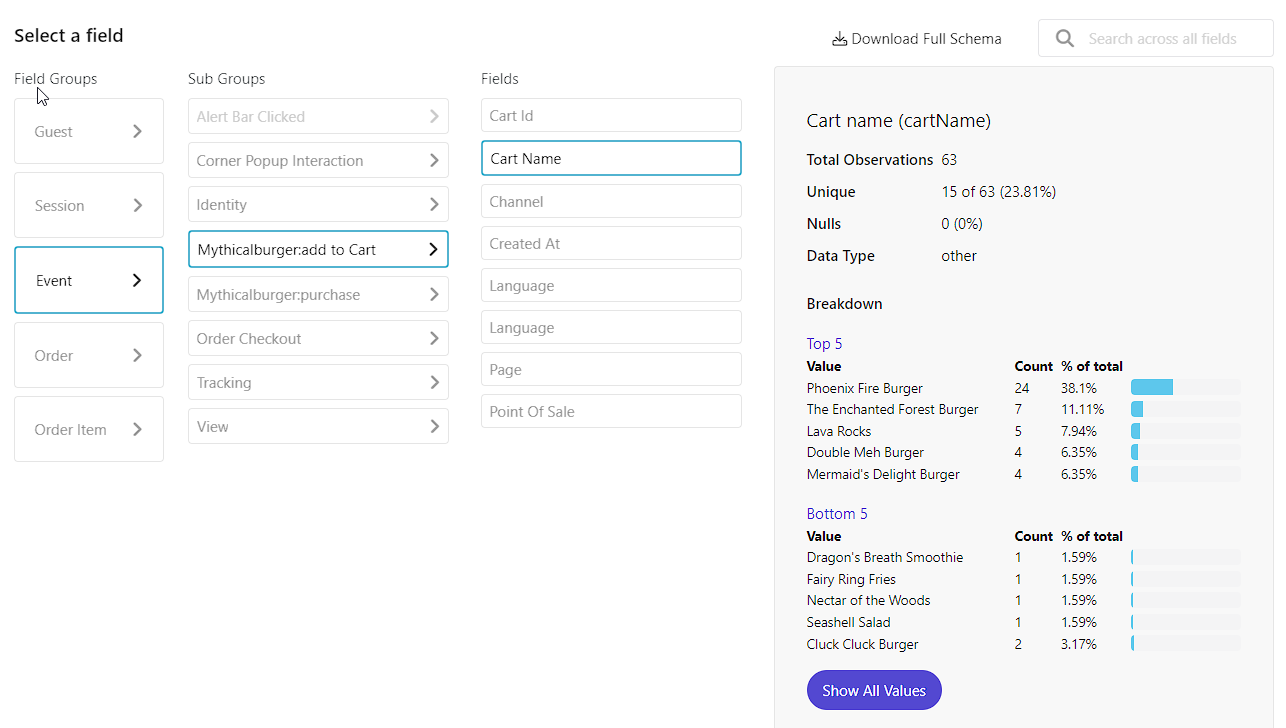
But how did we do that? Let’s have a look.
You might not capture this every time that they click Add to Cart as maybe they don’t continue
with the purchase, but here we’re just after the data. So inside our Cart we have a function that’s triggered each
time we click.
import { defaultEventData as eventData } from './CdpPageView';
import { engage } from './engage';

...

const addToCart = async (burger: Burger) => {
    setCartItems((prevItems) => {
      const existingItem = prevItems.find(item => item.id === burger.id);
      if (existingItem) {
        return prevItems.map(item =>
          item.id === burger.id ? { ...item, quantity: (item.quantity ?? 1) + 1 } : item
        );
      } else {
        return [...prevItems, { ...burger, quantity: 1 }];
      }
    });

  const extensionData = {
    cartId: burger.id,
    cartName: burger.name
  };
  await engage?.event("mythicalburger:ADD_TO_CART", eventData, extensionData);
};
The first half of the function we’re ensuring our cart is up to date, but the last bit is where we setup our extension data. We can arrange it any way we want really, but honestly simpler is better.
After the extensionData is created, we can then create the event and send the data to CDP. Here we’ve
got our custom event type, mythicalburger:ADD_TO_CART and the eventData is the same data
object we’re using in the CdpPageView.tsx component.
await engage?.event("mythicalburger:ADD_TO_CART", eventData, extensionData);
It’s really that simple. While the event itself does show up relatively quickly in the guests’ timeline, it can take sometime later before it it’s available within the Data Browser allowing you to create Segments and use the data as part of Personalize.
Let’s Go Into CDP and Create a Segment
Inside Batch Segments, click Create Segment.
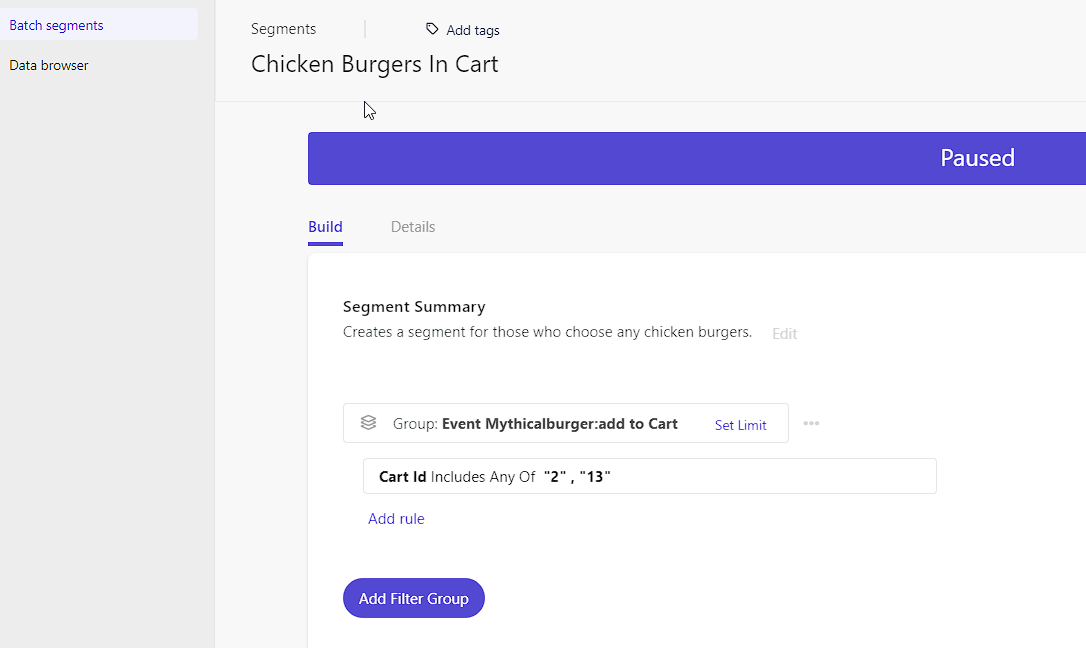
We created a Segment that’s pretty simple. We wanted to identify folks who’ve added either chicken burger to their cart, whether they’ve purchased it or not.
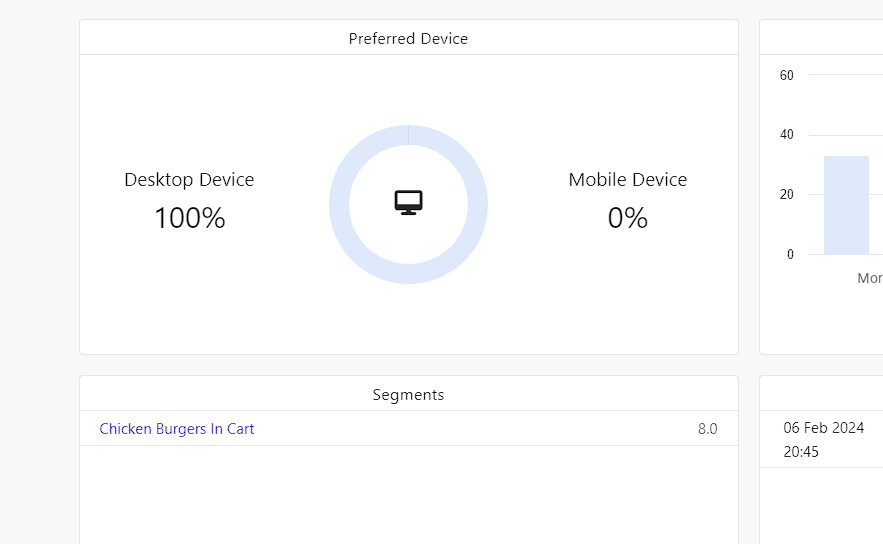
Now in the future we can create a Web Experience based upon this Segment. In the guest’s Overview tab, we can actually see what Segments a visitor or customer is apart of.

Meet David Austin
Development Team Lead | Sitecore Technology MVP x 3
📷🕹️👪
David is a decorated Development Team Lead with Sitecore Technology MVP and Coveo MVP awards, as well as Sitecore CDP & Personalize Certified. He's worked in IT for 25 years; everything ranging from Developer to Business Analyst to Group Lead helping manage everything from Intranet and Internet sites to facility management and application support. David is a dedicated family man who loves to spend time with his girls. He's also an avid photographer and loves to explore new places.