In this blog, we will create the second and final stage of our Release Pipeline in DevOps for our Sitecore XM Cloud solution: the Vercel Stage. If you have not done it yet, you will first need to create the XM Cloud stage which I detailed in my previous blog. The stage will run a source-controlled PowerShell script which will install Vercel on our agent, then pick up some environment specific settings we have added to our stage, and then deploy. This blog includes how to link our Vercel Project to our corresponding Sitecore XM Cloud environment.
Creating The New Vercel Project
First you need to set up a Vercel account. This account needs to have access to the Team you are creating the Project within.
Locally, you will need to run this command within the root directory of your project in a PowerShell window.
npm i -g vercel
Then we can run the vercel command from the same directory which will create and deploy a new Vercel Project. The directory property in the below wizard can be empty if you are deploying from your rendering folder.
vercel
? Set up and deploy “~/web/my-new-project”? [Y/n] y
? Which scope do you want to deploy to? My Awesome Team
? Link to existing project? [y/N] n
? What’s your project’s name? my-new-project
? In which directory is your code located? my-new-project/
Auto-detected project settings (Next.js):
- Build Command: \`next build\` or \`build\` from \`package.json\`
- Output Directory: Next.js default
- Development Command: next dev --port $PORT
? Want to override the settings? [y/N]
You will now have a .vercel folder inside your solution containing a project.json file. The variables contained within this file will be used for deployments when running the vercel command in PowerShell. The .gitignore file in your solution was updated to include the .vercel path because we generally do not want to source control this file. However, for deployment sake, we will need to include this in our repo. Copy the .vercel folder and rename this copy .vercel-qa (or postfix with whatever environment we are deploying to). Within this new folder, you can delete everything that isn’t the project.json file. In utilizing this methodology, you will see how we can save the required deployment schema for multiple Vercel Projects.
Settings Inside Vercel
We need to tell our application where to fetch its content from. In our case, this is our Sitecore XM Cloud environment. Therefore, setting up XM Cloud before proceeding is essential.
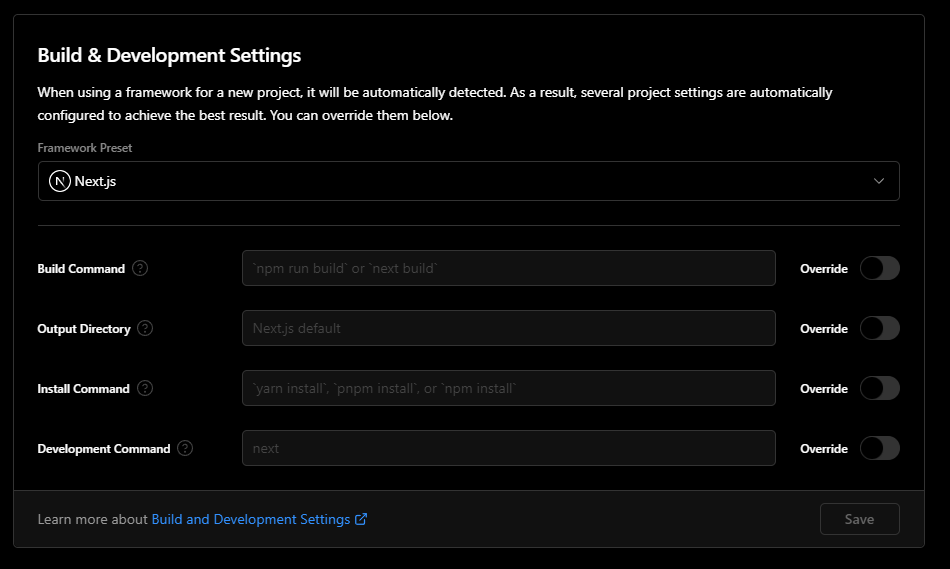
Under Settings > General, ensure the Framework Preset is set to Next.js
Environment Variables In Vercel
These are set at the project level. Not to be confused with environment variables set at the organization level. To view these navigate to Settings > Environment Variables. The majority of these variables are available within XM Cloud via the screenshots below.
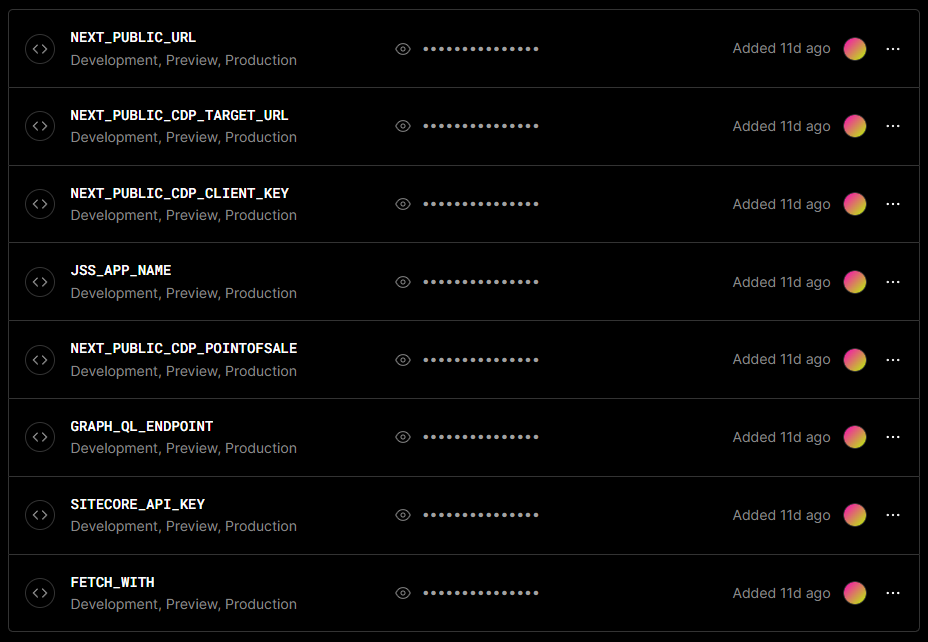
The following variables are not in the Developer Settings within XM Cloud:
JSS_APP_NAME - This is the name of our Next.JS application you would have set when instantiating our application
FETCH_WITH - Set to GraphQL
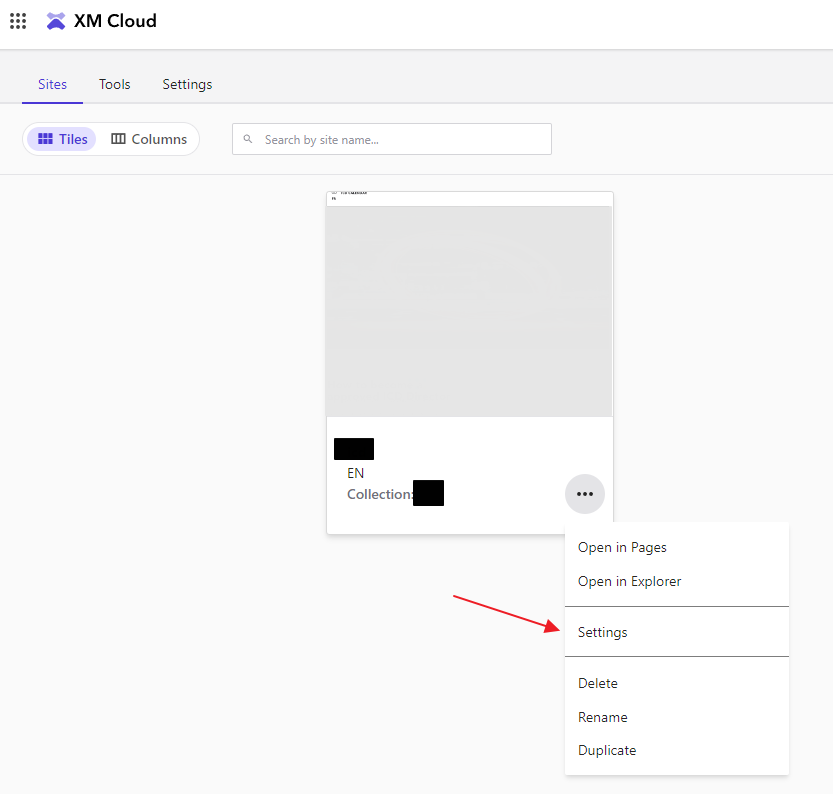
Generating The SITECORE_API_KEY
We need to generate this in Sitecore XM Cloud. This can be done through in the portal displaying our Environments sites under Site > Settings > Developer Settings as seen in the below screenshots.
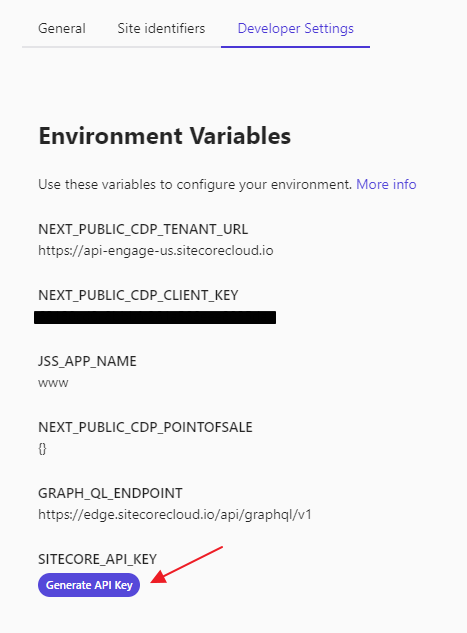
Under Settings, you will find the Developer Settings tab. Here we have the majority of our values needed for our Vercel Projects Environment Variables. We will also see the Generate API Key button. This generated value will need to be stored within Vercel as well.
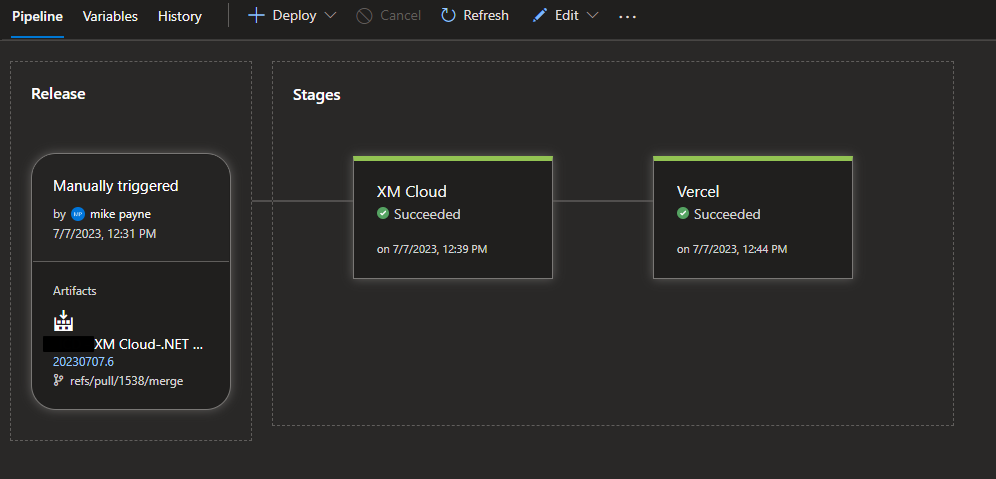
DevOps Release pipeline
Here we will add a Vercel stage to our release pipeline. It will include a Task which references a PowerShell script we have added to our solution. In this solution we will set variables that relate to the specific Vercel Project we are deploying to.
We will need to add a PowerShell script to the code repository. This script will install Vercel on our agent and then run the deployment command. The specific environment variables $env:VercelToken and $env:VercelScope will be stored in our Tasks properties (detailed below).
if ($env:VercelToken -AND $env:VercelScope) {
    Write-Host "Found Token: " $env:VercelToken
    Write-Host "Found Scope: " $env:VercelScope

    Write-Host "Installing Vercel" -ForegroundColor Green
    npm install --global vercel

    Write-Host "Deploy" -ForegroundColor Green
    vercel --token $env:VercelToken --scope $env:VercelScope
}
else {
    Write-Error "VercelToken or VercelScope are not defined"
}
In our release task named Vercel (or similar), we will create a PowerShell task. We have two options here depending on requirements.
- Type → File Path
- Type → Inline
With option 1, we will link directly to the file in our solution. This may be acceptable for a one Project solution. We used option 2 because of how we created our build artifacts (with the Archive job, we need to unzip the folder) and to deal with multiple environments for deployment (Dev, UAT, Prod, etc). The code defined in the Inline section unzips our artifact and then renames our .vercel-qa folder to .vercel. This .vercel folder contains the schema we need to deploy to our Vercel QA environment. The folder will get picked up when we run the vercel command in our script.
cd "[[PIPELINE NAME]]/drop/"

Get-ChildItem -Path ".\*.zip" | ForEach-Object {
Write-Host "Zip found and extracting ... " $_.Name

Expand-Archive -Path $_.Name -Force

cd $_.BaseName
cd s
cd src\[[JSS APP FOLDER NAME]]
ls
Rename-Item -Path ".vercel-qa" -NewName ".vercel"
Write-Host "Run Vercel release script ... "
.\vercelrelease.ps1
}
Stage Task Environment Variables
We will need to add the two variables being referenced in our script in our Task properties under Environment Variables.
VercelToken
Create an access token from your personal user account (not from the Team) to use in your DevOps release to Vercel.

VercelScope
This variable is equal to the the Vercel Team name that includes the Project we are deploying to.
Final Step
All that is left to do is trigger Create release. The DevOps logs created by these tasks will generate a link to the Vercel deployment task. Within this page on Vercel there will be more detailed logging info.
👋 Hey Sitecore Enthusiasts!
Sign up to our bi-weekly newsletter for a bite-sized curation of valuable insight from the Sitecore community.
What’s in it for you?
- Stay up-to-date with the latest Sitecore news
- New to Sitecore? Learn tips and tricks to help you navigate this powerful tool
- Sitecore pro? Expand your skill set and discover troubleshooting tips
- Browse open careers and opportunities
- Get a chance to be featured in upcoming editions
- Learn our secret handshake
- And more!


Meet Mike Payne
Development Team Lead
🎶🚴♂️⛰
Mike is a Development Team Lead who is also Sitecore 9.0 Platform Associate Developer Certified. He's a BCIS graduate from Mount Royal University and has worked with Sitecore for over seven years. He's a passionate full-stack developer that helps drive solution decisions and assist his team. Mike is big into road cycling, playing guitar, working out, and snowboarding in the winter.