To maximize the potential of Sitecore XM Cloud and ensure smooth deployment, integrating it with a DevOps release pipeline has become increasingly popular. This blog explores the first step, the Sitecore XM Cloud stage of deploying to Sitecore XM Cloud, through a DevOps release pipeline. By embracing this approach, organizations can achieve faster and more reliable deployments, reduced time-to-market, enhanced collaboration between development and operations teams, and improved overall web development efficiency. Let's dive deeper into why this deployment strategy is a crucial step towards unleashing the full potential of Sitecore XM Cloud.
DevOps XM Cloud Release Task
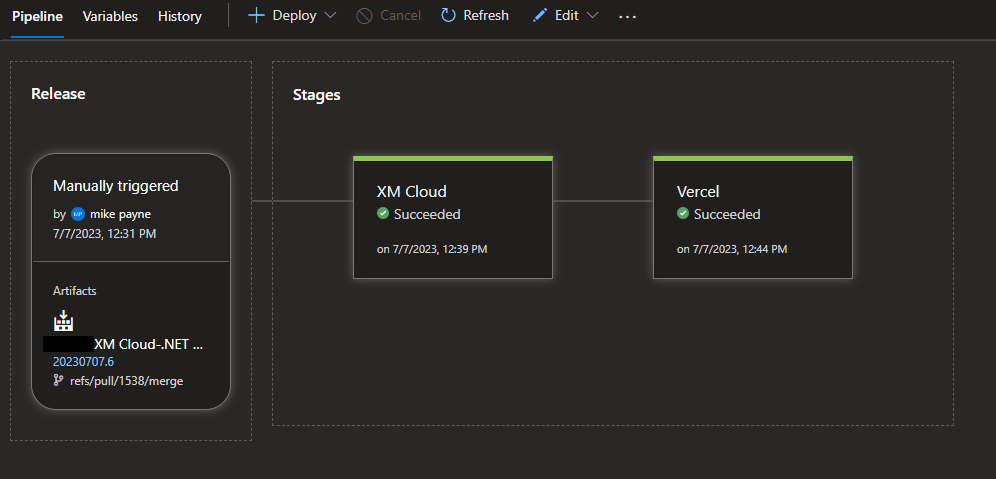
First off, lets create a new release Stage for XM Cloud that references the artifact created from our build pipeline. Our last step in our DevOps build pipeline is that of Archive. What this does is zip up all the contents created from our build before it gets created as an artifact.
The XM Cloud Task can be automatically triggered by the creation of a release. However, there may be a need to only release to XMCloud or Vercel (depending on what is contained within the release, be it just frontend or Sitecore changes) so the task could also be set to manual.
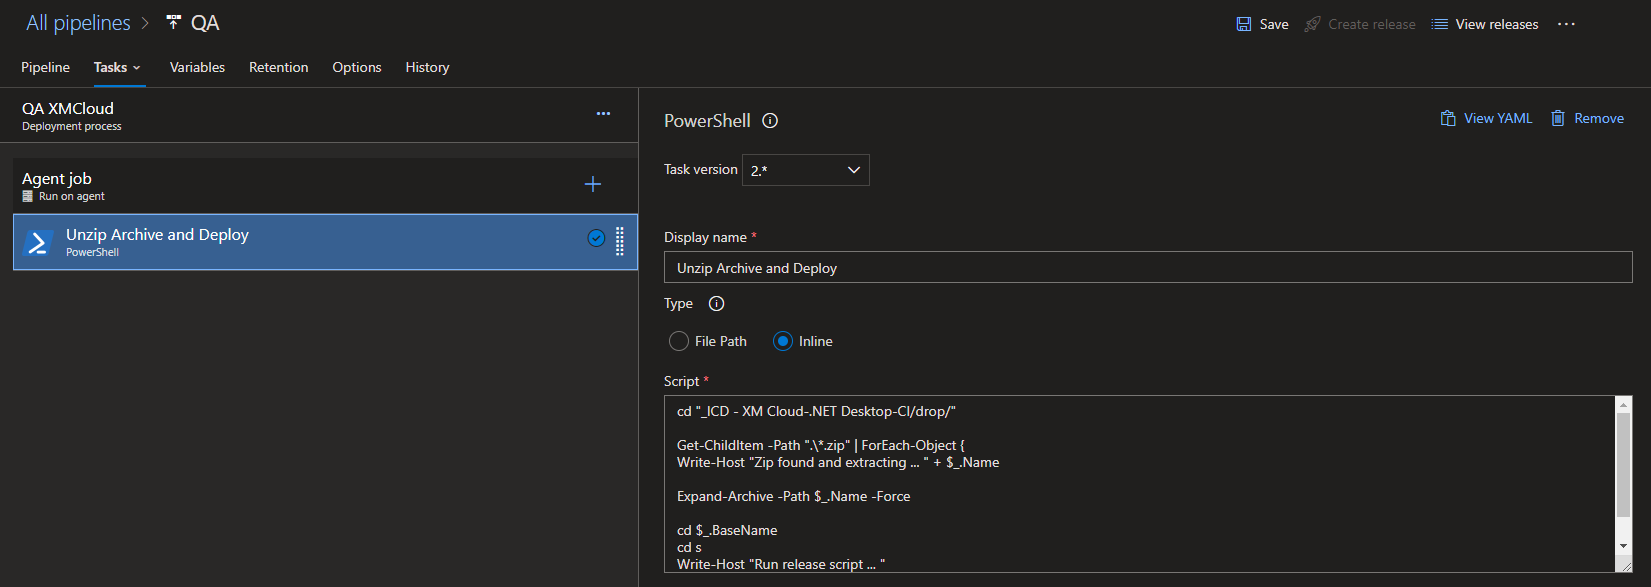
In order to ensure that our build artifact is properly extracted and our script is executed as intended, we will need to create a new PowerShell Task in this Stage. This task will be responsible for unzipping the build artifact, which may be a large and complex file, and preparing it for execution. Once the artifact has been extracted, the task will then run the script that is located within our repository. This process allows us to more easily manage and update our code as needed, since we can simply modify the script in our repository and then rely on the PowerShell Task to execute the updated code during the build process.
DevOps Release Script
Create a PowerShell script in the root of the code solution with a name such as xmcloudrelease.ps1. It will include the following contents into this file and then upload it to the repository.
$ErrorActionPreference = "Stop";

if (!-not $(Get-PackageSource -Name Sitecore -ProviderName NuGet -ErrorAction Ignore))
{
    Write-Host "Adding Sitecore NuGet Source" -ForegroundColor Green
    dotnet nuget add source -n Sitecore https://sitecore.myget.org/F/sc-packages/api/v3/index.json
}
Write-Host "Installing Sitecore dotnet CLI" -ForegroundColor Green
dotnet tool update Sitecore.CLI

Write-Host "Logging into XM Cloud" -ForegroundColor Green
dotnet sitecore cloud login --client-credentials --client-id $env:ClientId --client-secret $env:ClientSecret

Write-Host "Creating the deployment" -ForegroundColor Green
dotnet sitecore cloud deployment create --environment-id $env:EnvironmentId --upload
Task Inline Script
The inline script of our newly created Task will navigate to the root of our artifact containing the .zip folder created from our build pipeline. It will then unzip it and navigate to the folder containing the PowerShell script we added to the repository. It will then trigger it which will ultimately release our code to XM Cloud.
cd "_PROJECT - XM Cloud-.NET Desktop-CI/drop/"

Get-ChildItem -Path ".\*.zip" | ForEach-Object {
Write-Host "Zip found and extracting ... " + $_.Name

Expand-Archive -Path $_.Name -Force

cd $_.BaseName
cd s
Write-Host "Run release script ... "
.\xmcloudrelease.ps1
}
Environment Variables
There are three environment variables referenced by the above PowerShell script. The are all retrievable from XM Cloud.
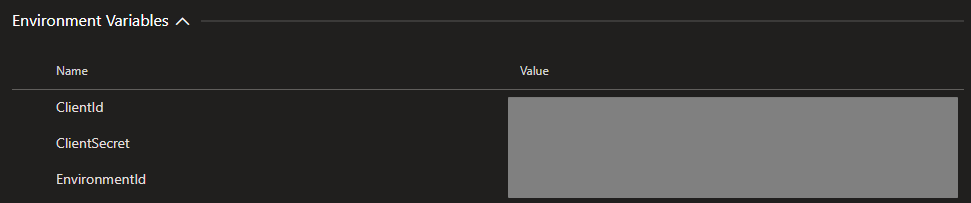
ClientId + ClientSecret
Generate an Automation Client from the Deploy Portal that points to the appropriate Project and Environment. It is important to save the key that is created after you click generate on the window below. That key is not retrievable after you close the window.
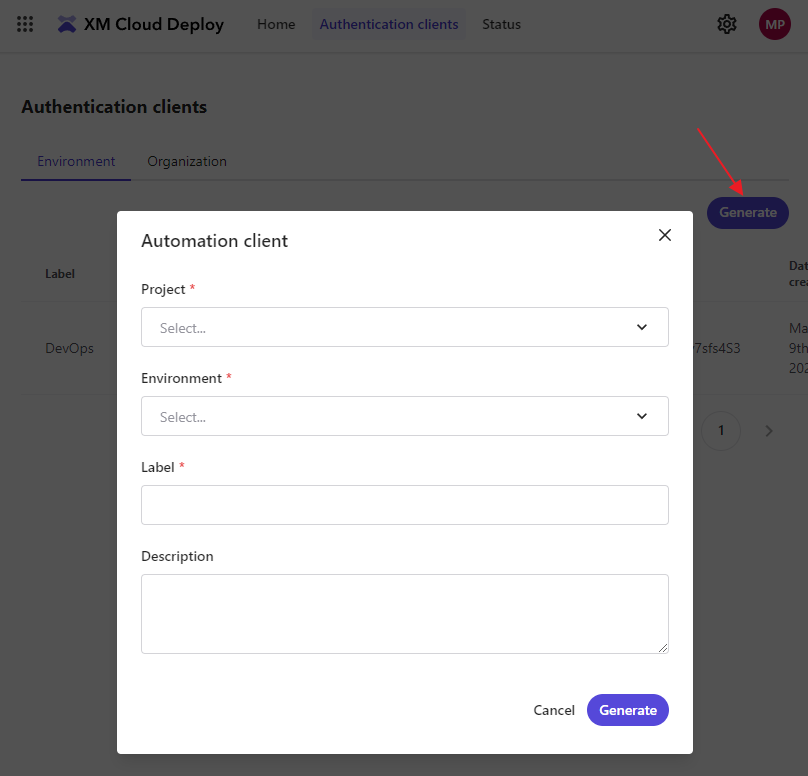
You can see all your created credentials within the Credential area of the Deploy Portal.
EnvironmentId
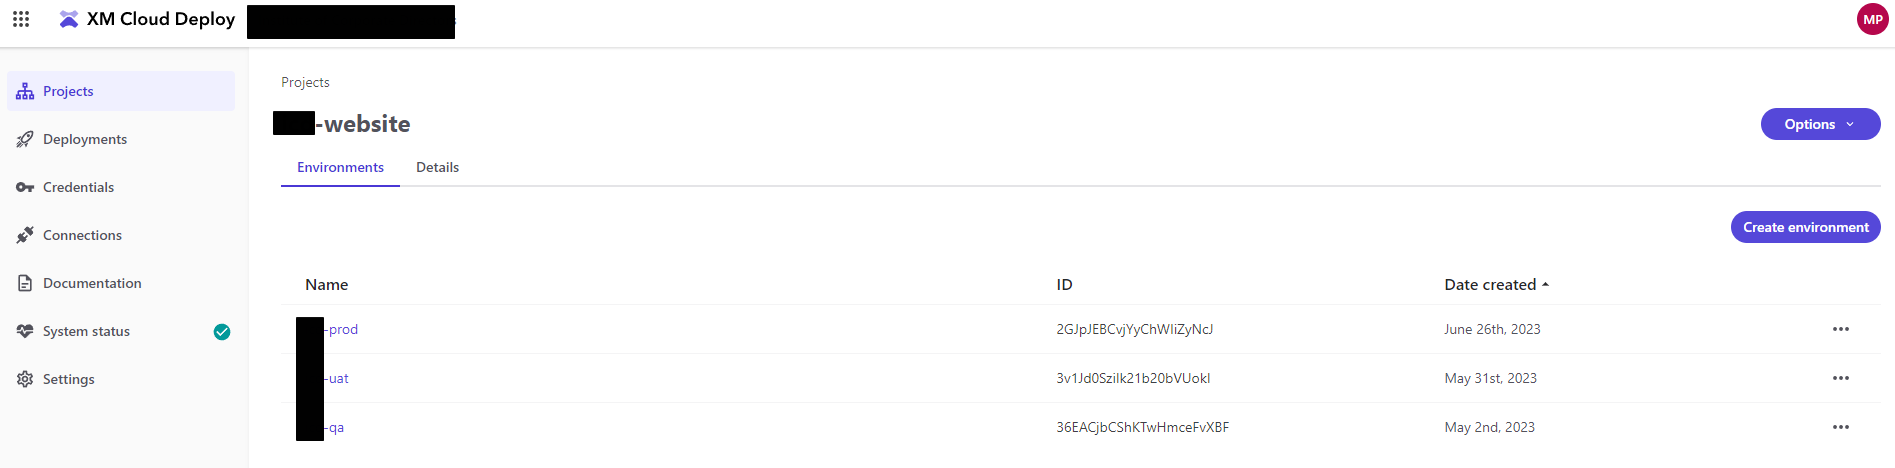
Relates to the XM Cloud environment ID. You can see all the environments and their IDs under Projects > Environments within the Deploy Portal.
Final Step in Your Deployment
All that is left to do is trigger a release and wait for success. However, there is a chance there may be issues on your first deployment and subsequent deployments. If the error is of a complex nature it will not likely be in the DevOps logs. Therefore, we can download logs from XM Cloud to help us narrow down what the issue is. We have detailed how to do this below.
Debugging Your Deployment
Run the following command on your local machine to get the list of the latest logs in the Sitecore XM Cloud environment:
dotnet sitecore cloud environment log list -id ENVIRONMENTIDGOESHERE --latest
Then run this command to download a specific log and give it an output name:
dotnet sitecore cloud environment log download -id ENVIRONMENTIDGOESHERE --log RenderingHost.xmcloudpreview.log.20230502.070309.txt -o rendering-log.txt
Deploying XM Cloud to Vercel
Read our next blog, to see how we create the second and final stage of our Release Pipeline in DevOps for our Sitecore XM Cloud solution: the Vercel Stage.
👋 Hey Sitecore Enthusiasts!
Sign up to our bi-weekly newsletter for a bite-sized curation of valuable insight from the Sitecore community.
What’s in it for you?
- Stay up-to-date with the latest Sitecore news
- New to Sitecore? Learn tips and tricks to help you navigate this powerful tool
- Sitecore pro? Expand your skill set and discover troubleshooting tips
- Browse open careers and opportunities
- Get a chance to be featured in upcoming editions
- Learn our secret handshake
- And more!


Meet Mike Payne
Development Team Lead
🎶🚴♂️⛰
Mike is a Development Team Lead who is also Sitecore 9.0 Platform Associate Developer Certified. He's a BCIS graduate from Mount Royal University and has worked with Sitecore for over seven years. He's a passionate full-stack developer that helps drive solution decisions and assist his team. Mike is big into road cycling, playing guitar, working out, and snowboarding in the winter.