Integrating Multiple Sites in Sitecore XM Cloud
Within the domain of XM Cloud environments, our methodology has conventionally comprised setting up unique rendering hosts for every single site, a standard procedure that guarantees independence and personalization. Imagine, though, that you would prefer the smooth merging of several sites under a single component architecture and design. This offer becomes very appealing for a variety of other compelling reasons, in addition to brand constancy.
Taking this novel approach enables the centralization of design elements and components, creating an atmosphere in which updates and improvements can be easily deployed globally across all related sites. This cohesive strategy improves the effectiveness of continuous maintenance while also streamlining the development process.
Presenting a consistent visual identity across several websites becomes a real benefit from a branding standpoint. In addition to enhancing brand recognition, the harmonized design offers a more cohesive and engaging user experience. Imagine the flexibility and scalability this provides, enabling businesses to grow their online presence without sacrificing the integrity of their brands.
However, like with any novel idea, there are factors to take into account. Even though shared design and components provide many advantages, there are some drawbacks that must be considered. The benefits must be carefully weighed against any potential disadvantages, such as the demand for a strong governance plan to handle the varied content requirements across many sites.
Grab The Latest XM Cloud Foundation Template
Let’s clone the latest XM Cloud Foundation Template so we have something to work with, shall we? This command will set us up a project locally in the xmexample folder.
git clone https://github.com/sitecorelabs/xmcloud-foundation-head xmexample
Once everything is setup, we need to get two sites setup in Sitecore so let’s do that now.
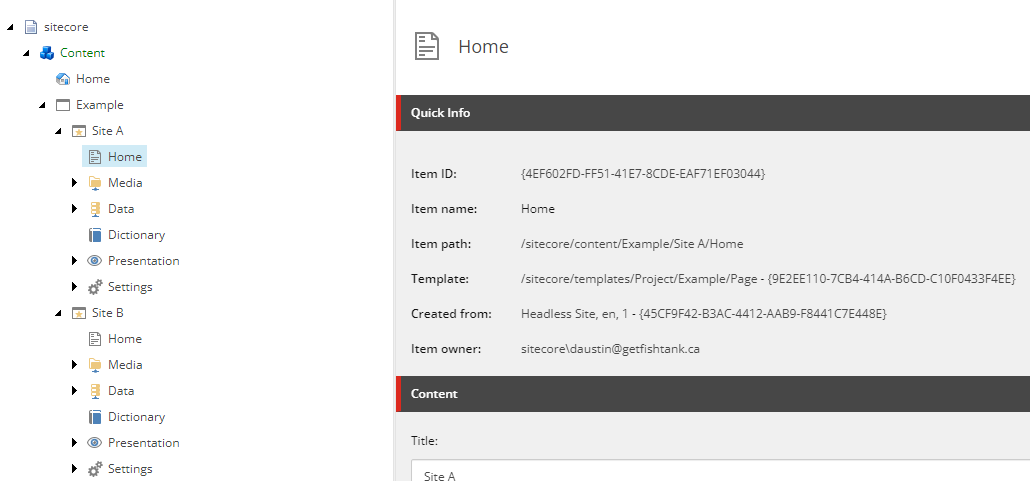
So now we have Site A and Site B and we’re going to have both of them utilize the sxastarter rendering host provided by the Foundation template.
Duplicate Rendering Host And Update
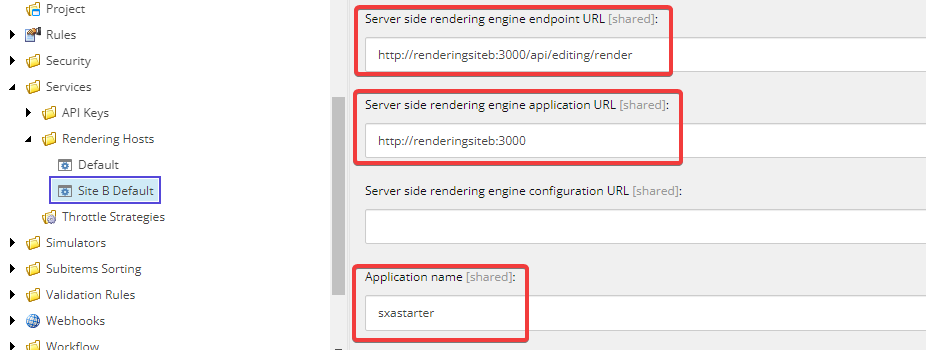
So firstly, we’re going to duplicate the default rendering host and change the values to reflect a new rendering container we’re going to setup later. Note the name for the Site B Default rendering host. We’ve updated both from rendering:3000 to renderingsiteb:3000. Now you can use whatever works, this is just what I’m using for this example. Also be sure to set the application name for BOTH rendering hosts to the appropriate name. In our case, it’s sxastarter.
Update Site B’s Site Grouping
Head back up to the Site B you setup previously and update the Site Grouping to point to the new Predefined application rendering host. This will allow us to have Site B use the secondary rendering docker container that uses the same front-end.

Update Settings Item For Both Sites
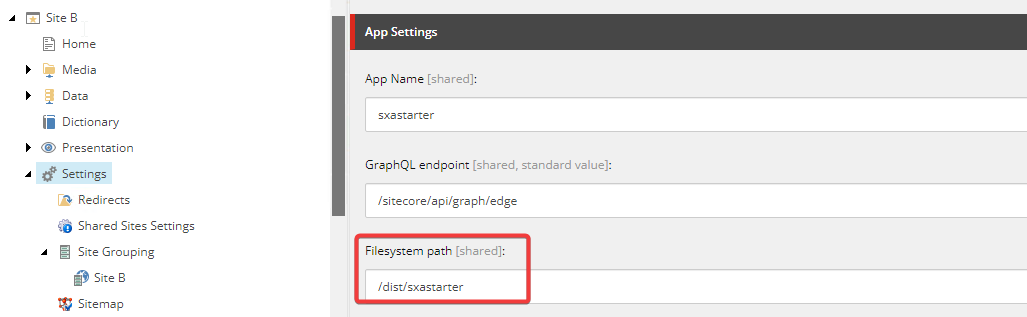
Both sites’ Settings item will need to be updated to reflect the use of the same rendering front-end. You will want to ensure the App Name and the Filesystem path for the Settings of each site both point to the folder name of your application. This assumes the folder name matches that of the value in the package.json for your application name.
Update Docker Setup
So we need to head back into the Docker setup and update init.ps1, docker-compose.override.yml, Traefik certificates, .env file and add another build setup.
Updating init.ps1
So there are three areas in init.ps1 we need to update. Let’s update the first where it generates the Traefik TLS certificate
Write-Host "Generating Traefik TLS certificate..." -ForegroundColor Green
    & $mkcert -install
    & $mkcert "*.sxastarter.localhost"
    & $mkcert "*.sxastartersiteb.localhost"
    & $mkcert "xmcloudcm.localhost"
Next, update the Windows host file entries.
Write-Host "Adding Windows hosts file entries..." -ForegroundColor Green

Add-HostsEntry "xmcloudcm.localhost"
Add-HostsEntry "www.sxastarter.localhost"
Add-HostsEntry "www.sxastartersiteb.localhost"
Lastly update where the RENDERING_HOST env variable is setup to add in our Site B setup matching the hostname above.
# RENDERING_HOST
Set-EnvFileVariable "RENDERING_HOST" -Value "www.sxastarter.localhost"
Set-EnvFileVariable "RENDERING_HOST_SITEB" -Value "www.sxastartersiteb.localhost"
Updating docker-compose.override.yml
First, let’s duplicate the rendering mount setup. We’ll duplicate it and call it renderingsiteb so it matches what we called it above inside Sitecore Content Editor.
renderingsiteb:
  image: ${REGISTRY}${COMPOSE_PROJECT_NAME}-renderingsiteb:${VERSION:-latest}
  build:
    context: ./docker/build/renderingsiteb
    target: ${BUILD_CONFIGURATION}
    args:
      PARENT_IMAGE: ${REGISTRY}${COMPOSE_PROJECT_NAME}-nodejs:${VERSION:-latest}
  volumes:
    - .\src\sxastarter:C:\appsiteb
  environment:
    SITECORE_API_HOST: "http://cm"
    NEXTJS_DIST_DIR: ".next-container-siteb"
    PUBLIC_URL: "https://${RENDERING_HOST_SITEB}"
    JSS_EDITING_SECRET: ${JSS_EDITING_SECRET}
    SITECORE_API_KEY: "${SITECORE_API_KEY_xmcloudpreview}"
    DISABLE_SSG_FETCH: ${DISABLE_SSG_FETCH}
  depends_on:
    - cm
    - nodejs
  labels:
    - "traefik.enable=true"
    - "traefik.http.routers.renderingsiteb-secure.entrypoints=websecure"
    - "traefik.http.routers.renderingsiteb-secure.rule=Host(`${RENDERING_HOST_SITEB}`)"
    - "traefik.http.routers.renderingsiteb-secure.tls=true"
So what all did we change here:
- Duplicated and renamed it
renderingsiteb - Updated image and changed where it said
-renderingto-renderingsiteb - Changed the build context to
./docker/build/renderingsiteb - Updated the volumes to be:
- .\src\sxastarter"c:\appsiteb - Updated environment variables:
- Changed
NEXTJS_DIST_DIRto.next-container-siteb - Changed
PUBLIC_URLtohttps://${RENDERING_HOST_SITEB}
- Changed
- Updated labels changing
rendering-securetorenderingsiteb-secureand theHostvalue to
Lastly in the file we need to update the Traefik mount to depend on renderingsiteb.
# Mount the Traefik configuration and certs.
  traefik:
    volumes:
      - ./docker/traefik:C:/etc/traefik
    depends_on:
      - rendering
      - renderingsiteb
Duplicate And Update docker/build/rendering
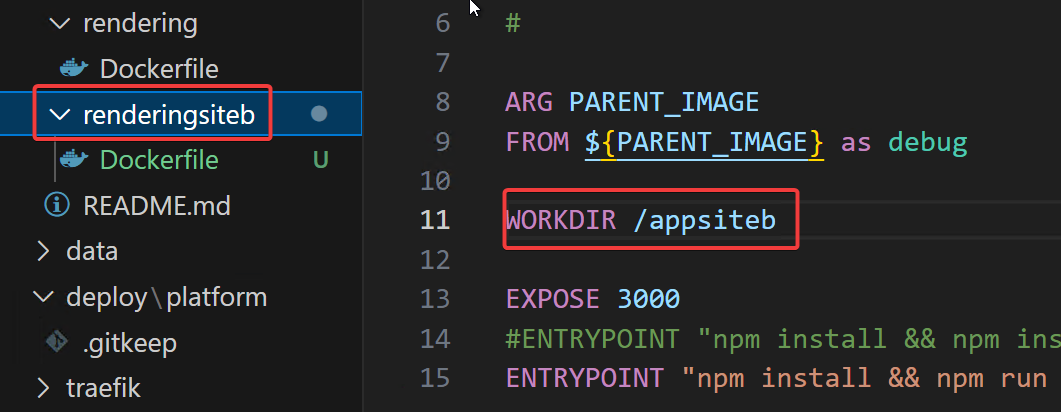
Let’s locate the rendering folder under docker/build. Then let’s duplciate and rename it renderingsiteb and then update the Dockerfile inside to reflect the volume we setup above. Namely, update the WORKDIR value to match the value changed in volumes.
Create Traefik certificates for Site B
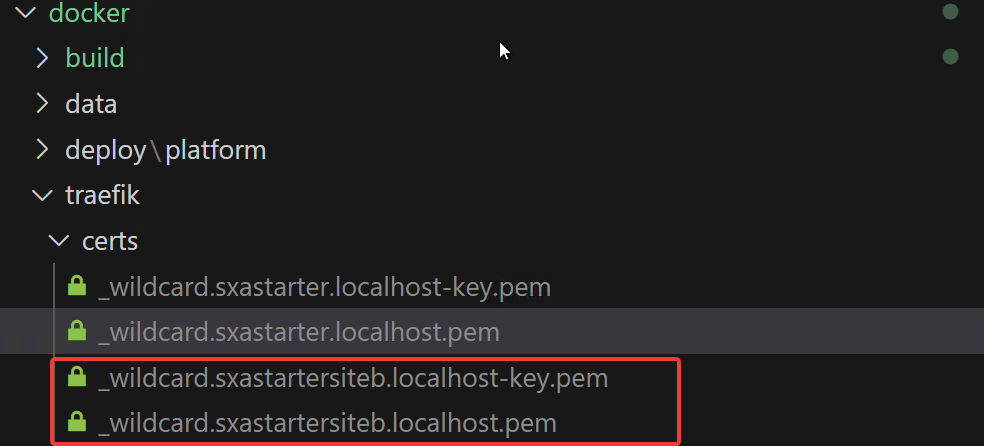
Locate docker/traefik/certs. We need to run the following command to generate our certificates:
mkcert "*.sxastartersiteb.localhost"
You should see the following

And be able to validate their creation here.
Update .env file for Docker setup
You’ll want to add some additional environment variables here:
RENDERING_HOST=www.sxastarter.localhost
RENDERING_HOST_INTERNAL_URI=http://rendering:3000
RENDERING_HOST_SITEB=www.sxastartersiteb.localhost
RENDERING_HOST_SITEB_INTERNAL_URI=http://renderingsiteb:3000
Important Note: Your .env file might also have RENDERING_HOST set to www.xmcloudpreview.localhost and that’s a bug you could run into if your front-end isn’t showing up. I’ve run into this when using www.sxastarter.localhost but the front-end wouldn’t load and the cause was this was weirdly set to www.xmcloudpreview.localhost.
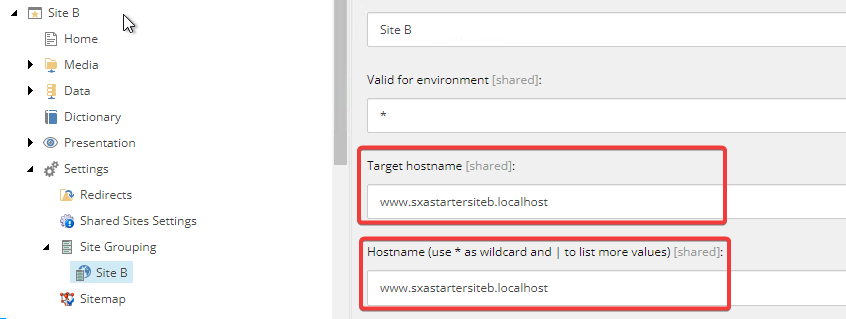
Back In Content Editor
Let’s update the Site Grouping for both Site A and Site B’s Target Hostname and Hostname values to specifically capture the hostnames so the site lookup works properly.
Let’s Re-Init and Re-Up
Before we do the init again, let’s first do a proper ./down if you haven’t already. Then once everything is settled, run ./init. This will then add the host entries and certificates for the second site.
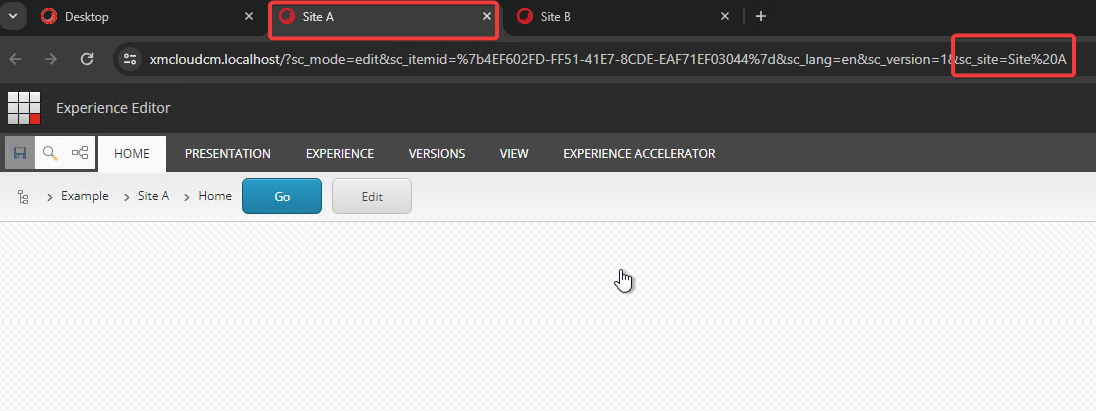
We can now verify the setup. Let’s first go into Content Editor and open up the Home item for each site into Experience Editor.
Site A Experience Editor Check
We can see the title of the tab matches that of the sc_site value and it loads without error.
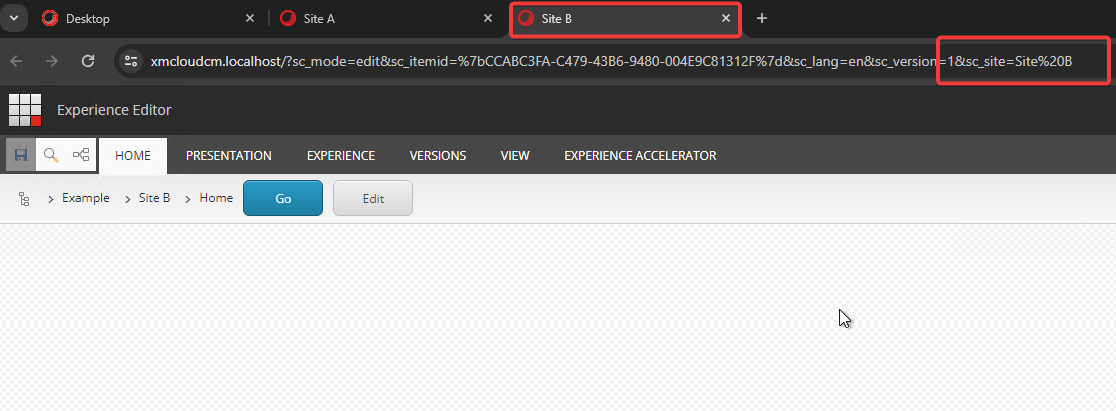
Site B Experience Editor Check
Same test for the Home item under Site B.
We can also do this for the front-ends by accessing both [https://www.sxastarter.localhost](https://www.sxastarter.localhost) and https://www.sxastartersiteb.localhost. I’m not showing them here because they’re just blank screens.
Additional work creating components and such still needs to be done, but in updating the front-end rendering, it will be reflected in both sites.

Meet David Austin
Development Team Lead | Sitecore Technology MVP x 3
📷🕹️👪
David is a decorated Development Team Lead with Sitecore Technology MVP and Coveo MVP awards, as well as Sitecore CDP & Personalize Certified. He's worked in IT for 25 years; everything ranging from Developer to Business Analyst to Group Lead helping manage everything from Intranet and Internet sites to facility management and application support. David is a dedicated family man who loves to spend time with his girls. He's also an avid photographer and loves to explore new places.