Enabling the Content Hub DAM Connector in Sitecore XM Cloud
Do you use Sitecore and Content Hub for your business? If so, you might be wondering how to make these two platforms communicate super smoothly. The tool in question is the Sitecore DAM component of the Sitecore Connect for Content Hub connector (SCCH). With this component, you'll be able to browse, search, and insert your digital assets directly from Sitecore DAM within the Content and Experience Editor.
In this blog, I am discussing how to enable the DAM connector for environments deployed in XM Cloud.
To enable the DAM connector in an XM Cloud deployed Sitecore environment, users need to follow a few steps. First, they need to ensure that they have access to the XM Cloud Deploy app and a user in Sitecore Content Hub with the necessary user rights. Second, they need to create an OAuth client for the connector. Once these prerequisites are met, users can configure and enable the DAM connector in the XM Cloud Deploy app by setting up variables and creating a new task to update the connector's connection settings.
Configure and Enable the DAM Connector in the XM Cloud Deploy App
To configure and enable the DAM connector:
- Log in to the XM Cloud Deploy app.
- On the navigation pane of the XM Cloud Deploy app, click Projects.
- On the Projects page, click the project that contains the environment where you want to enable the DAM connector.
- On the project page, click the environment where you want to enable the DAM connector.
- On the environment page, click Variables, then click Create variable.
- Create the following variables. For each variable, set the Target to CM.
| Variable | Value | Description |
|---|---|---|
| Sitecore_ConnectionStrings_DAM_dot_ContentHub | ClientId={client_id};ClientSecret={client_secret};UserName={username};Password={password};URI={uri}; | The Client ID and Client Secret, which belong to the connector's OAuth client. These credentials are required to establish a connection between the connector and both Sitecore and Content Hub platforms. The username and password of the Content Hub user that you created. This allows you to authenticate the connection and access the Content Hub instance. The correct URI for your Content Hub instance. |
| Sitecore_ConnectionStrings_DAM_dot_SearchPage | Sitecore Content Hub search page URL https://your-content-hub-url/en-us/sitecore-dam-connect/approved-assets | The correct URI for your Content Hub instance. |
| Sitecore_ConnectionStrings_DAM_dot_ExternalRedirectKey | Sitecore | The URL of the page that opens the DAM in an IFrame. This ensures that Browse Sitecore DAM opens the right page and displays assets from the SCCH component. |
| SITECORE_AppSettings_damEnabled__define | yes | By default, when you deploy an environment to XM Cloud, the DAM connector is disabled. To enable the connector, set this value to yes. |
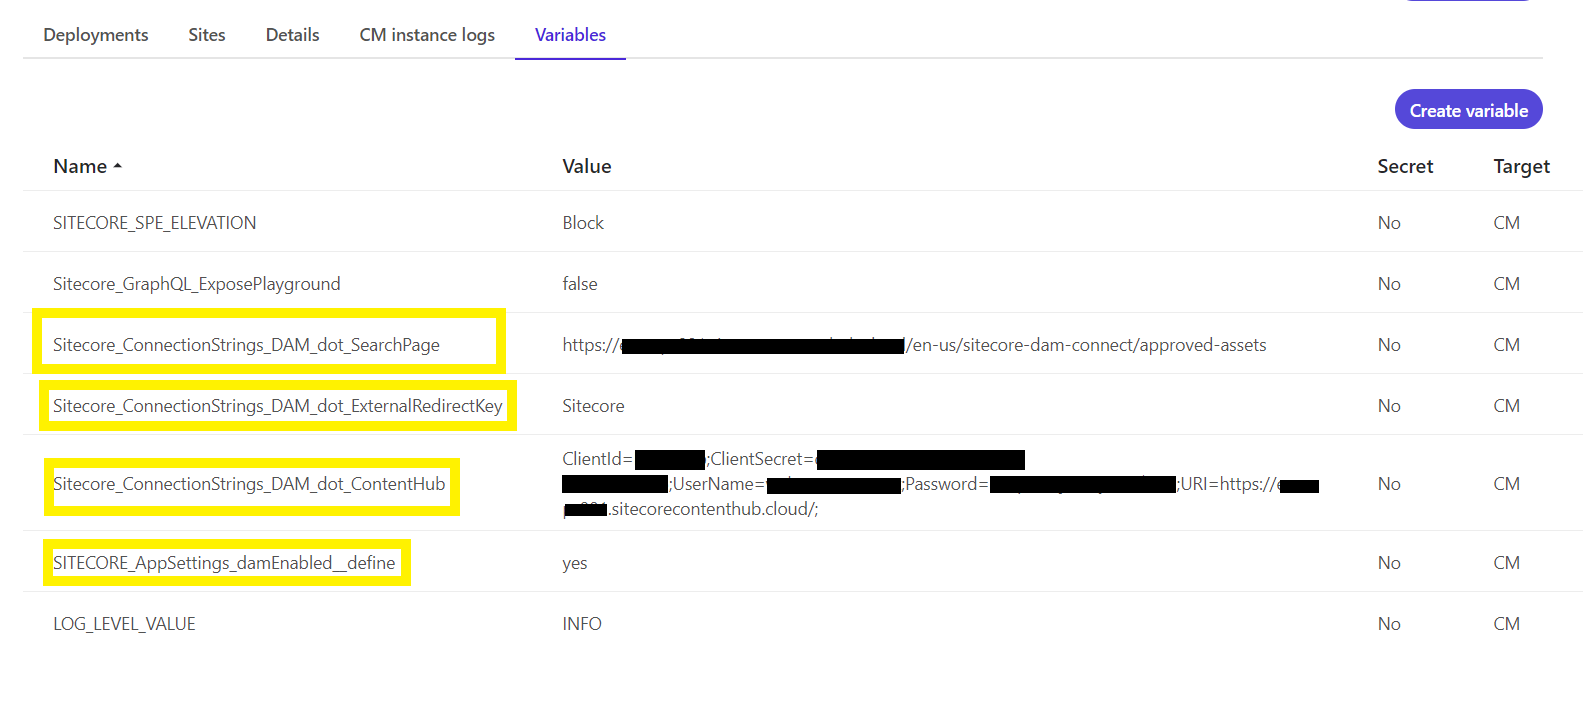
After creating the environment variables, it would be something like in the above screenshot.
Configure a DAM Connection
To configure a DAM connection:
- Clone the source control repository linked to your XM Cloud environment.
-
In the XM Cloud repository folder, create the following subfolder:
{Project Repo Name}/src/platform/App_Data/Xdts -
Open the
Xdtssubfolder, create a file namedWeb.config.xdt, and open it for editing. Add the instructions to modify theweb.configfile for the DAM configuration. For example:<?xml version="1.0" encoding="utf-8"?> <configuration xmlns:xdt="http://schemas.microsoft.com/XML-Document-Transform"> <location path="sitecore"> <system.webServer> <httpProtocol> <customHeaders> <!--DO NOT USE THIS CONTENT SECURITY POLICY EXAMPLE IN YOUR SOLUTION--> <add name="Content-Security-Policy" value="default-src 'self' 'unsafe-inline' 'unsafe-eval' [https://apps.sitecore.net](https://apps.sitecore.net/); img-src 'self' data: https://your-content-hub-url.cloud/ [https://s.gravatar.com](https://s.gravatar.com/) https://*.wp.com/cdn.auth0.com/avatars; style-src 'self' 'unsafe-inline' [https://fonts.googleapis.com](https://fonts.googleapis.com/); font-src 'self' 'unsafe-inline' [https://fonts.gstatic.com](https://fonts.gstatic.com/); block-all-mixed-content; child-src 'self' https://your-content-hub-url.cloud/; connect-src 'self' https://your-content-hub-url.cloud/; media-src https://your-content-hub-url.cloud/" xdt:Transform="Replace" xdt:Locator="Match(name)"/> </customHeaders> </httpProtocol> </system.webServer> </location> </configuration> -
It's crucial to add the Sitecore CM URL, Content Hub instance URL, and Content Hub vanity URL to the connect-src properties to ensure the DAM connection functions correctly for the Link & Image fields.
- Save the file.
-
To include the
web.configfile transformation in the XM Cloud build configuration, navigate to the root folder, and open thexmcloud.build.jsonfile for editing. Add the following properties:"transforms": [ { "xdtPath": "/app_data/xdts/web.config.xdt", "targetPath": "/web.config" } ] -
In the src/platform folder, open the
Platform.csprojfile and add the following:<ItemGroup> <Content Include="App_Data\**" /> </ItemGroup> -
Commit your changes and push them to the remote repository.
- Create a build and deploy it to your environment.
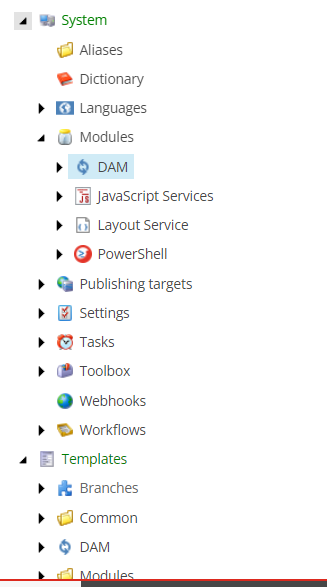
Once these steps are done you would be able to see the DAM folder in System/Modules & Templates in the Content Tree.
Configure CORS for DAM
To enable the Content Hub DAM iframe to successfully display in the Content Editor and XM Cloud Pages media item picker, you need to add the Pages and environment host name URLs to Content Hub CORS configuration.
To configure CORS for DAM:
-
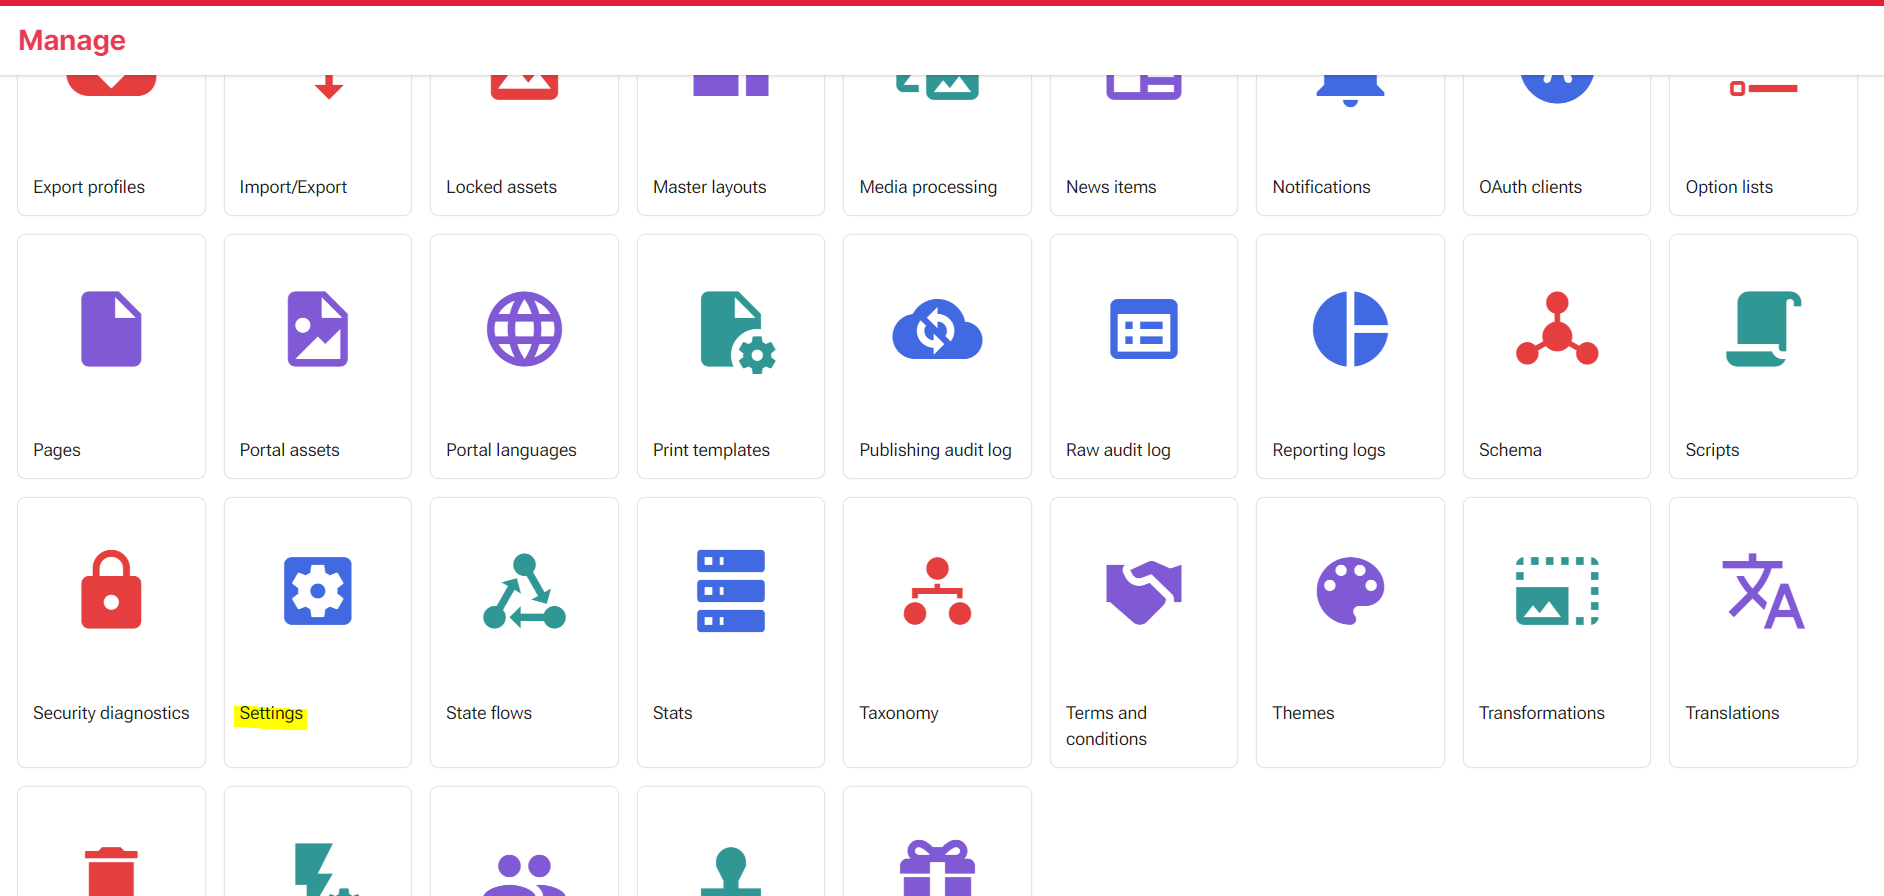
On the Sitecore DAM main menu, click Manage, then Settings.
-
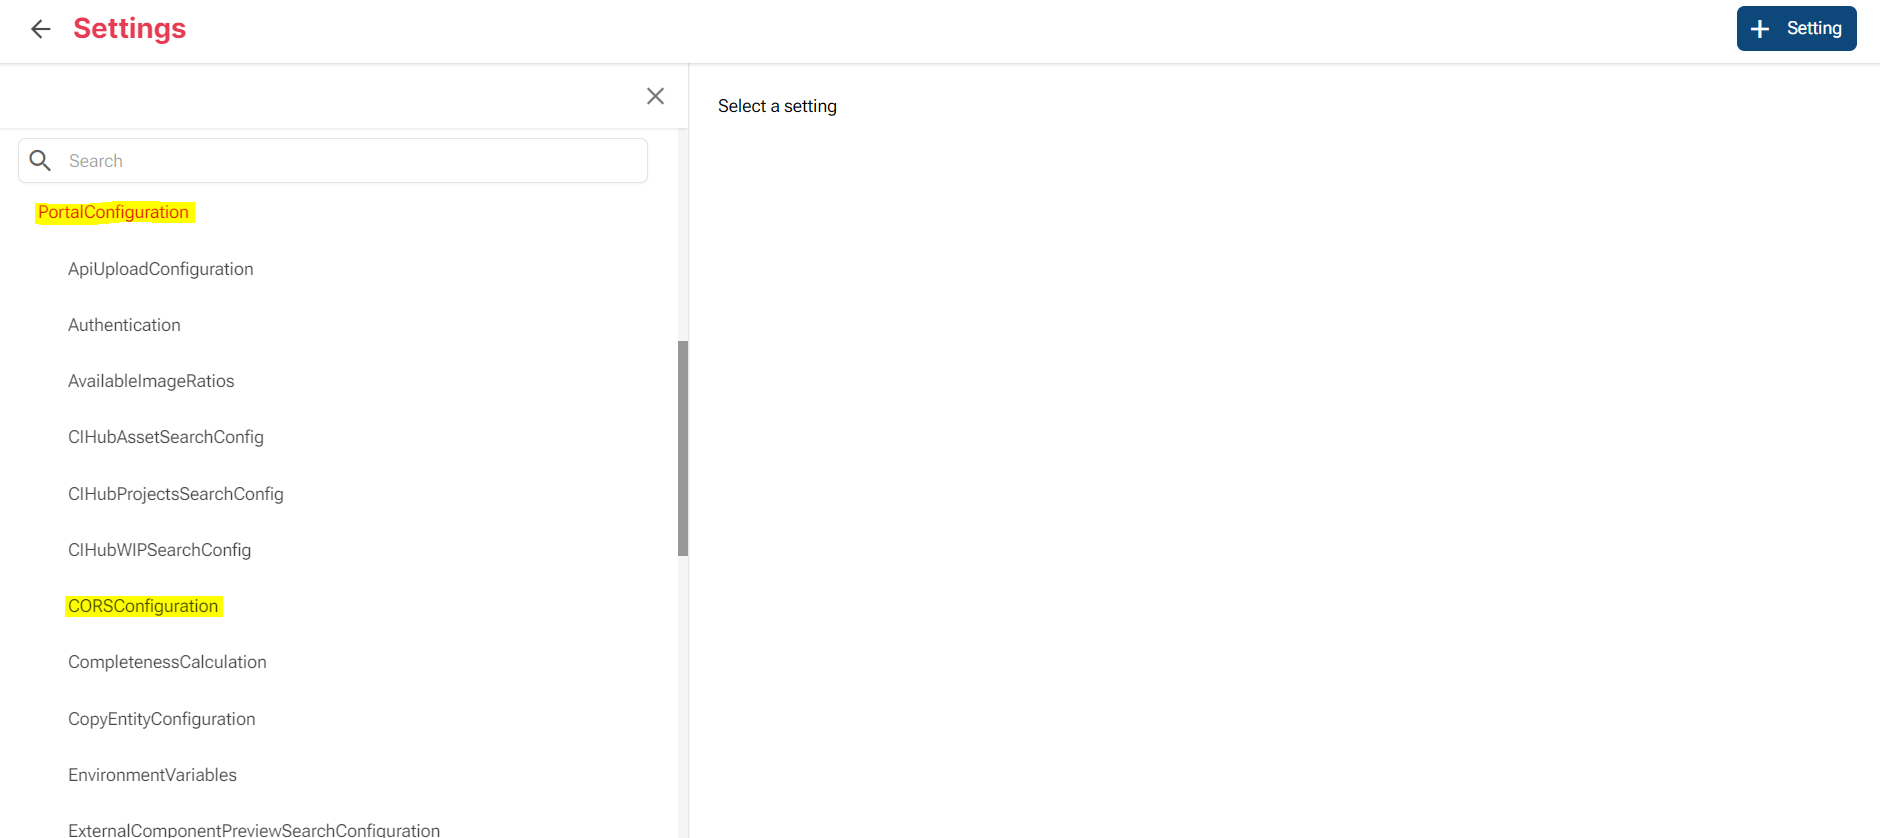
On the Settings page, click PortalConfiguration, then click CORSConfiguration.
-
In URL field, enter the URL of XM Cloud Pages:
https://pages.sitecorecloud.io/, then click Add. - In URL field, enter
https://, then the environment host name of your XM Cloud environment, for example:https://my-xmc-environment-host-name.cloud/, then click Add.
Now we will be able to browse and select the DAM assets through Content Editor for Image and Link fields.
Hope this blog helps in connecting Sitecore and content hub thereby enabling editors to seamlessly browse, search, and insert digital assets from Content Hub.
Thanks for reading!

Meet Anju Thomas
Sitecore Web Developer
🎞🥘🧩
Anju is a Sitecore Developer with a Bachelor's Degree in Computer Science and over 4 years of experience in Sitecore development. She loves solving Sudoku puzzles, watching movies, eating delicious food and exploring the world.