Getting Started in Sitecore Content Editor
As a world leading Content Management System, Sitecore is both versatile and robust in it’s functionality with tools that empower businesses to craft tailored digital experiences. But, like any powerful tool, the richness of its features can be initially overwhelming for new users. As we continue to train new clients on how to navigate Sitecore and it’s endless functionality, we are reminded that there are several nuances that get in the way of new users’ productivity and authoring experience. Whether you’re a content editor, marketer, or business user, understanding Sitecore’s intricacies is paramount. This blog was dedicated to help all new Sitecore enthusiasts by outlining some tips and tricks for getting started in Content Editor and Experience Editor.
While this blog offers valuable insights, tips, and best practices for new Sitecore users, it's important to understand that it’s not a substitute for formal Sitecore training. To take advantage of the platform's full potential and ensure best practices, we strongly recommend participating in official Sitecore training programs. Consider the content here as complementary guidance to enhance and support your formal learning journey.
Enable Standard Fields in Sitecore Content Editor
One common issue among new Sitecore users navigating Content Editor, is that their Standard Fields may not enabled by default. Because of this, there are some fields that are hidden from new content authors including the Workflow fields which are very important to being able to publish content to the live site.
Follow these two easy steps to remedy this issue:
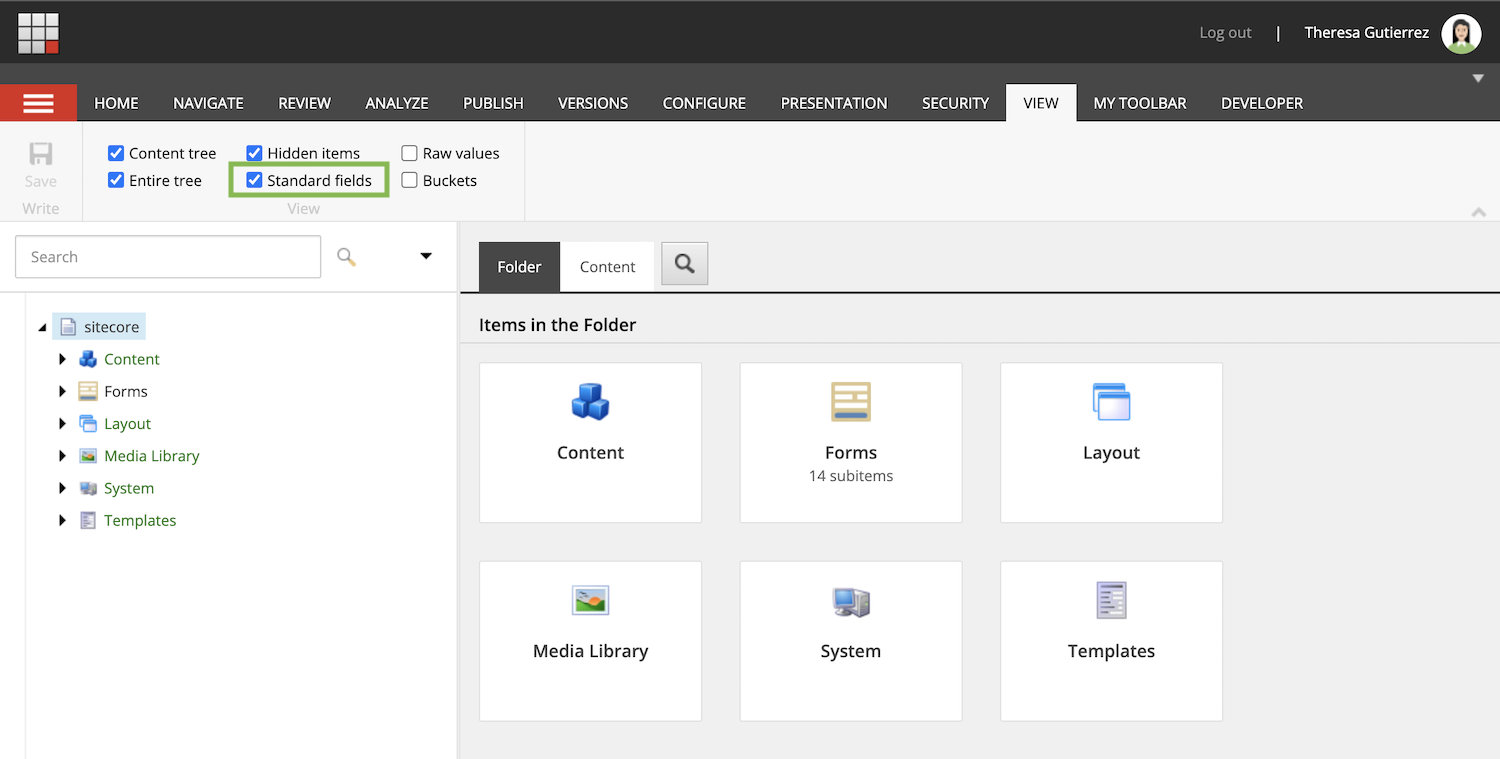
- Navigate to the View tab in Sitecore Content Editor
- Enable the Standard Fields check box in the top left corner
Enable the Left Navigation Menu in Sitecore Content Editor
Another important facet of Sitecore Content Editor that is not automatically enabled for new users is the Workflow state in the left Navigation menu. By enabling the Workflow state in the left-hand menu, we can show whether a web page is either in draft or live on the site.
To enable the Workflow State in the left Navigation Menu in Sitecore Content Editor, follow these steps:
-
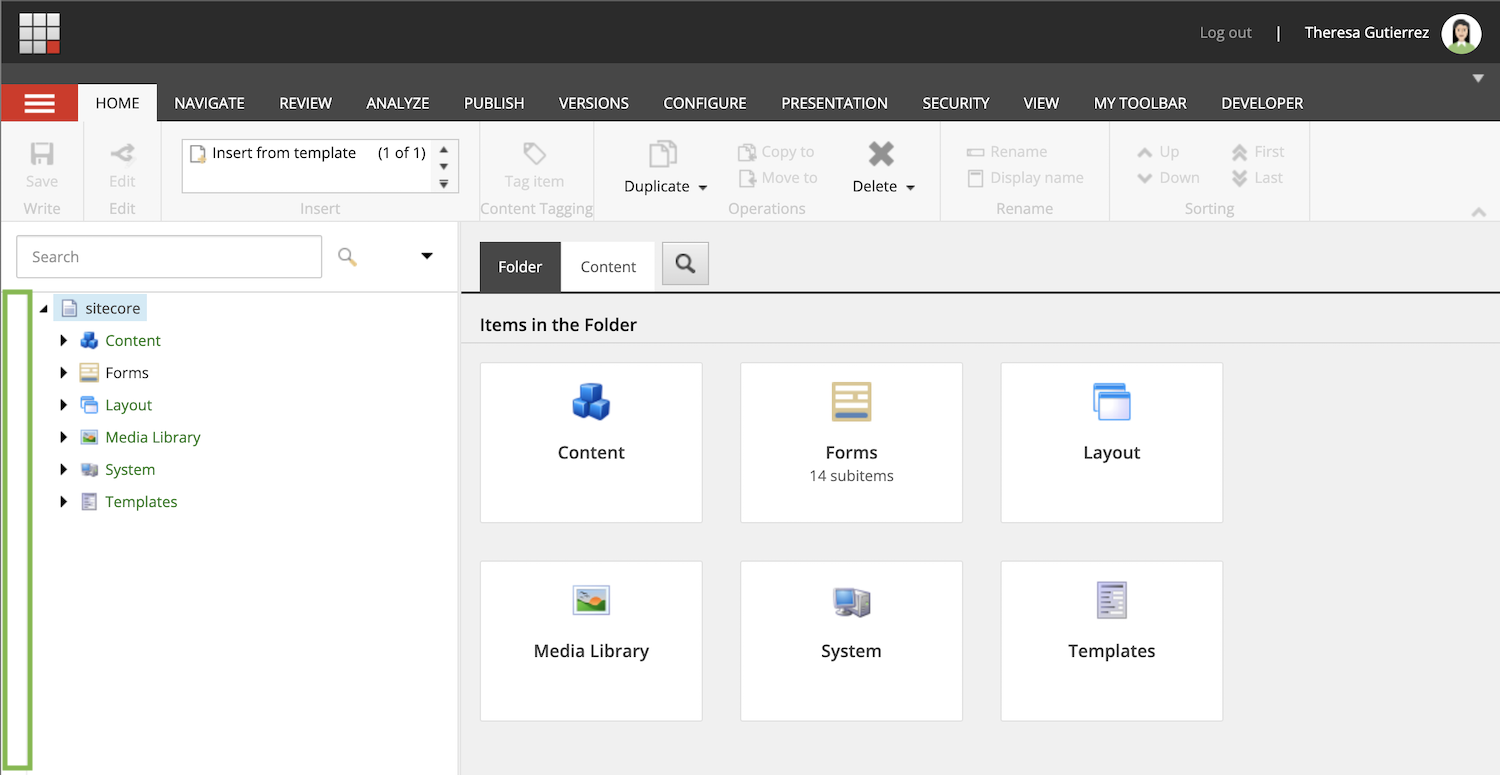
Right click the area next to the Content Tree (highlighted in the screenshot below).
-
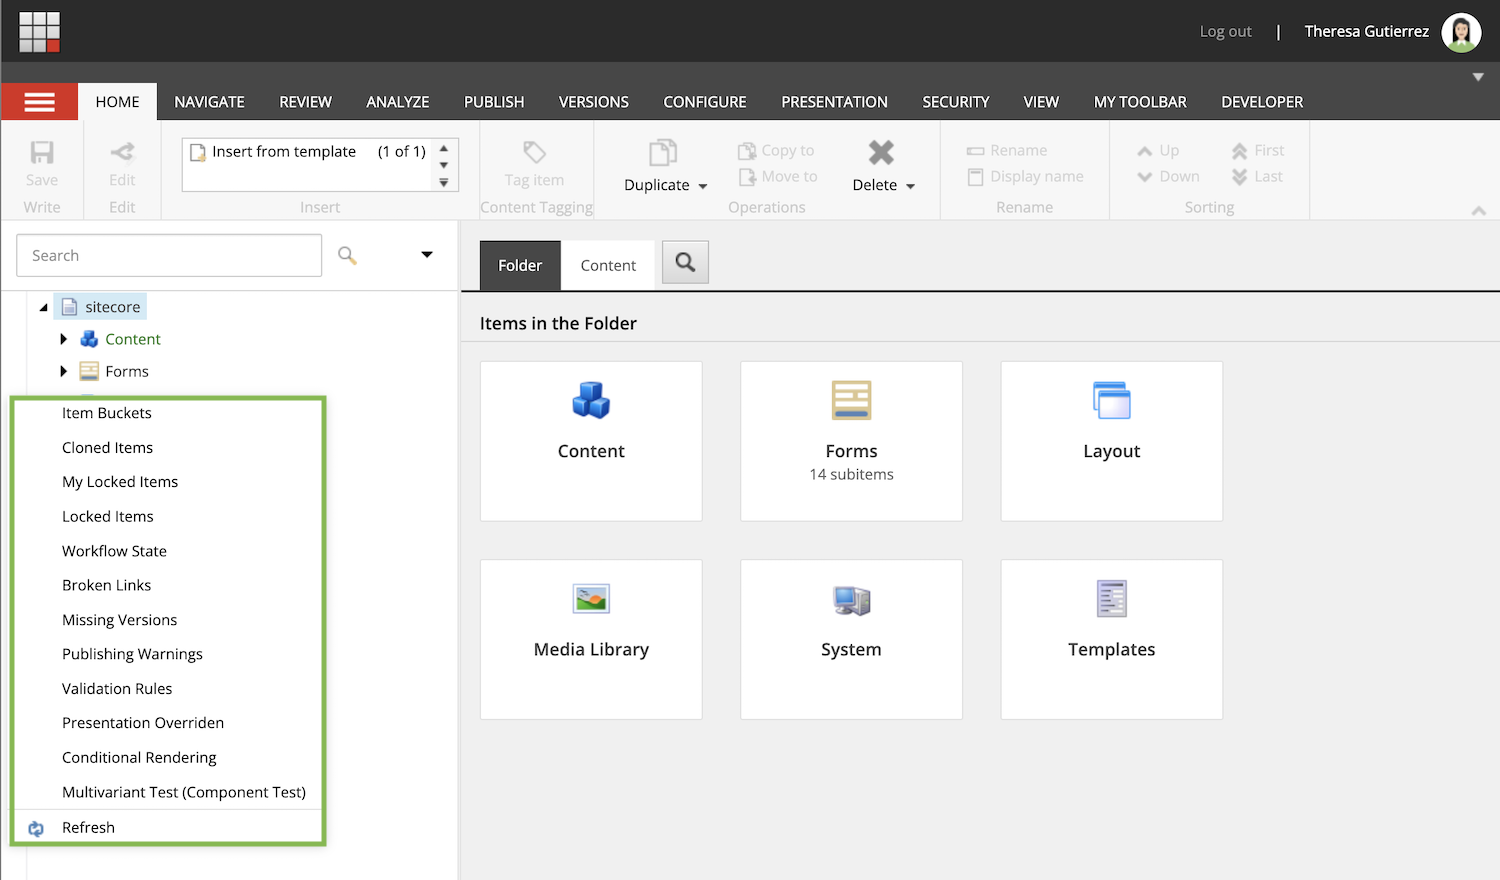
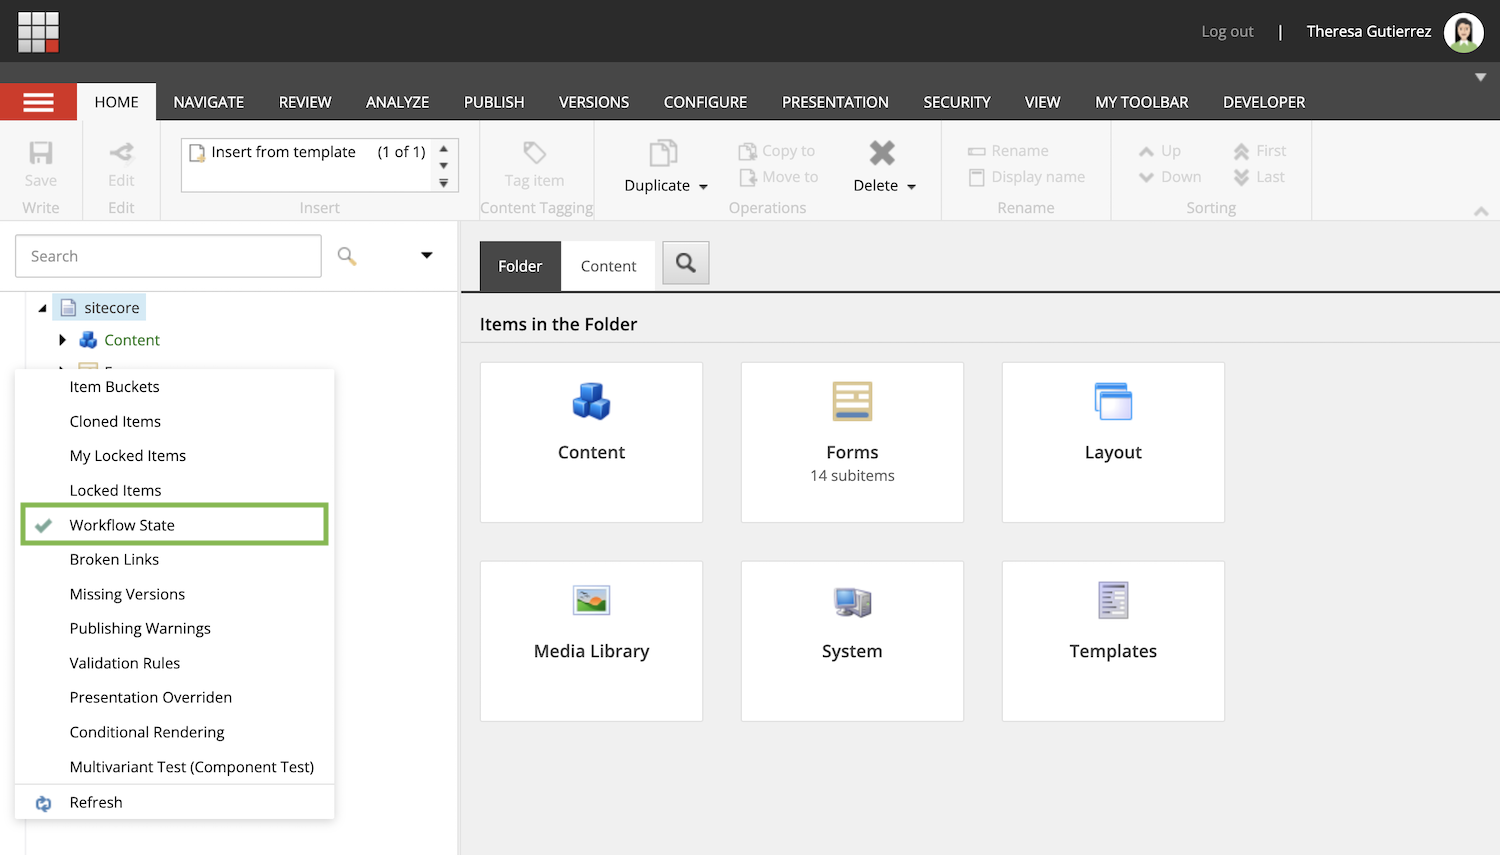
When the following menu appears, click Workflow State.
-
Now the Workflow State will be enabled in the Content Editor Navigation Menu.
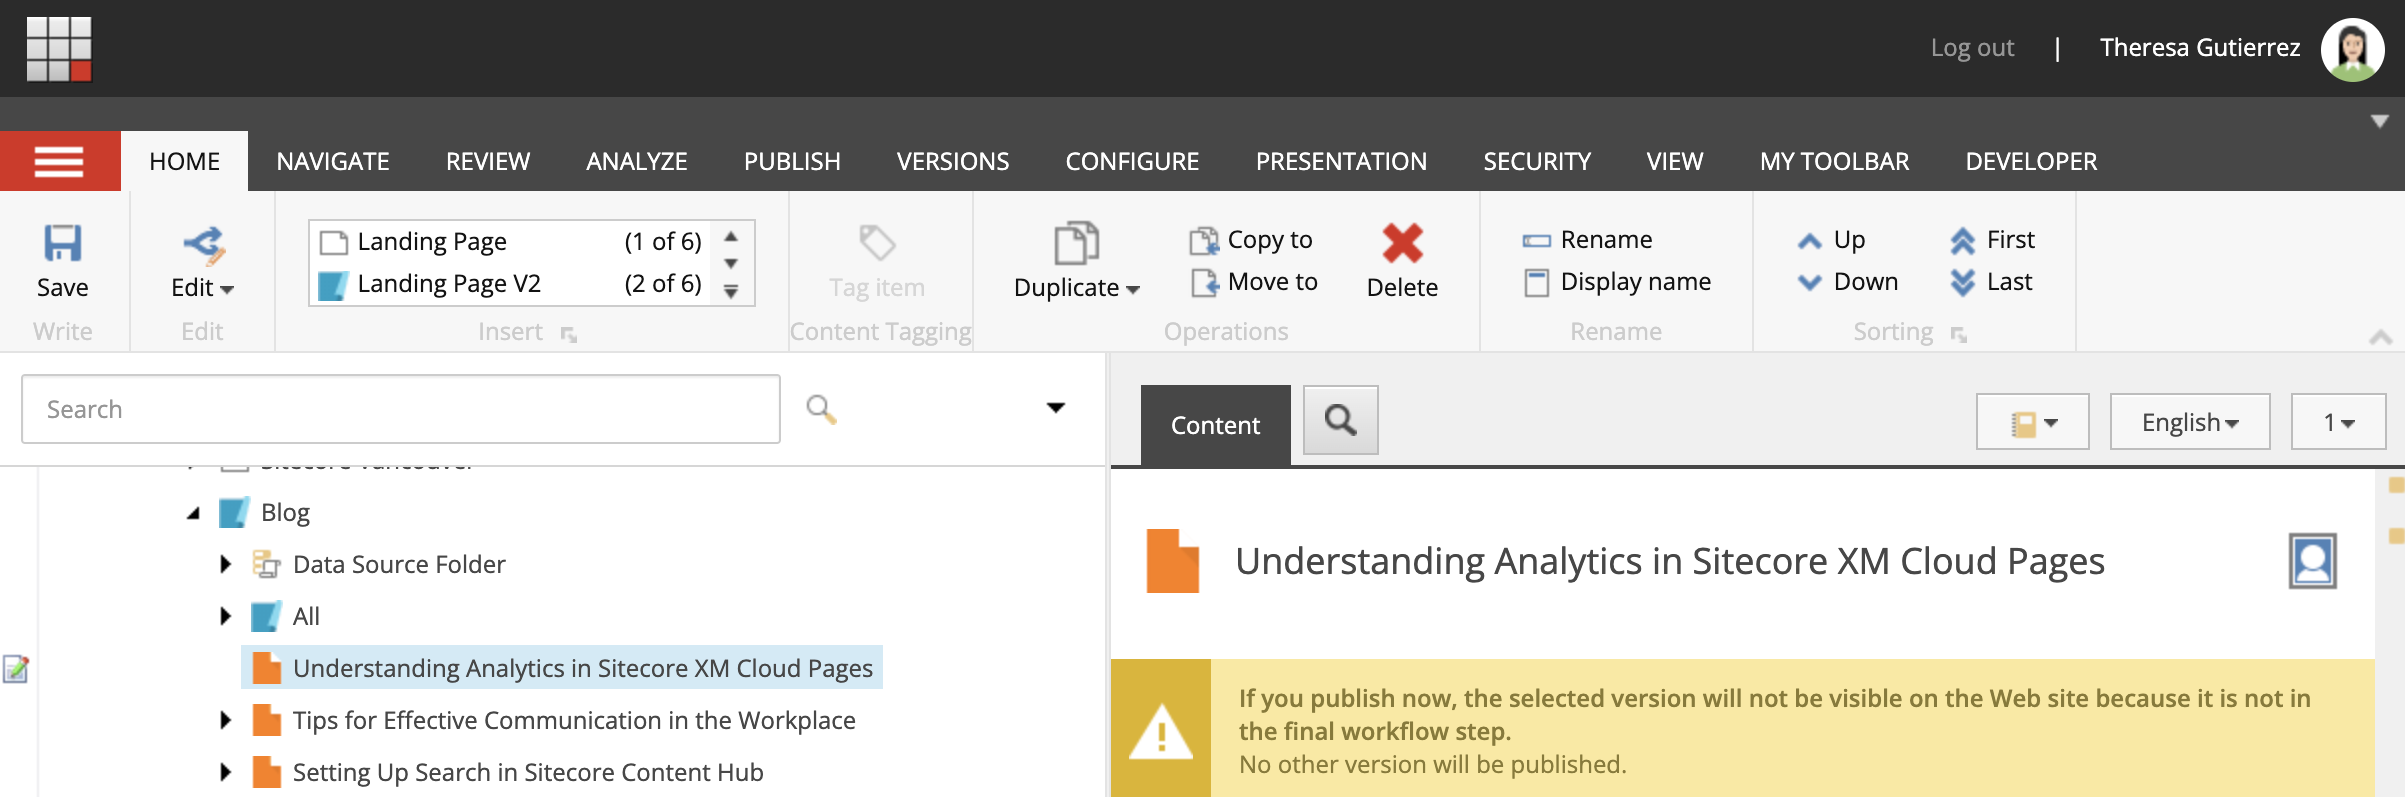
Pages that are currently being edited by another user will have a symbol with a paper and pencil next to them on the left Navigation menu. Here is a screenshot of what enabling the Workflow State for your content tree in Sitecore Content Editor will look like with a page in Draft.
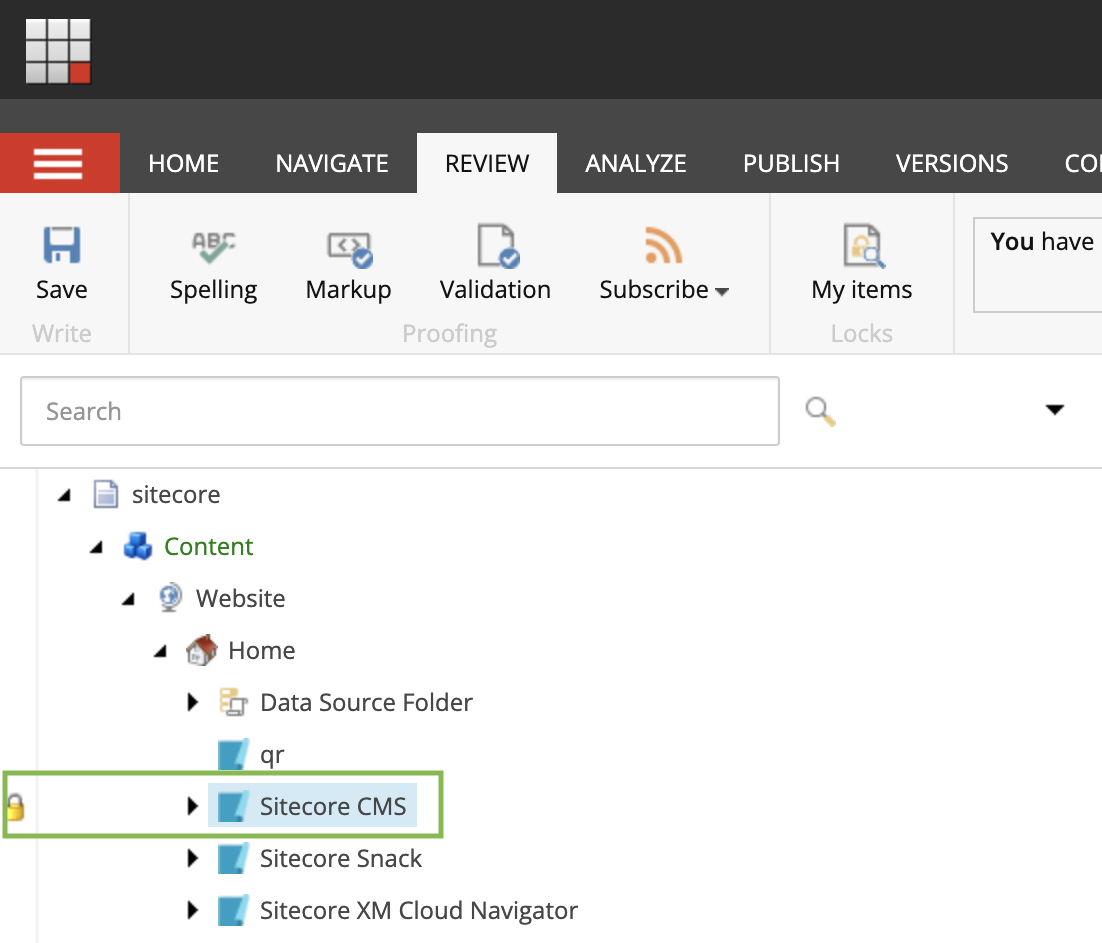
You can also enable the Locked Items option in the left Navigation menu so you can easily see which items are locked by other users in your organization. Locked items indicate that someone is editing that item and it can’t be edited by anyone else until the item unlocked by being submitted.
Navigate Faster with the "Favorites" Feature
Within Sitecore's Content Editor, the hierarchical structure of the content tree can be massive and sometimes mean you're frequently navigating through multiple layers to access specific pages or items. To streamline this process, the "Favorites" feature, found under the "Navigate" tab in the top menu, will become your best friend.
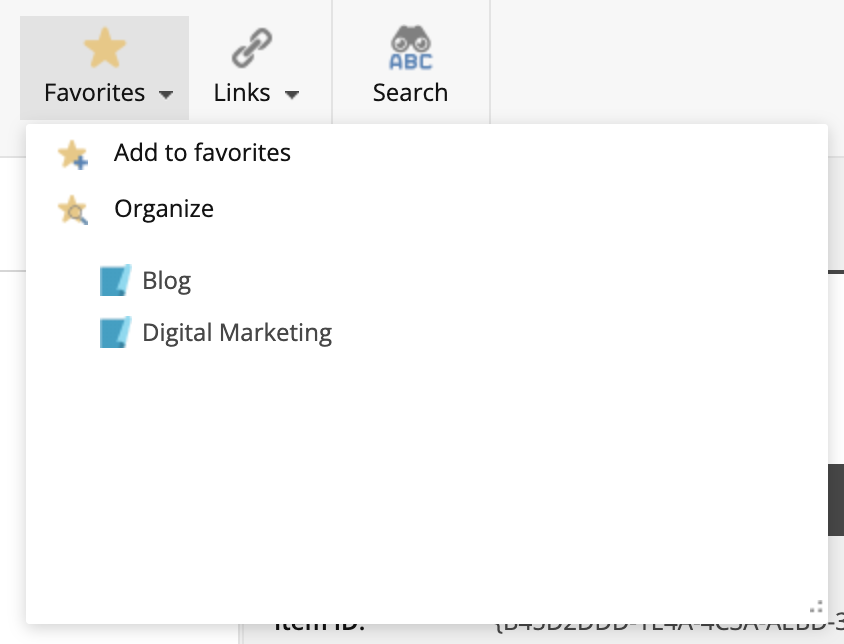
The "Favorites" button, symbolized by a yellow star, is designed to give you swift access to pages or items you frequently work on. Instead of delving deep into the content tree and opening multiple page accordions, you can swiftly jump to your most-used items with just a click.
By following these simple steps, your chosen item will be bookmarked under "Favorites," ready for rapid access whenever you need it. It's a practical way to improve efficiency, especially if you're managing a content-rich Sitecore instance. Here’s how to optimize your workflow with the Favorites feature in Sitecore Content Editor:
- Ensure the item you want to Favorite is selected.
-
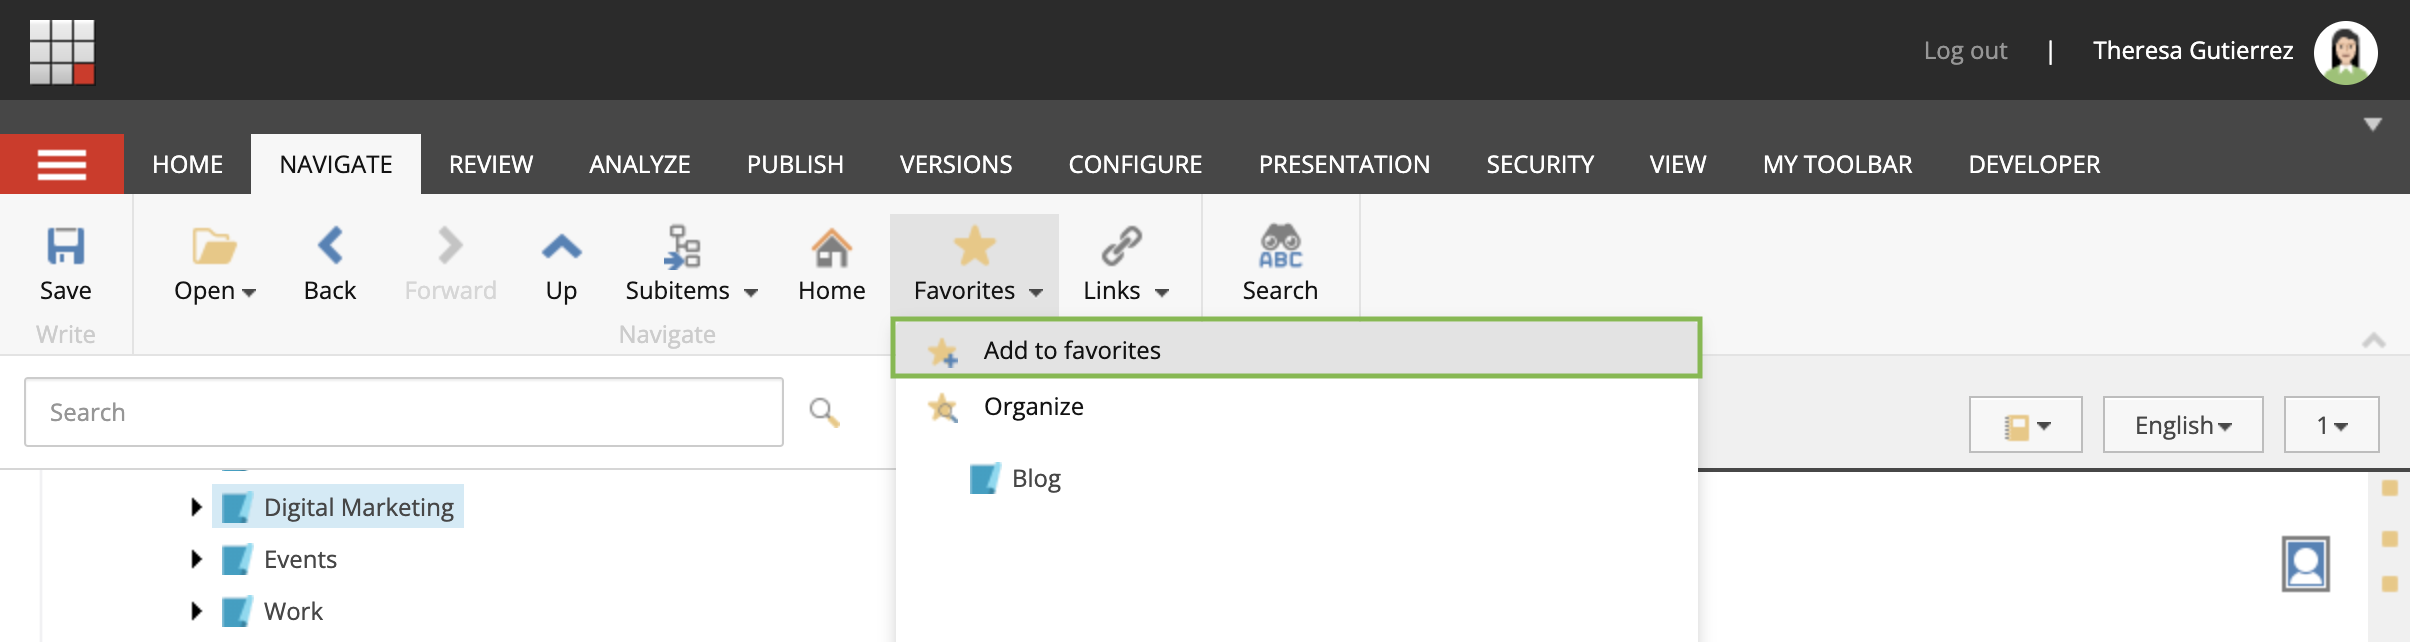
Click on the Navigate tab at the top of your Content Editor ribbon and click on Favorites.
-
Click Add to favorites.
-
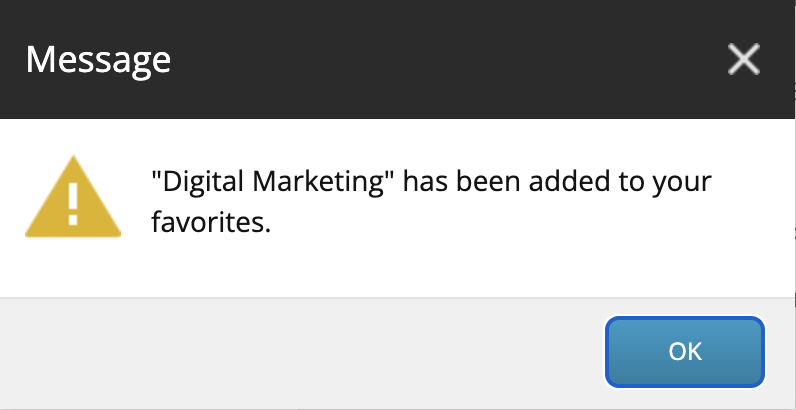
You’ll see a dialog box to confirm the item you wanted was added to your favorites.
-
If you want to easily navigate back to your favorited items, all you need to do is click the Favorites button and select the item and it will be selected in Content Editor.

Ensure You’re in the Shared Layout in Experience Editor
Navigating Sitecore’s features can be daunting for newcomers. At it’s core, Sitecore offers a dual-layered approach to rendering your page designs: Shared Layout and Final Layout. The Shared Layout is where you set up foundational elements that remain the same across all page versions and languages. This ensures consistency throughout your website, irrespective of language or version differences. On the other hand, the Final Layout provides content authors with customization options, allowing them to adjust presentation specifics for particular versions or languages. Collectively, these features enable content authors to strike a balance between consistency and personalized user experiences, ensuring the content connects effectively with diverse audiences.
Consider a global company operating in various parts of the world. Using the Shared Layout, organizations can maintain create net-new content once. Any additions made are consistent across all versions and languages in Shared Layout. If you want to introduce region-specific content, the Final Layout can be used. For new content editors, always create new content using the Shared Layout in the Experience Editor. Here is how you can confirm which Layout option you’re in:
- Open Experience Editor
-
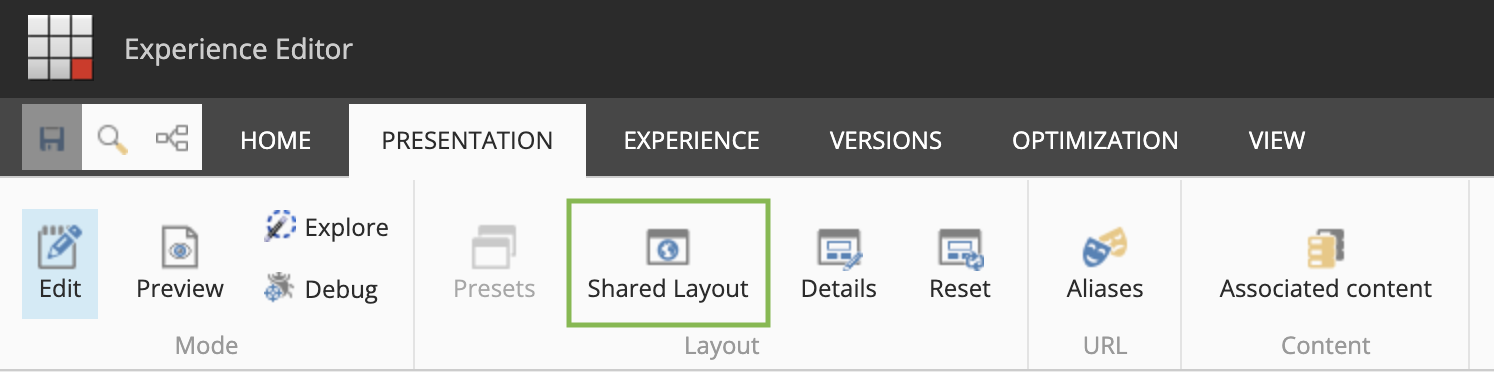
Navigate to the Presentation tab. Check if your Layout options have the Shared Layout option selected.
-
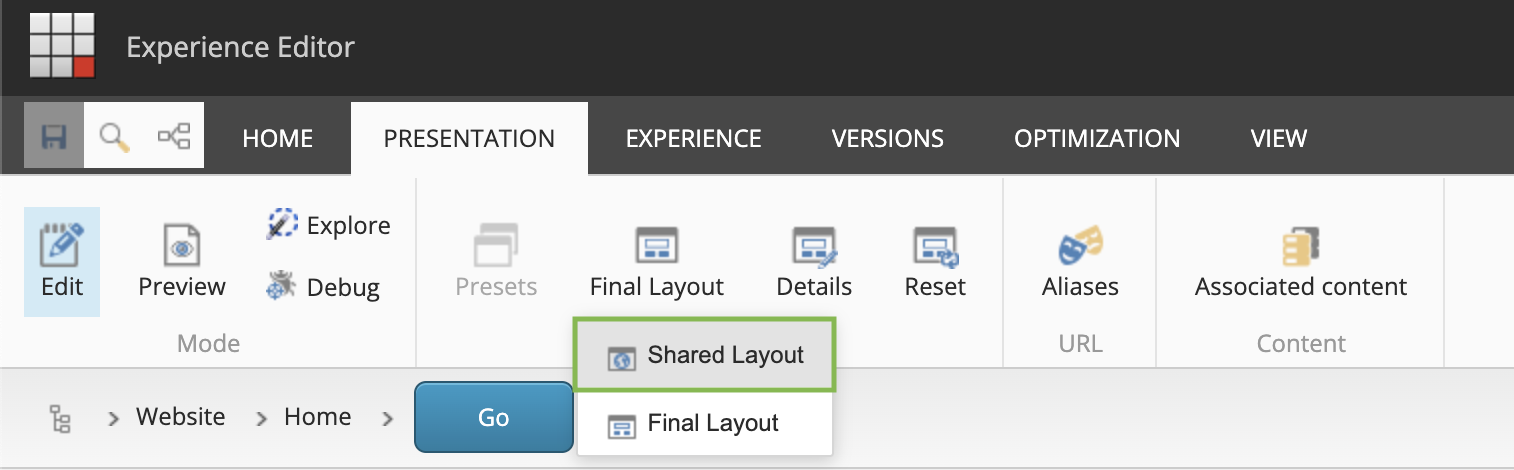
If the Final Layout option is selected, click it and you’ll see a dropdown menu to change it.
-
Click Shared Layout and start editing your page.

For a more in-depth look into Shared Layout vs. Final Layout, check out our latest blog here.
Starting Your Sitecore Journey
Sitecore stands as a world-leading CMS full of dynamic capabilities that don’t come without their complexities. For budding content authors venturing into Sitecore Content Editor and Experience Editor, mastering the nuances between both can seem daunting. But I’m hoping this blog gave you the right tips and tricks under your belt, to help get you started on your authoring journey. Remember, every tool and feature in Sitecore has been crafted with the intent to optimize user experience and streamline content creation. As you continue to explore and experiment, let these insights be a good starting point for you on your journey, and lead you towards crafting compelling content and delivering unmatched digital experiences. Here's to your success and growth in the world of Sitecore!
Happy authoring!

Meet Theresa Gutierrez
Sitecore Strategist | Sitecore Strategy MVP
⛳ 🌮👩🏻💻
Theresa, aka 'T', is a high-energy marketing creative with 8+ years of experience across various industries. She's passionate about delivering strategy and design, with a focus on Sitecore SaaS technologies. T is an avid golfer and loving dog momma, appeased only by delicious food and a bevy of something bubbly. Cheers!