Unlocking Site Analytics With Data Layer Integration
The web development world is constantly evolving, and keeping track of how visitors interact with your site is crucial for success. Enter the data layer: a behind-the-scenes hero that acts like an invisible tracker. It sheds light on user behavior, revealing valuable insights that can guide your development decisions.
This guide is tailored for developers working with Sitecore Headless and Next.js, aiming to equip you with the skills to integrate a data layer effectively. We'll cover the essentials, from setting up the data layer in your Next.js app and managing configurations in Sitecore, to fetching data with GraphQL and dynamically applying settings. By the end of this guide, you'll have a comprehensive analytics setup that provides valuable insights into user navigation, empowering you to enhance your website's user experience.
Adding a Data Layer in Next.js
When integrating a data layer in a Next.js application, developers have two primary approaches: a manual method using a custom hook and the useEffect hook, and a more automated method utilizing the @next/third-parties/google package.
1. Manual Method With Custom Hooks
The manual approach involves directly manipulating the data layer within your Next.js application. This method gives you full control over the data layer's initialization and updates. Here's a brief overview:
-
Custom Hook: Create a custom hook,
useDataLayer, to manage the data layer. This hook uses theuseEffecthook to initialize the data layer and can include functions to update it based on user interactions or other events.// hooks/useDataLayer.js import { useEffect } from 'react'; const useDataLayer = () => { useEffect(() => { window.dataLayer = window.dataLayer || []; window.dataLayer.push({ event: 'eventName', page: { title: document.title, url: window.location.href, }, }); }, []); }; export default useDataLayer; -
Implementation in
_app.js: To ensure the data layer is initialized on every page load, we use theuseDataLayerhook within the_app.jsfile, which acts as the root for all pages in your Next.js application. This setup allows us to maintain a global data layer that is consistent across the entire site.// pages/_app.js import useDataLayer from '../hooks/useDataLayer'; function MyApp({ Component, pageProps }) { useDataLayer(); return <Component {...pageProps} />; } export default MyApp;In addition to initializing the data layer, this approach provides an opportunity to integrate
SitecorePagePropsinto the data layer. For example, if you're using Sitecore XM Cloud for your headless CMS, you might have access to properties likelocaleandidfor each page. These properties are part of the page-specific data that Sitecore XM Cloud provides to your Next.js application. You can include these properties in the data layer to enhance your analytics with context-specific information, allowing for more granular analysis of user behavior across different regions and pages of your site.// hooks/useDataLayer.js import { useEffect } from 'react'; const useDataLayer = (sitecorePageProps) => { useEffect(() => { // Initialize the data layer with global data window.dataLayer = window.dataLayer || []; window.dataLayer.push({ event: 'pageview', page: { title: pageProps?.layoutData?.sitecore?.route.displayName, url: window.location.href, id: sitecorePageProps.layoutData?.sitecore?.route.itemId, locale: sitecorePageProps.locale, }, }); }, [sitecorePageProps.layoutData?.sitecore?.route.itemId, sitecorePageProps.locale]); }; export default useDataLayer;Then, in
_app.js, you can pass theSitecorePagePropsto theuseDataLayerhook// pages/_app.js import useDataLayer from '../hooks/useDataLayer'; function App({ Component, pageProps }: AppProps<SitecorePageProps>): JSX.Element { const { dictionary, ...rest } = pageProps; useDataLayer(pageProps); return ( <I18nProvider lngDict={dictionary} locale={pageProps.locale}> <Component {...rest} /> </I18nProvider> ); }By integrating
SitecorePagePropsinto the data layer, you can capture valuable context about each page, such as its unique ID and locale, which can be instrumental in segmenting and analyzing user behavior across different regions and pages of your site. -
Dynamic Updates: You can further extend the data layer by dynamically updating it based on user interactions or other events. For example, you might add a function to your custom hook to track button clicks:
  // Add to hooks/useDataLayer.js
  const trackButtonClick = (buttonName) => {
    window.dataLayer.push({
      event: 'button_click',
      button: {
        name: buttonName,
      },
    });
  };
Then, use this function in your components to track specific button clicks:
  // In a component file
  import { trackButtonClick } from '../hooks/useDataLayer';

  const MyButton = () => (
    <button onClick={() => trackButtonClick('my_button')}>Click Me</button>
  );
Note for TypeScript Users:
If you're using TypeScript and encounter the error
Property 'dataLayer' does not exist on type 'Window & typeof globalThis', you'll need to extend theWindowinterface to include thedataLayerproperty. This ensures that TypeScript recognizesdataLayeras a valid property on the globalWindowobject. Create a new file named global.d.ts or window.d.ts in your project's root directory or a directory included in your TypeScript configuration.// global.d.ts // Extend the Window interface declare global { interface Window { dataLayer: any[]; } } export {};Make sure your TypeScript configuration file (
tsconfig.json) includes the declaration file in itsincludearray.{ "include": ["next-env.d.ts", "**/*.ts", "**/*.tsx", "global.d.ts"] }By following these steps, you'll resolve the TypeScript error and ensure that your data layer implementation is compatible with TypeScript's type checking.
2. Automated Method With @next/third-parties/google
For developers looking for a more streamlined integration with Google Analytics and Google Tag Manager, the @next/third-parties/google package offers a convenient solution:
- Installation: Install the
@next/third-parties/googlepackage in your Next.js project. -
Sending Events: Use the
sendGAEventorsendGTMEventfunction to send events to Google Analytics or Google Tag Manager, respectively. These functions abstract away the direct manipulation of the data layer, simplifying the event tracking process.import { sendGTMEvent } from '@next/third-parties/google'; export function EventButton() { return ( <button onClick={() => sendGTMEvent({ event: 'buttonClicked', value: 'xyz' })}> Send Event </button> ); }This automated method is ideal for projects that require a straightforward integration with Google's analytics tools and do not need extensive customization of the data layer.
Both manual and automated methods have their place in Next.js development. The manual approach offers more control and customization, while the automated method provides ease of use and quick integration with Google's analytics platforms. When deciding between these two approaches, consider your project's specific requirements and the level of customization needed.
Manage Configurations in Sitecore
Sitecore offers a flexible and robust content management system that can be leveraged to manage your tracking configurations centrally. By creating a dedicated template for your tracking needs, you can streamline the process of configuring and maintaining your analytics setup.
Creating a Tracking Configuration Template
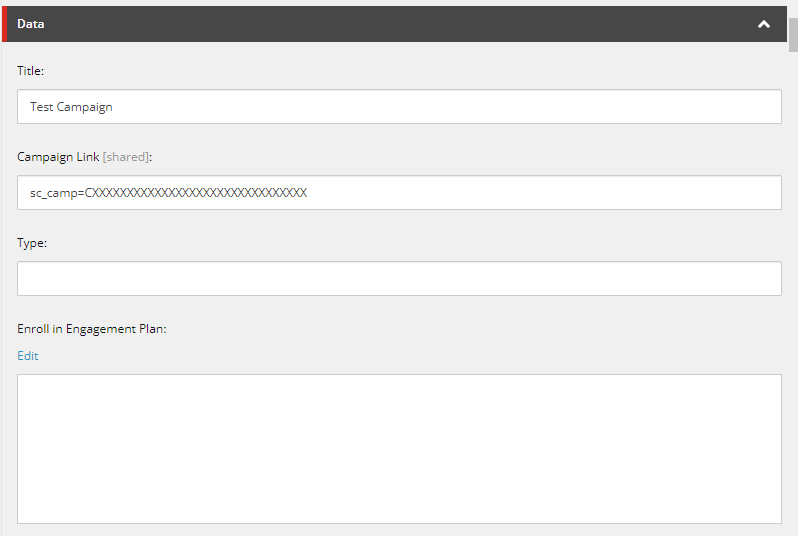
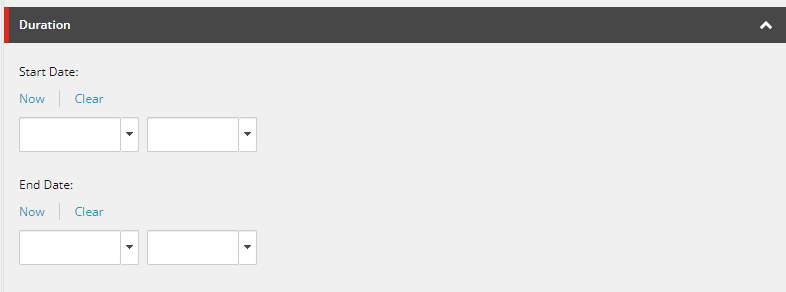
- Template Creation: In Sitecore, create a new template named
Campaign(or any name that suits your needs) to store your tracking configurations. This template will act as a blueprint for your tracking items. -
Custom Fields: Add custom fields to your
Campaigntemplate to represent different aspects of your tracking configuration. For example, you might include fields forDataLayerNameandDataLayerValue, along with any other relevant properties such asStartDate,EndDate, orCampaignType. -
Creating Items: Use this template to create items that represent individual tracking configurations. Populate the fields with the appropriate values for each campaign or tracking scenario.
Fetching Configurations With GraphQL
Once you have your tracking configurations set up in Sitecore, the next step is to fetch this data for use in your Next.js application. GraphQL provides a powerful and efficient way to query your Sitecore instance for the specific tracking data you need.
To learn more about how to use GraphQL to fetch data from Sitecore in a Next.js context, check out my previous blog post: Custom Hooks for Next.js in Sitecore XM Cloud. In this post, I cover the basics of setting up GraphQL queries in Next.js and how you can create custom hooks to streamline fetching and using Sitecore data in your Next.js components.
By leveraging GraphQL and the techniques outlined in the blog, you can efficiently retrieve your tracking configurations from Sitecore and prepare them for integration into your data layer.
Integrating the Data Layer With a Custom Hook
After fetching the tracking configuration data from Sitecore, you can utilize a custom hook to dynamically push the relevant data to the data layer in your Next.js application. This approach allows you to apply the data layer settings either globally in app.tsx or selectively on specific pages.
Here's an example of a custom hook, useFetchDataLayerItems, that fetches data and updates the data layer:
// useFetchItemFields.ts
import { useEffect, useState } from 'react';
import { useSitecoreContext } from '@sitecore-jss/sitecore-jss-react';

type JsonValue = {
  value: string | boolean | number | null;
  id?: string;
  url?: string;
  name?: string;
  displayName?: string;
  fields?: {
    [key: string]: {
      value: string | {} | null;
    };
  };
};

type Field = {
  name: string;
  jsonValue: JsonValue | JsonValue[] | null;
};

type Result = {
  name: string;
  fields: Field[];
};

type Children = {
  total: number;
  results: Result[];
  pageInfo: {
    endCursor: string;
    hasNext: boolean;
  };
};

type Item = {
  id: string;
  name: string;
  children: Children;
};

type Data = {
  item: Item;
};

export type ItemProps = {
  data: Data;
};

export const useFetchDataLayerItems = () => {
  const [itemFields, setItemFields] = useState<Result[]>([]);
  const { sitecoreContext } = useSitecoreContext();

  useEffect(() => {
    const fetchData = async () => {
      try {
        const apiUrl ='/api/graphQL/GetDatalayerItems' // Adjusted endpoint name


        const response = await fetch(apiUrl, {
          method: 'POST',
          headers: {
            'Content-Type': 'application/json',
          },
          body: JSON.stringify({
            sitecoreLanguage: sitecoreContext?.language ?? 'en',
          }),
        });

        if (!response.ok) {
          throw new Error(`HTTP error! Status: ${response.status}`);
        }

        const result = await response.json();

        // Assuming the API returns the result directly without needing JSON.parse
        // Adjust according to your actual API response structure
        setItemFields(result);
      } catch (err) {
        console.error('Error fetching item fields:', err);
      }
    };

    fetchData();
  }, [sitecoreContext?.language]);
  // Separate useEffect for dataLayer logic
  useEffect(() => {
    if (typeof window !== 'undefined' && itemFields?.length > 0) {
      // Ensure dataLayer is initialized
      window.dataLayer = window.dataLayer || [];

      itemFields.forEach((item, index) => {
        const endDateField = item.fields.find((field) => field.name === 'EndDate')
          ?.jsonValue as JsonValue;

        // Check if endDateField exists and is not the placeholder date
        if (
          endDateField == null ||
          (endDateField &&
            endDateField.value &&
            (new Date(endDateField.value.toString()) > new Date() ||
              endDateField.value.toString() === '0001-01-01T00:00:00Z'))
        ) {
          console.log(new Date(endDateField?.value?.toString()) < new Date());
          const channelField = item.fields.find((field) => field.name === 'Channel')
            ?.jsonValue as JsonValue;
          const campaignGroupField = item.fields.find((field) => field.name === 'Campaign group')
            ?.jsonValue as JsonValue;
          const campaignFacetField = item.fields.find((field) => field.name === 'Campaign facet 1')
            ?.jsonValue as JsonValue;

          window.dataLayer.push({
            Source: channelField?.name || 'Unknown Source',
            Medium: 'Deprecated - Display',
            Campaign: campaignGroupField?.name || 'Unknown Campaign',
            Content: campaignFacetField?.name || 'Unknown Content',
          });
        }
      });
    }
  }, [itemFields]);

  return itemFields;
};
To apply the data layer settings globally, you can use the useFetchDataLayerItems hook in your app.tsx file:
// pages/_app.tsx
import { useFetchDataLayerItems } from '../hooks/useFetchDataLayerItems';

function MyApp({ Component, pageProps }) {
  useFetchDataLayerItems();

  return <Component {...pageProps} />;
}

export default MyApp;
Alternatively, if you want to apply the data layer settings only on specific pages, you can use the hook directly within those page components:
// pages/somePage.tsx
import { useFetchDataLayerItems } from '../hooks/useFetchDataLayerItems';

export default function SomePage() {
  useFetchDataLayerItems();

  return (
    // Page content
  );
}
By using this custom hook, you can ensure that your data layer is dynamically updated with the relevant tracking configurations from Sitecore, providing a flexible and scalable solution for your analytics needs.
Enhancing Analytics in Sitecore Headless With Next.js
In this guide, we've demonstrated how to integrate a dynamic data layer into a Sitecore Headless and Next.js application, enhancing its analytics capabilities. We explored both manual and automated methods for implementing the data layer, managing tracking configurations in Sitecore, and applying them dynamically in Next.js.
By effectively utilizing a data layer, you can gain valuable insights into user behavior and site performance, enabling data-driven decisions that improve user experience and marketing strategies. Whether you opt for the manual or automated approach, the key is to ensure a seamless integration with your analytics tools.

Meet Sohrab Saboori
Senior Full-Stack Developer
💪👨💻🤼
Sohrab is a Senior Front-End Developer with extensive experience in React, Next.js, JavaScript, and TypeScript. Sohrab is committed to delivering outstanding digital solutions that not only meet but exceed clients' expectations. His expertise in building scalable and efficient web applications, responsive websites, and e-commerce platforms is unparalleled. Sohrab has a keen eye for detail and a passion for creating seamless user experiences. He is a problem-solver at heart and enjoys working with clients to find innovative solutions to their digital needs. When he's not coding, you can find him lifting weights at the gym, pounding the pavement on the run, exploring the great outdoors, or trying new restaurants and cuisines. Sohrab believes in a healthy and balanced lifestyle and finds that these activities help fuel his creativity and problem-solving skills.