Creating a Contact Form in Sitecore
In this blog, we will walk you through the process of creating a simple "Contact Us" form in Sitecore using Next.js and Nodemailer.
The form will collect user input (firstname, lastname, message), and upon submission, it will send an email to your designated email address using the Nodemailer library. This blog assumes you have some basic knowledge of Next.js and Sitecore.
The whole form creation, backend logic for submission and securing using Google recaptcha is divided into two separate blogs for the purpose of easy understanding.
Install Nodemailer
In the root folder of your project, install the Nodemailer library. Nodemailer is a popular JavaScript library that allows you to send emails from your application. In simple terms, it's like a postman for your code. Just as a postman delivers physical letters to recipients, Nodemailer delivers virtual emails to their intended email addresses.
Creating the Contact Form Component
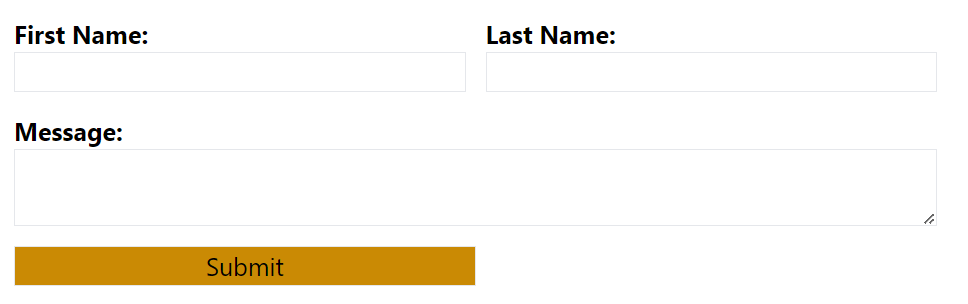
Create a new file called "ContactUsForm.tsx" inside the "components" folder. This file will contain the form component. The form should include input fields for the user's name, email, and message. Also, include a submit button.
import { ComponentProps } from 'lib/component-props';
import { ChangeEvent, FormEvent, useState } from 'react';
import { withDatasourceCheck, Field, Text } from '@sitecore-jss/sitecore-jss-nextjs';

export type ContactUsFormProps = ComponentProps & {
  fields: {
    emailRecipient: Field<string>;
    successMessage: Field<string>;
    emailSubject: Field<string>;
  };
};

const FORM_DEFAULT: {
  [key: string]: string;
} = {
  firstName: '',
  lastName: '',
  message: '',
};

const ContactUsForm = ({ fields }: ContactUsFormProps): JSX.Element => {
  const [formData, setFormData] = useState(FORM_DEFAULT);
  const [successMsgCss, setSuccesssMsg] = useState(false);

  //function to update the form data when the user enters information into any of the form fields.
  const changeFormData = (
    e: ChangeEvent<HTMLInputElement | HTMLTextAreaElement>,
    field: string
  ) => {
    const initialFormData = { ...formData };
    initialFormData[field] = e.target.value;
    setFormData(initialFormData);
    setSuccesssMsg(false);
  };
  //function that handles form submission by sending the form data to the server using the fetch API
  const formSubmit = async (event: FormEvent<HTMLFormElement>) => {
    event.preventDefault();
    formData.recipient = fields.emailRecipient.value;
    formData.emailSubject = fields.emailSubject.value;
    fetch('/api/contact', {
      method: 'POST',
      headers: {
        Accept: 'application/json, text/plain, */*',
        'Content-Type': 'application/json',
      },
      body: JSON.stringify(formData),
    })
      .then((response) => {
        console.log('response recieved');
        if (response.status === 200) {
          console.log('response succeeded');
          setSuccesssMsg(true);
          setFormData(FORM_DEFAULT);
        }
      })
      .catch((error) => {
        console.error(error);
      });
  };

  return (
    <div className="pr-15px pl-25px pt-50px pb-25px p-10">
      <div>
        <h4
          className={[
            'text-large leading-normal text-green-600 font-bold break-words mb-20px',
            `${successMsgCss ? ' ' : ' hidden'}`,
          ].join('')}
        >
          <Text field={fields.successMessage}></Text>
        </h4>
      </div>
      <form method="post" onSubmit={formSubmit} id="js-subscription-form grid">
        <div className="flex flex-row gap-16px md:gap-4 mb-4">
          <div className="flex flex-col w-1/2">
            <label htmlFor="firstName" className="flex flex-col font-bold text-lg">
              First Name:
              <input
                id="firstName"
                type="text"
                name="FirstName"
                className="border border-form-border text-lg font-bold px-2px py-1px"
                value={formData.firstName}
                onChange={(e) => changeFormData(e, 'firstName')}
              />
            </label>
          </div>
          <div className="flex flex-col w-1/2">
            <label htmlFor="lastName" className="flex flex-col font-bold text-lg ">
              Last Name:
              <input
                id="lastName"
                type="text"
                name="LastName"
                className="border border-form-border text-lg font-bold px-2px py-1px"
                value={formData.lastName}
                onChange={(e) => changeFormData(e, 'lastName')}
              />
            </label>
          </div>
        </div>
        <div className="flex flex-row mb-16px">
          <div className="flex flex-col w-full md:w-full">
            <label htmlFor="message" className="flex flex-col font-bold text-lg">
              Message:
              <textarea
                id="message"
                name="Message"
                className="border border-form-border text-lg font-bold px-2px py-1px"
                value={formData.message}
                onChange={(e) => changeFormData(e, 'message')}
              />
            </label>
          </div>
        </div>
        <div className="flex flex-row gap-16px md:gap-4">
          <div className="flex flex-col w-full md:w-1/2 pt-4">
            <button
              id="js-subscribe-submit-button"
              type="submit"
              className="bg-yellow-600 border border-form-border text-lg px-6px py-2px"
            >
              Submit
            </button>
          </div>
        </div>
      </form>
    </div>
  );
};

export default withDatasourceCheck()<ContactUsFormProps>(ContactUsForm);
Wrapping the formSubmit function in an onClick in the submit button will run the formSubmit function whenever we click submit, so the user input will be collected and posted by the Fetch call to our /api/contact url.
Creating the API Route
Inside src/pages/api , create a new file called "contact.ts". This file will handle the form submission and sending the email using Nodemailer.
Once a user hits the submit button, we must process the information they have provided. To achieve this, we will use Fetch to send the data somewhere. All we have to do is take the user's data and send it to an API when they submit it.
import { NextApiRequest, NextApiResponse } from 'next';
import nodemailer from 'nodemailer';

export default async function handler(req: NextApiRequest, res: NextApiResponse): Promise<void> {
// Create a transporter object using your email service provider's details.
  const transporter = nodemailer.createTransport({
    port: 587,
    host: 'smtp.sendgrid.net',
    auth: {
      user: process.env.SENDGRID_AUTH_USER,
      pass: process.env.SENDGRID_AUTH_PASS,
    },
    secure: false,
  });
  // Email content
  const mailData = {
    from: '[email protected]',
    to: req.body.recipient,
    subject: `From ${req.body.email}`,
    text: req.body.subject + ' Sent from: ' + req.body.email,
    html: `<div>First Name: ${req.body.firstName}<br>Last Name: ${req.body.lastName}<br><br>Message: ${req.body.message}</div>`,
  };
  try {
     await transporter.sendMail(mailData, function (err, info) {
        if (err) {
          console.log(err);
          res.status(500).send('Internal Server Error');
        } else {
          console.log('successful');
          console.log(info);
          res.status(200).end();
        }

    }
   catch (error) {
    console.error(error);
    res.status(500).send('Internal server error');
  }
}
The handler function is the main function for this API route. It takes req (the incoming request) and res (the server response) as arguments. The function is marked as async, indicating that it contains asynchronous operations (such as sending emails) that will return a Promise
The createTransport function creates a Nodemailer transporter object using the SendGrid SMTP server settings.Nodemailer has many alternatives available, which is great news. If you are not familiar with the library, I suggest reviewing the fantastic nodemailer documentation. The authentication details (SENDGRID_AUTH_USER and SENDGRID_AUTH_PASS) are read from environment variables to keep sensitive information secure.
mailData is an object containing the email content. It includes the sender's email address (from), the recipient's email address (to), the email subject, and both plain text and HTML versions of the email body.
The transporter.sendMail method is used to send the email. It takes the mailData object and a callback function as arguments. The callback function handles the response after attempting to send the email. If there is an error (err), it sends a 500 status response with an error message. If the email is sent successfully, it logs a success message and ends the response with a 200 status.
Add Sitecore Rendering and Associated Templates
The fields added in the ContactUsForm template are as follows
- emailRecipient: Comma separated values for emails to be send to
- successMessage: The message to be displayed on successful form submission
- emailSubject: The subject of the email
You could add more fields as required
A json rendering called ContactUsForm is also added in Sitecore whose Component name matches the name in the tsx file
Conclusion
In this blog, we have learned how to create a basic form that collects user input such as name, email, and message. Upon submission, the form data is sent to a designated email address using Nodemailer. In my next blog I will be providing steps on securing form submissions through Google Captcha. By following this guide, you have gained foundational knowledge to build more advanced forms and integrate them into your Sitecore projects. Utilizing Next.js and Nodemailer, you can effortlessly enhance your website's functionality, making it more interactive and engaging for users.
👋 Hey Sitecore Enthusiasts!
Sign up to our bi-weekly newsletter for a bite-sized curation of valuable insight from the Sitecore community.
What’s in it for you?
- Stay up-to-date with the latest Sitecore news
- New to Sitecore? Learn tips and tricks to help you navigate this powerful tool
- Sitecore pro? Expand your skill set and discover troubleshooting tips
- Browse open careers and opportunities
- Get a chance to be featured in upcoming editions
- Learn our secret handshake
- And more!


Meet Anju Thomas
Sitecore Web Developer
🎞🥘🧩
Anju is a Sitecore Developer with a Bachelor's Degree in Computer Science and over 4 years of experience in Sitecore development. She loves solving Sudoku puzzles, watching movies, eating delicious food and exploring the world.