Accessing Sitecore DB’s Within A Local Docker Environment
Author: David Austin Blog Topic(s): SQL, Sitecore Status: Ready for Review Summary: This blog post explains how to access a Sitecore database within a local Docker environment. The author provides instructions on identifying the necessary connection string values, starting up the Docker container, and using software such as SQL Server Management Studio to access the database. The post also includes information on extending this capability to create and share additional databases and table creation scripts.
SQL Inside Docker Is Almost Invisible
Thanks to switching to Docker on some recent projects, my interaction with Microsoft SQL Server has been almost nil. That is assuming I’m using a Docker template for XM Cloud or one we’ve built previously as a starter. Not that I needed to access it a ton before, but it’s considerably less than even before.
So when it came to needing access to a Sitecore DB, I was initially asking myself… ok, but, how? I needed to add a separate database to be able to use it as part of some additional development work for a client. Unsurprisingly it’s just as straightforward you just need to know which values to use.
You never know when you might need reset that admin password and you don’t want to take your site back to scratch to do it.
Identifying Connection String Values
Open up your Docker XM Cloud template and look for the .env file. You will need this as well as the docker-compose.yml file. You admittedly require additional files depending on how you’ve setup your environment.
The information you’re after is the following:
- SQL Admin Username
- SQL Admin Password
- SQL Port Number
These will be located in the mssql-init section.
Start-up Your Docker Container
Unlike before with standalone installs, you actually will require to start up your Docker container as without that, SQL Server (aka mssql) won’t even be running. So before progressing, start up your container and ensure it’s running without issue.
Necessary Software
These days you have a bit of flexibility to access the Sitecore databases. I’ve looked into two pieces of software. The first, Azure Data Studio. The second, SQL Server Management Studio. Either will suffice. For the sake of this example we’re going to use SQL Server Management Studio (SSMS). After starting it up, you’ll be presented with a login screen. This is where the previous information comes in handy.
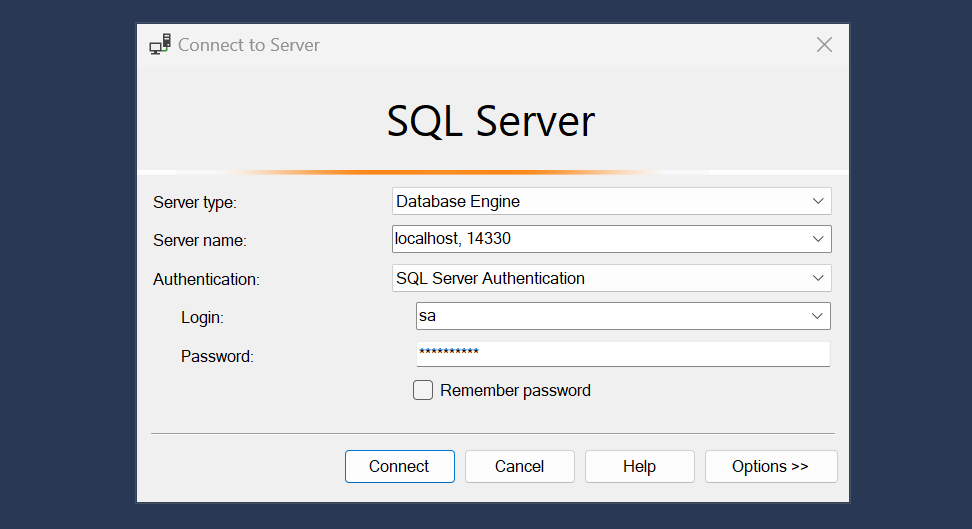
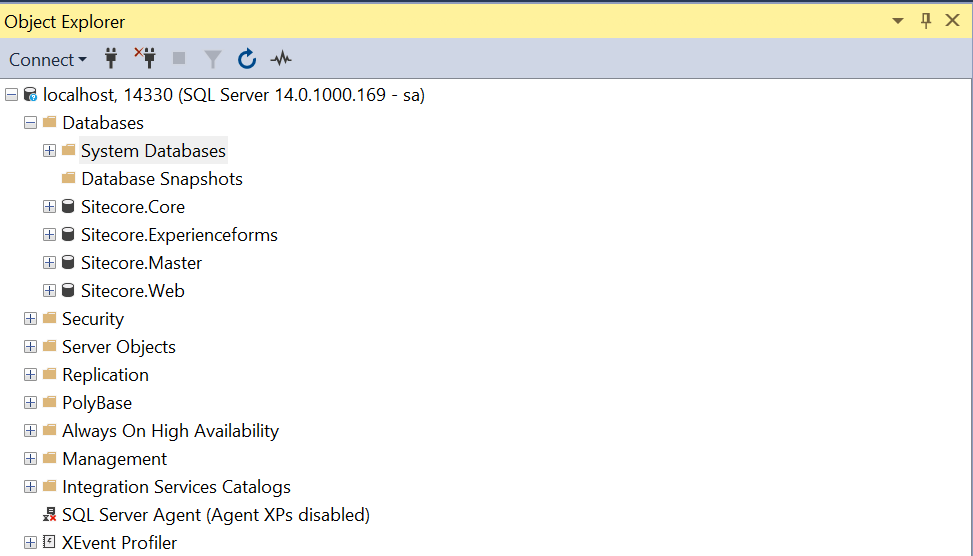
After using localhost as the server name, the PORT from either your .env or docker-compose.yml file, and the username and password you’ve set for the admin account; you should be presented with a list of the databases.
Extending
From here, now that you have access, you can extend this capability. Say your Sitecore solution requires you to store information in a separate database. You can now create that database, share the database and table creation scripts with other developers if need be, and take advantage of a multitude of opportunities.
There is one caveat in that this won’t work in XM Cloud as the database is not part of the deployment. As such you’re limited to PaaS or Azure SaaS environments.
ConnectionStrings.config
First thing you’ll need to do is duplicate one of the lines of your connectionstrings.config file, e.g. master. You’ll want to update the name attribute to be the name of your database. Then, inside the connectionString attribute, at the end, change Database to be the name of your database.
docker-compose.yml
Inside your docker-compose.yml file, look for your CM docker instance. Likely labeled cm. Inside there, you’ll want to look for a line resembling the following.
Sitecore_ConnectionStrings_Web: Data Source=${SQL_SERVER};Initial Catalog=${SQL_DATABASE_PREFIX}.Web;User ID=${SQL_SA_LOGIN};Password=${SQL_SA_PASSWORD}
You’ll want to duplicate that line, just like you did in ConnectionString.config and replace _Web with _*Name.* That Name, should match the value you used in the name attribute of the ConnectionStrings.config file.
Now you’re docker compose might be slightly different, but the purpose here is to pass along the configured server, user and password to gain access to the database.
And That’s All
From here on out, you should be able to query your custom database using a NuGet package like Dapper super easily.
Related Links

Meet David Austin
Development Team Lead | Sitecore Technology MVP x 3
📷🕹️👪
David is a decorated Development Team Lead with Sitecore Technology MVP and Coveo MVP awards, as well as Sitecore CDP & Personalize Certified. He's worked in IT for 25 years; everything ranging from Developer to Business Analyst to Group Lead helping manage everything from Intranet and Internet sites to facility management and application support. David is a dedicated family man who loves to spend time with his girls. He's also an avid photographer and loves to explore new places.