How To Use Browsersync To Speed Up Web Development
Save time by using Browsersync's live reloading feature! No more hitting the refresh button anytime you make a small change. Changing any code, from html to css, automatically reloads the webpage when you hit save.
Step 1: Install
First, open up the terminal and navigate to your workspace.
You'll need Node.js installed, check which version you have with the following command.
node -v
If this command isn't recognized, head over to https://nodejs.org/en/ and install.
Next, install Browsersync:
npm install browser-sync
To install globally, you can use the following command:
npm install -g browser-sync
Step 2: Using Browsersync
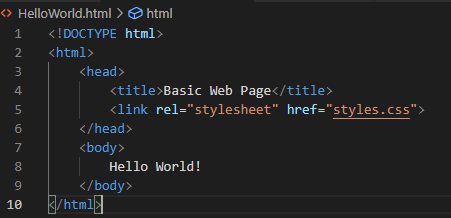
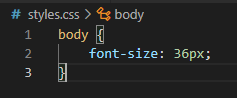
First, let's make an html and css file to test! I've made the following files in my root folder.
From the terminal, run the following command:
browser-sync start --server --files "*.html, *.css"
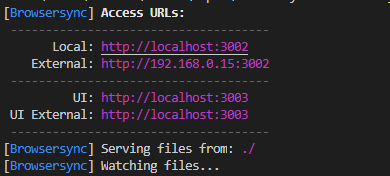
This instructs Browsersync to watch all HTML and CSS files in the current folder. You should see something similar appear in your console:
Now let's make some changes! Jump into styles.css and change the font-size to 12px.
Notice that the page will now automatically reload with your changes as soon as you save your file!
To watch all files for changes, and even files in subfolders, I use the following command:
browser-sync start --server --files "**/*"
Step 3: Browsersync And Gulp
Since we're removing mundane tasks, we might as well use gulp to run Browsersync so we don't need to remember
this long command.
First, install Gulp:
npm install -g gulp
Next, create a gulpfile.js file in your base directory. Place the following code
into it.
var gulp        = require('gulp');
var browserSync = require('browser-sync').create();
var reload      = browserSync.reload;

gulp.task('default', function() {
    browserSync.init({
        server: {
            baseDir: "./"
        }
    });


    gulp.watch("**/*").on("change", reload);

});
Finally, type gulp into your terminal and watch the magic happen.
Browsersync's UI In Additional Features
Remember this picture?
We can check out the Browsersync UI by heading to the UI URL,
which in our case is http://localhost:3003.
Enter yours into a new window and you should get the following page.

Check out Sync Options and Remote Debug for more helpful options to speed up your web development!
👋 Hey Sitecore Enthusiasts!
Sign up to our bi-weekly newsletter for a bite-sized curation of valuable insight from the Sitecore community.
What’s in it for you?
- Stay up-to-date with the latest Sitecore news
- New to Sitecore? Learn tips and tricks to help you navigate this powerful tool
- Sitecore pro? Expand your skill set and discover troubleshooting tips
- Browse open careers and opportunities
- Get a chance to be featured in upcoming editions
- Learn our secret handshake
- And more!


Meet Gorman Law
Full Stack Developer
🏋️🎸🏈
Gorman is a Full Stack Developer and a University of Calgary alumni who has a background in Canada's financial industry. Outside of work, he likes to go rock climbing, try out new ice cream places, and watch sports.