Introduction To This Series
As a Sitecore marketer and content author myself, I’m increasingly frustrated at the lack of non-development resources online on all topics surrounding personalization, marketing automation, email marketing, content authoring, form building, and so on.
It seems as though there’s a wealth of information online for Sitecore developers, but when it comes to resources and a community for Sitecore marketers and content authors, you can easily feel as though you're the only one out there.
My goal is to change all that. Starting with this blog, I’ll be releasing a series of articles with step by step instructions for marketers and content authors who work with Sitecore, so we don’t have to spend two weeks Google searching for content to solve a common problem.
Before you get started with this blog, I’ve created a Facebook group for all marketers and content authors who work with Sitecore, to ask questions, share tips and strategies, offer advice and learn from each other. It’s looking a little sad right now, so head on over there, join the group and let’s start this helpful community.
Now let's get into the real reason why you're here. How to finally get started setting up Sitecore personalization.
Why Personalize?
Anyone would be preaching to the choir by explaining why businesses should personalize content today. Personalization delivers more relevant experiences to customers, which leads to a greater impact of commercial outcomes.
Think about it. I’m sure everyone reading this article would be more inclined to click on an ad that features a product in a category they’re interested in, rather than one that they’ve never even searched for, or expressed any interest in at all. This is because we’re naturally more inclined to engage with content that is relevant to us, or that we find interesting. As well as this, relevant content makes your messages more believable and positions you as an authoritative figure. The same holds true for personalized website content.
Data from Forrester, Gartner, Econsultancy, Mckinsey and Sitecore has continually shown the positive impact personalization has on ROI, with data demonstrating ROI increases from 16-30% when a customer received personalized content.
However recently, new information from Gartner and Mckinsey demonstrate the difficulties organizations face with implementing personalization. In 2019 Gartner published an article in which they predicted that 80% of marketers will abandon personalization efforts by 2025, because of weaknesses associated with data collection and technology proving to be a major hurdle to personalization.
This information is of no surprise to me, given that such a high volume of businesses with Sitecore XP aren’t using Sitecore’s personalization features because they simply don’t know how. This is further confirmed by Mckinsey’s study of senior leaders, which found that only 15% of CMOs believe that their company is on the right track with personalization.
Well, it’s time for you to start reaping the benefits of personalization and seeing that ROI for yourself. I'm here to help you finally set-up Sitecore personalization and join the thousands of businesses that are improving their conversion rate and customer satisfaction with personalized content.
What You Need To Get Started
- Sitecore XP (version 8.1 or higher)
- A valid xConnect certificate
- Make sure your xConnect is working!
Step By Step
1. Getting Started: Determining Your Goals
The first step in setting up Sitecore personalization is determining your digital goals. In order to work out your digital goals, it’s best to also understand, and put into writing your business’ strategic theme, strategic objectives and marketing objectives. This will ensure that you select digital goals that contribute to your overall goals.
You may wish to skip this step, but I highly recommend that you complete the exercise of determining each of these goals for your business, as this will come in handy when setting up your engagement value scale in Sitecore. It also gives you a clearer view of what your business wants to accomplish long-term, as well as short-term to contribute to the long-term vision.
- Strategic theme
- Strategic objectives
- Marketing objectives
- Digital goals
You can think of the strategic theme as the business’ overarching big vision. The strategic objective explains what the business needs to do in order to achieve that big vision, and the marketing objectives are the marketing goals that the business needs to meet in order to achieve the strategic objective. The digital goals are the actions that users on the website need to fulfil in order to achieve the marketing goals, and are usually actions that lead to a conversion.
A simple example of these that I found from Sitecore for a vehicle manufacturer could be:
- Strategic theme: Become the leading carmaker worldwide
- Strategic objective: Increase market share
- Marketing objectives: Accelerate qualified leads; increase awareness
- Digital goals: Book a test drive; check local stock; register my interest; download specs
2. Aligning Your Digital Goals With Engagement Value Scale
Once you’ve determined your business’ goals, you can then create an engagement value scale that will allow you to track visitor activity on the website, and that you can use to personalize content.
The engagement value scale gives you insights into how your website visitors are engaging with your content. You’ve probably used metrics such as page visits, time on page, bounce rate and exit rate that you’ve got from Google Analytics until now to track visitor activity. However these metrics don’t allow you to track visitor engagement. Metrics like time on page can leave you confused about whether or not the visitor was really engaging with the content, or whether they left your webpage open on their browser while they went about another task.
Setting up an engagement value scale lets you track the level of engagement (or actions) of different visitors.
First, in a document, decide on what website actions you want to track and associate as ‘goals’. The best way to do this is to use a scale from 0-100 and rank your goals based on the impact they have on achieving your marketing goals.
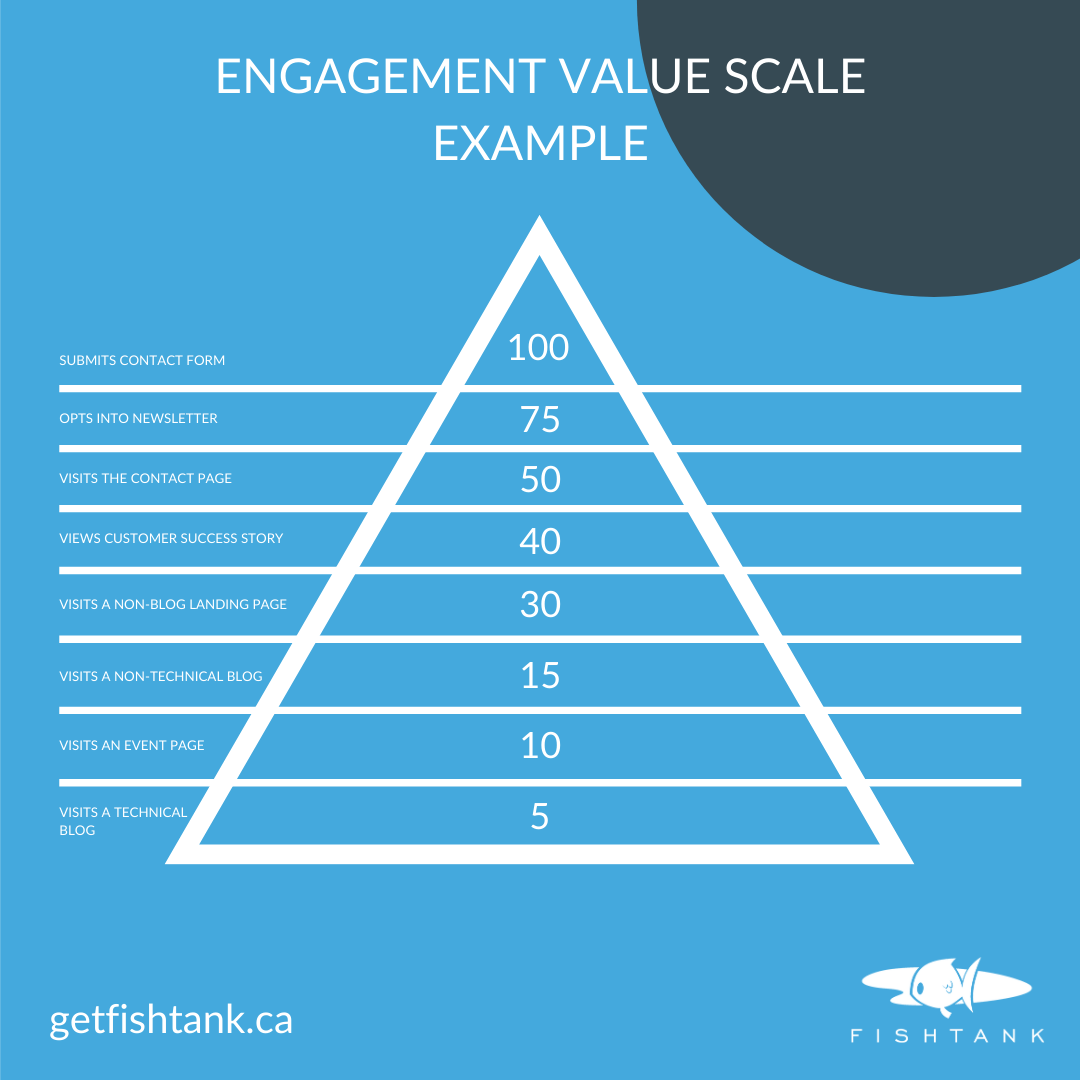
For example, for a simple website your engagement value scale could look something like this:
- Submits the contact form: 100
- Opts into the newsletter: 75
- Visits the contact page: 50
- Views customer success story: 40
- Visits a non-blog landing page: 30
- Visits a non-technical blog: 15
- Visits an event page: 10
- Visits a technical blog: 5
This will totally depend on what actions on your website are possible for visitors to do, and what’s important to your business and your business’ goals. For example, your business might have a ‘call now’ button, that you might also want to give 100 points to. Or you might have gated brochures or videos on the website, and you know that someone who downloads a gated brochure or watches 50% of a video is further along the funnel and nearly ready to buy, so you might make that goal worth 75%.
It’s completely up to you and your business how you structure the goals. You also don’t have to include page views in this scale if they’re not relevant for your business. However any actions that you don’t include here, you won't be able to track and measure against.
My biggest suggestion here would be to rank the scale in increments anywhere from 5-100 (anything ranked 0 won’t be visible/tracked as a goal).
3. Setting The Goals Up In Sitecore
Here’s where the fun starts: Setting up the goals from your engagement value scale in Sitecore, so you can start tracking visitor activity.
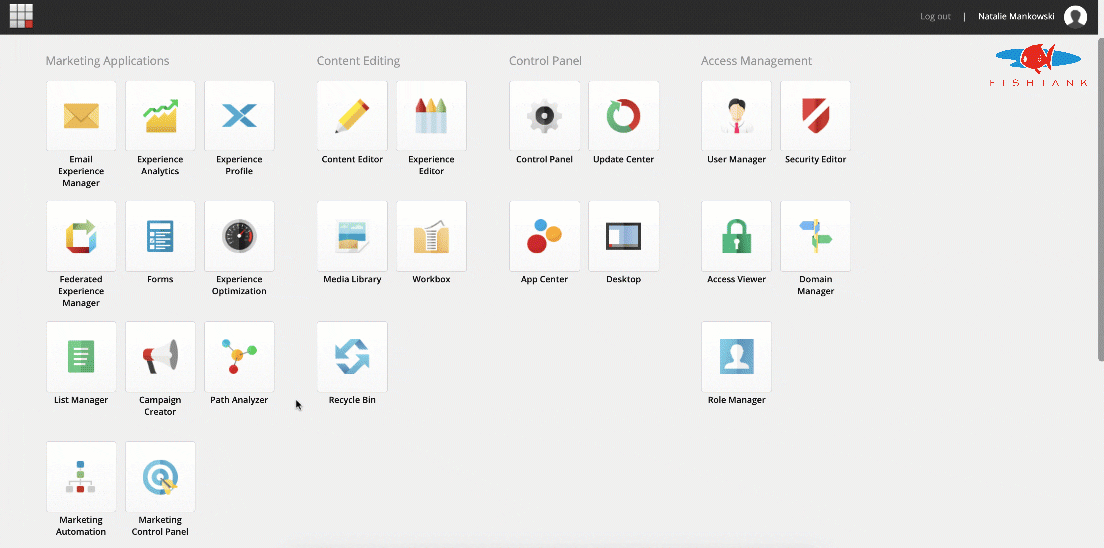
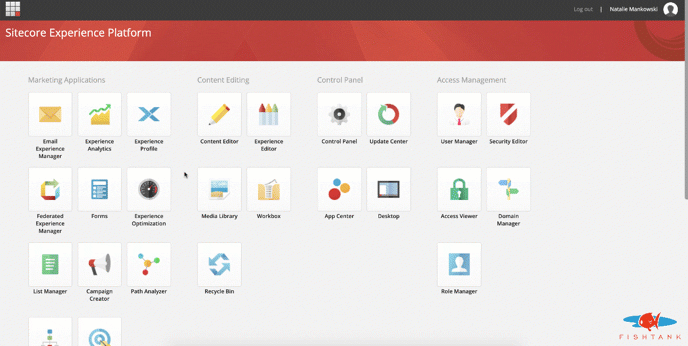
- On the Sitecore launchpad, click Marketing Control Panel. This is going to be your new home on your Sitecore personalization journey
- Right click on Goals in the content tree, and select Insert > Goal
- Scroll down to Data, and enter a descriptive name of the goal (don’t name it something like ‘Goal 1’ - instead name it after the action, i.e. ‘Submits contact form’)
- Allocate it the number of points that you decided on when you created your engagement value scale, i.e. 100
- Scroll down to the section ‘Options’, and ensure that the ‘Is Goal’ checkbox is selected
- Scroll down to the Experience Profile Options section and select the checkboxes ‘Show in Xfile as Latest Event’ and ‘Show in Events’
Other optional areas to fill in here include:
- Category: You can assign the goal to a category if you have a lot of goals and want to group them
- Description: If the name of your goal is unclear, or could be misconstrued, you can add a detailed description
I suggest staying away from selecting any other checkboxes or filling anything else in for now. I’ve got you covered with the basics you need completed above ;-)
For a description of the other checkboxes, check out Sitecore’s create and deploy a goal article.
- When you’ve finished setting your goal up, under Workflow, change the workflow to Deployed > hit Save in the top navigation ribbon, and then Publish.
4. Associating Your Goals With Website Items And Actions
Once you’ve decided on your goals, determined their value, set them up and deployed them, now you need to associate them with their relevant actions on the website.
There’s two ways you can do this. You can set up Rules in the Rules section of the goal itself.
Or you can associate the goal with the action, directly on the item itself.
The latter is my personal favourite, and the least complex way to set goals up, so I recommend setting goals up directly on the items that the action is associated with. Here’s how:
- From the Sitecore launchpad, click Content Editor
- Navigate to, and select the item in the content editor that you want to associate a goal with
- In the top navigation ribbon, click Analyze > Goals
- Select the goal that you want to associate a pageview of this page with, and click ‘OK’
- Select Save and publish the page by visiting Publish in the top navigation, clicking on the dropdown arrow next to Publish, and selecting ‘Publish item’
Associating A Goal With A Form Completion
- Follow the steps above in the Content Editor for the form that you want to associate a goal with.
- Afterwards, navigate to the Sitecore launchpad.
- Select Forms
- Select the form that you want to associate the goal with
- Select the submit button on the form, and add a submit action of Trigger Goal
- Select the goal that you want to trigger upon form submission from the list of goals that appears
- Click Apply and Save
- Revisit the form that you edited in the content tree of the Content Editor
- Save and publish this form
It's important to note that you'll need to to continue adding the goals to any new items that you create in the future, as required. This can be hard to remember, so try to create a process or make it a habit to check whether a new item needs a goal before hitting publish.
5. Tracking Interactions On Your Website
Here’s where it starts to get interesting.
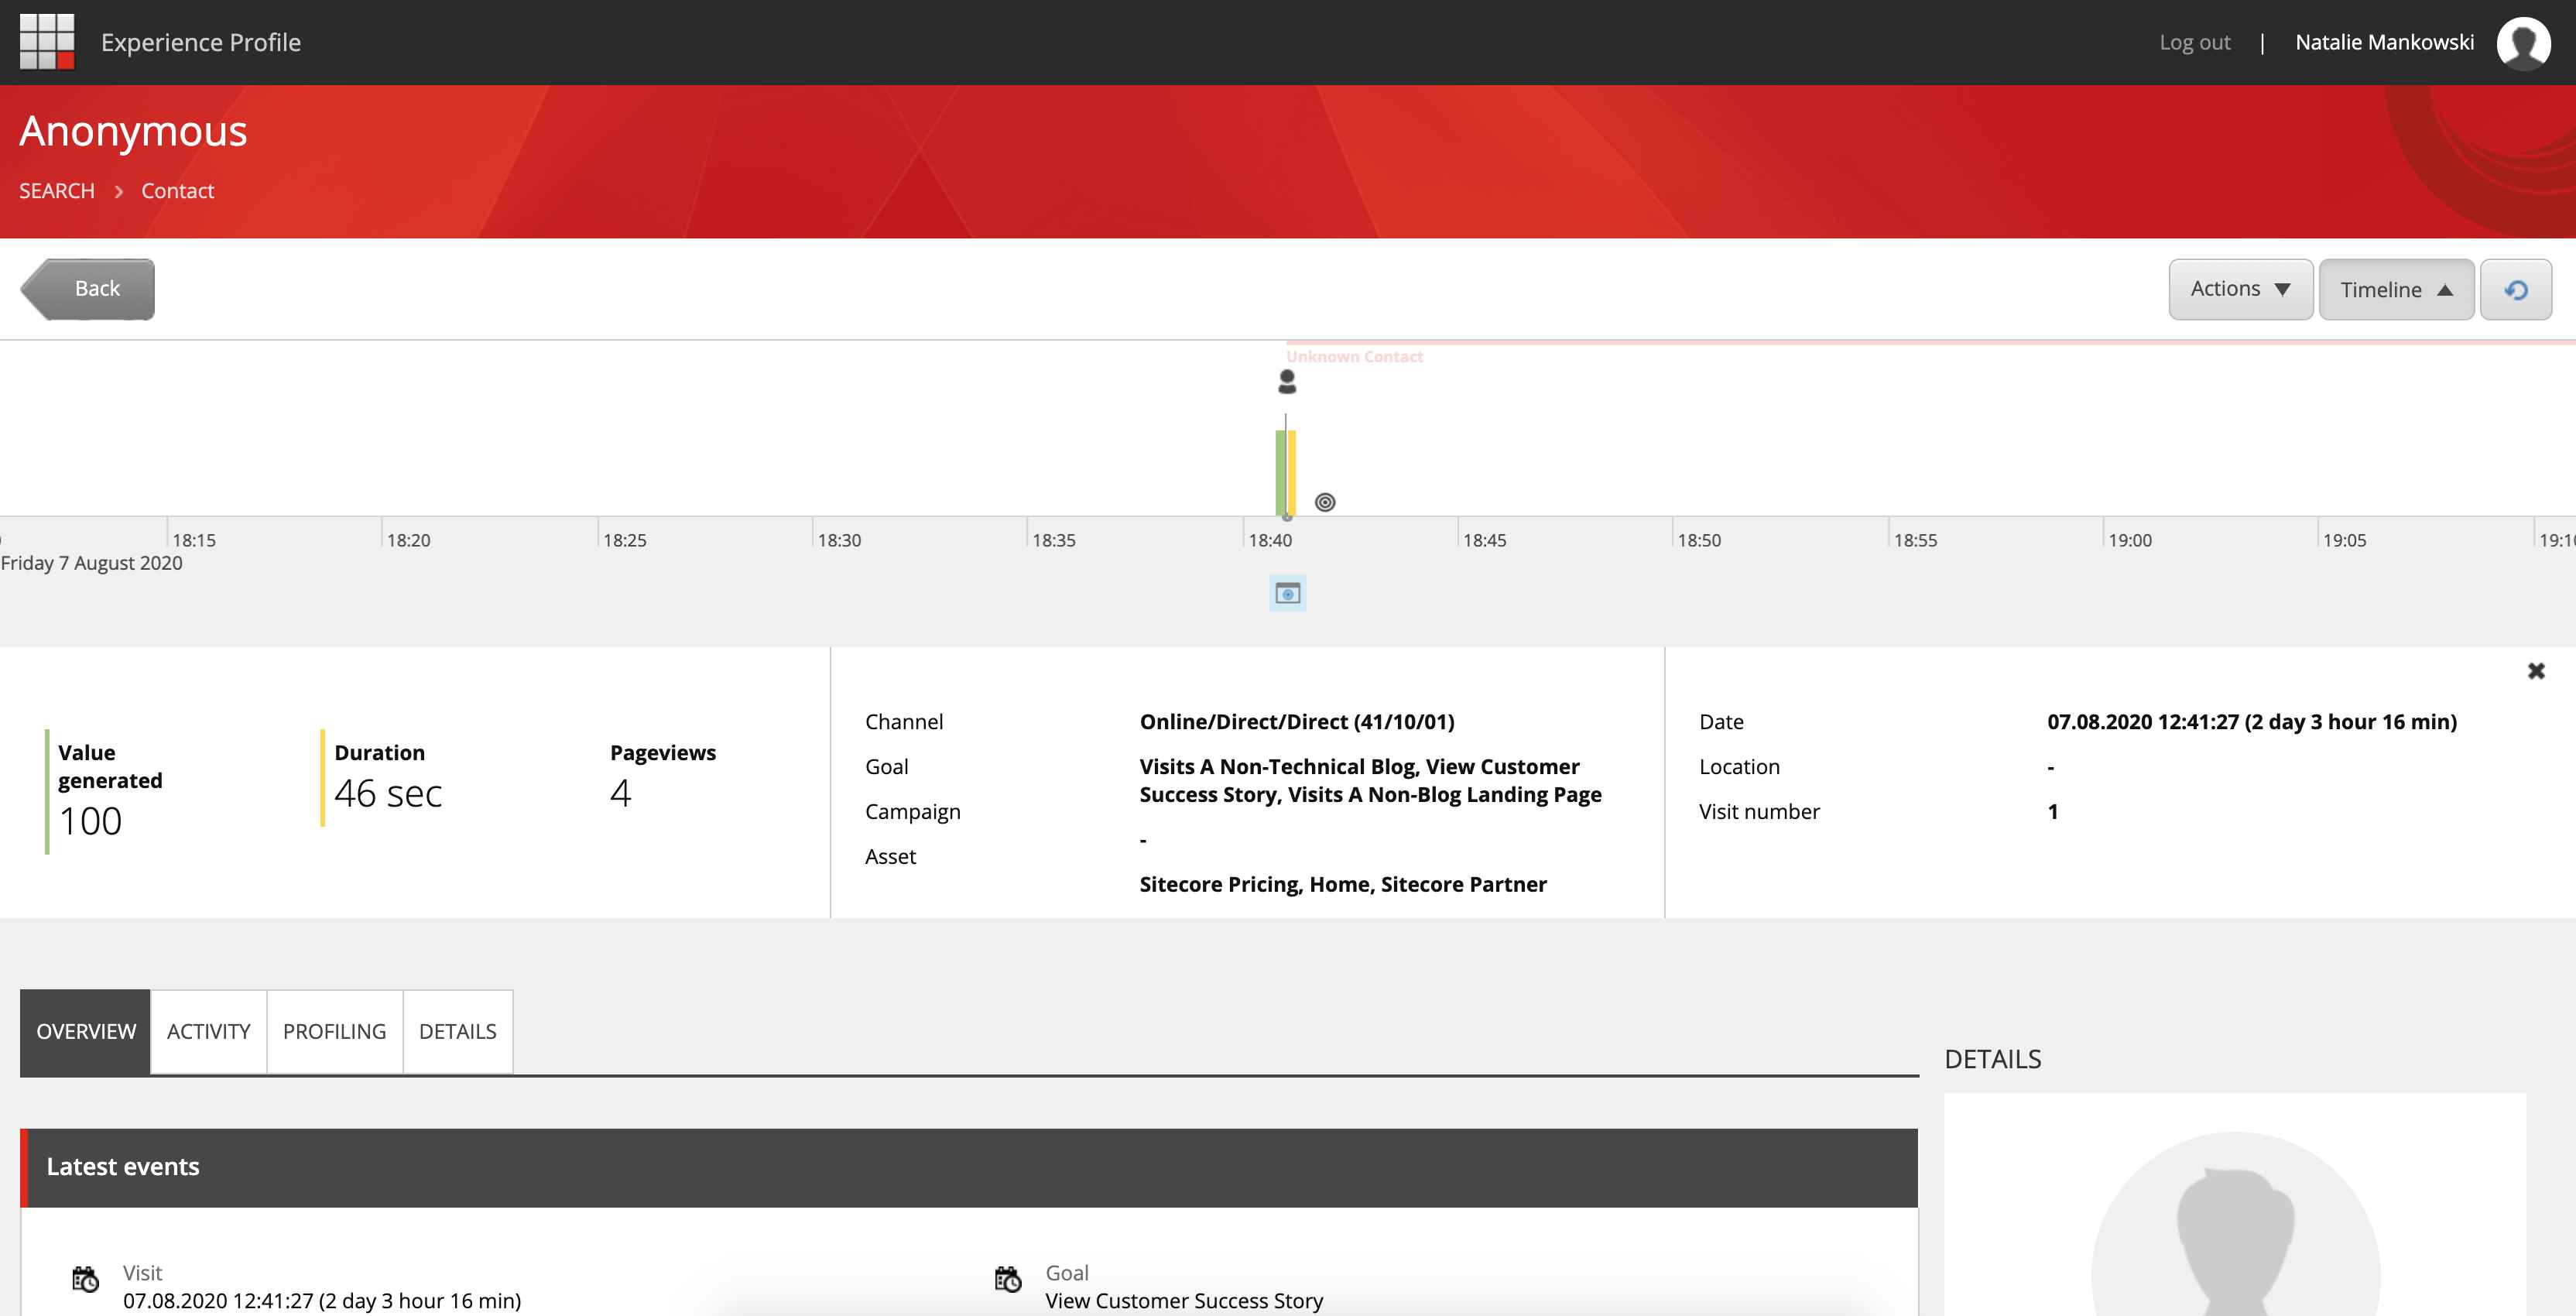
In the Sitecore Launchpad, select Experience Profile.
You should see a table that contains every interaction with your website, as well as the name and email of visitors (if they completed a form), and the value of their latest visit, number of visits, total of all visits, visit duration, location, and last interaction. The website visitors that are added to this table are called contacts, and can either be anonymous, or identified based on whether they have identified themselves via a form-fill or login process..
When goals are set up correctly, Experience Profile is pure gold for marketers, letting you monitor the behaviour of visitors across your site, and how they interact with it. Remember that experience profile only shows actions here that are configured with goals, which is why it’s so important to set goals up correctly and accurately for all interactions on your website that you want to track.
To view the exact goals that a contact submitted, and find out more about their activity on the website, like how long certain actions took them, click on the name of the contact in the experience profile table. This view is called a contact card. Under Overview and Activity, you can view the goals the contact achieved, and how long each activity took them.
Selecting the bar in the timeline for the date that the visitor visited the site also displays:
- The total value of the visit for this contact
- Visit duration
- How many pages they viewed
- The channel they used for their visit
- The goals that they achieved
- Any campaigns that they’re not a part of (I will write a blog about Sitecore campaigns soon, and will link to it here when it’s published)
- The assets that the goals are associated with, that the contact interacted with during their visit
- The date of their visit
- The location of their visit
- The number of visits this contact has had to the website
How Engagement Value Points Are Accumulated
Value per visit is counted by adding up the value associated with each goal that the visitor reached as they interact with and browse your website or other assets such as an email.
For contacts who aren’t anonymous, meaning that they’ve been identified by submitting a form, experience profile data can you give you a great insight into how ‘hot’ they are (how ready they are to make a purchase), or how ‘cold’ they are, (whether they need further nurturing before they make a decision to buy from your business).
Closing Thoughts
If you've made it this far following the steps, stay tuned for part two of the Setting Up Sitecore Personalization blog series, which is currently under way. I'll link it here when it's published.
As I mentioned, this blog is part of a wider series of content that I hope helps marketers and content authors that use Sitecore to regain confidence with the platform, and have resources to help them complete whatever they need to.
If you have any questions, please post them in this Facebook group for Sitecore marketers and content authors, or reach out to me on Twitter @natmankowski.
Thank you for reading and good luck out there!
Part 2
Head to the next article (part 2) in the 'Setting up Sitecore personalization' series.
Editor's Note: This post was originally published in August 2020 and has been revised and updated for accuracy and comprehensiveness.
