Take Your Designs To The Next Level
Take your boring flat design to the next level with prototyping. With that arsenal, you can tell a more compelling story. In this quick tutorial, you will learn the quick steps to create some powerful prototypes.
Let's get started, shall we.
1. How To Find Prototype Mode
In some different programs, sometimes it is hard to find what you are looking for but in XD, it's quick and simple. To create a prototype, you first need to switch to Prototype mode by using the toggle on the top left corner of the page. All the design related toolbar will be disable.
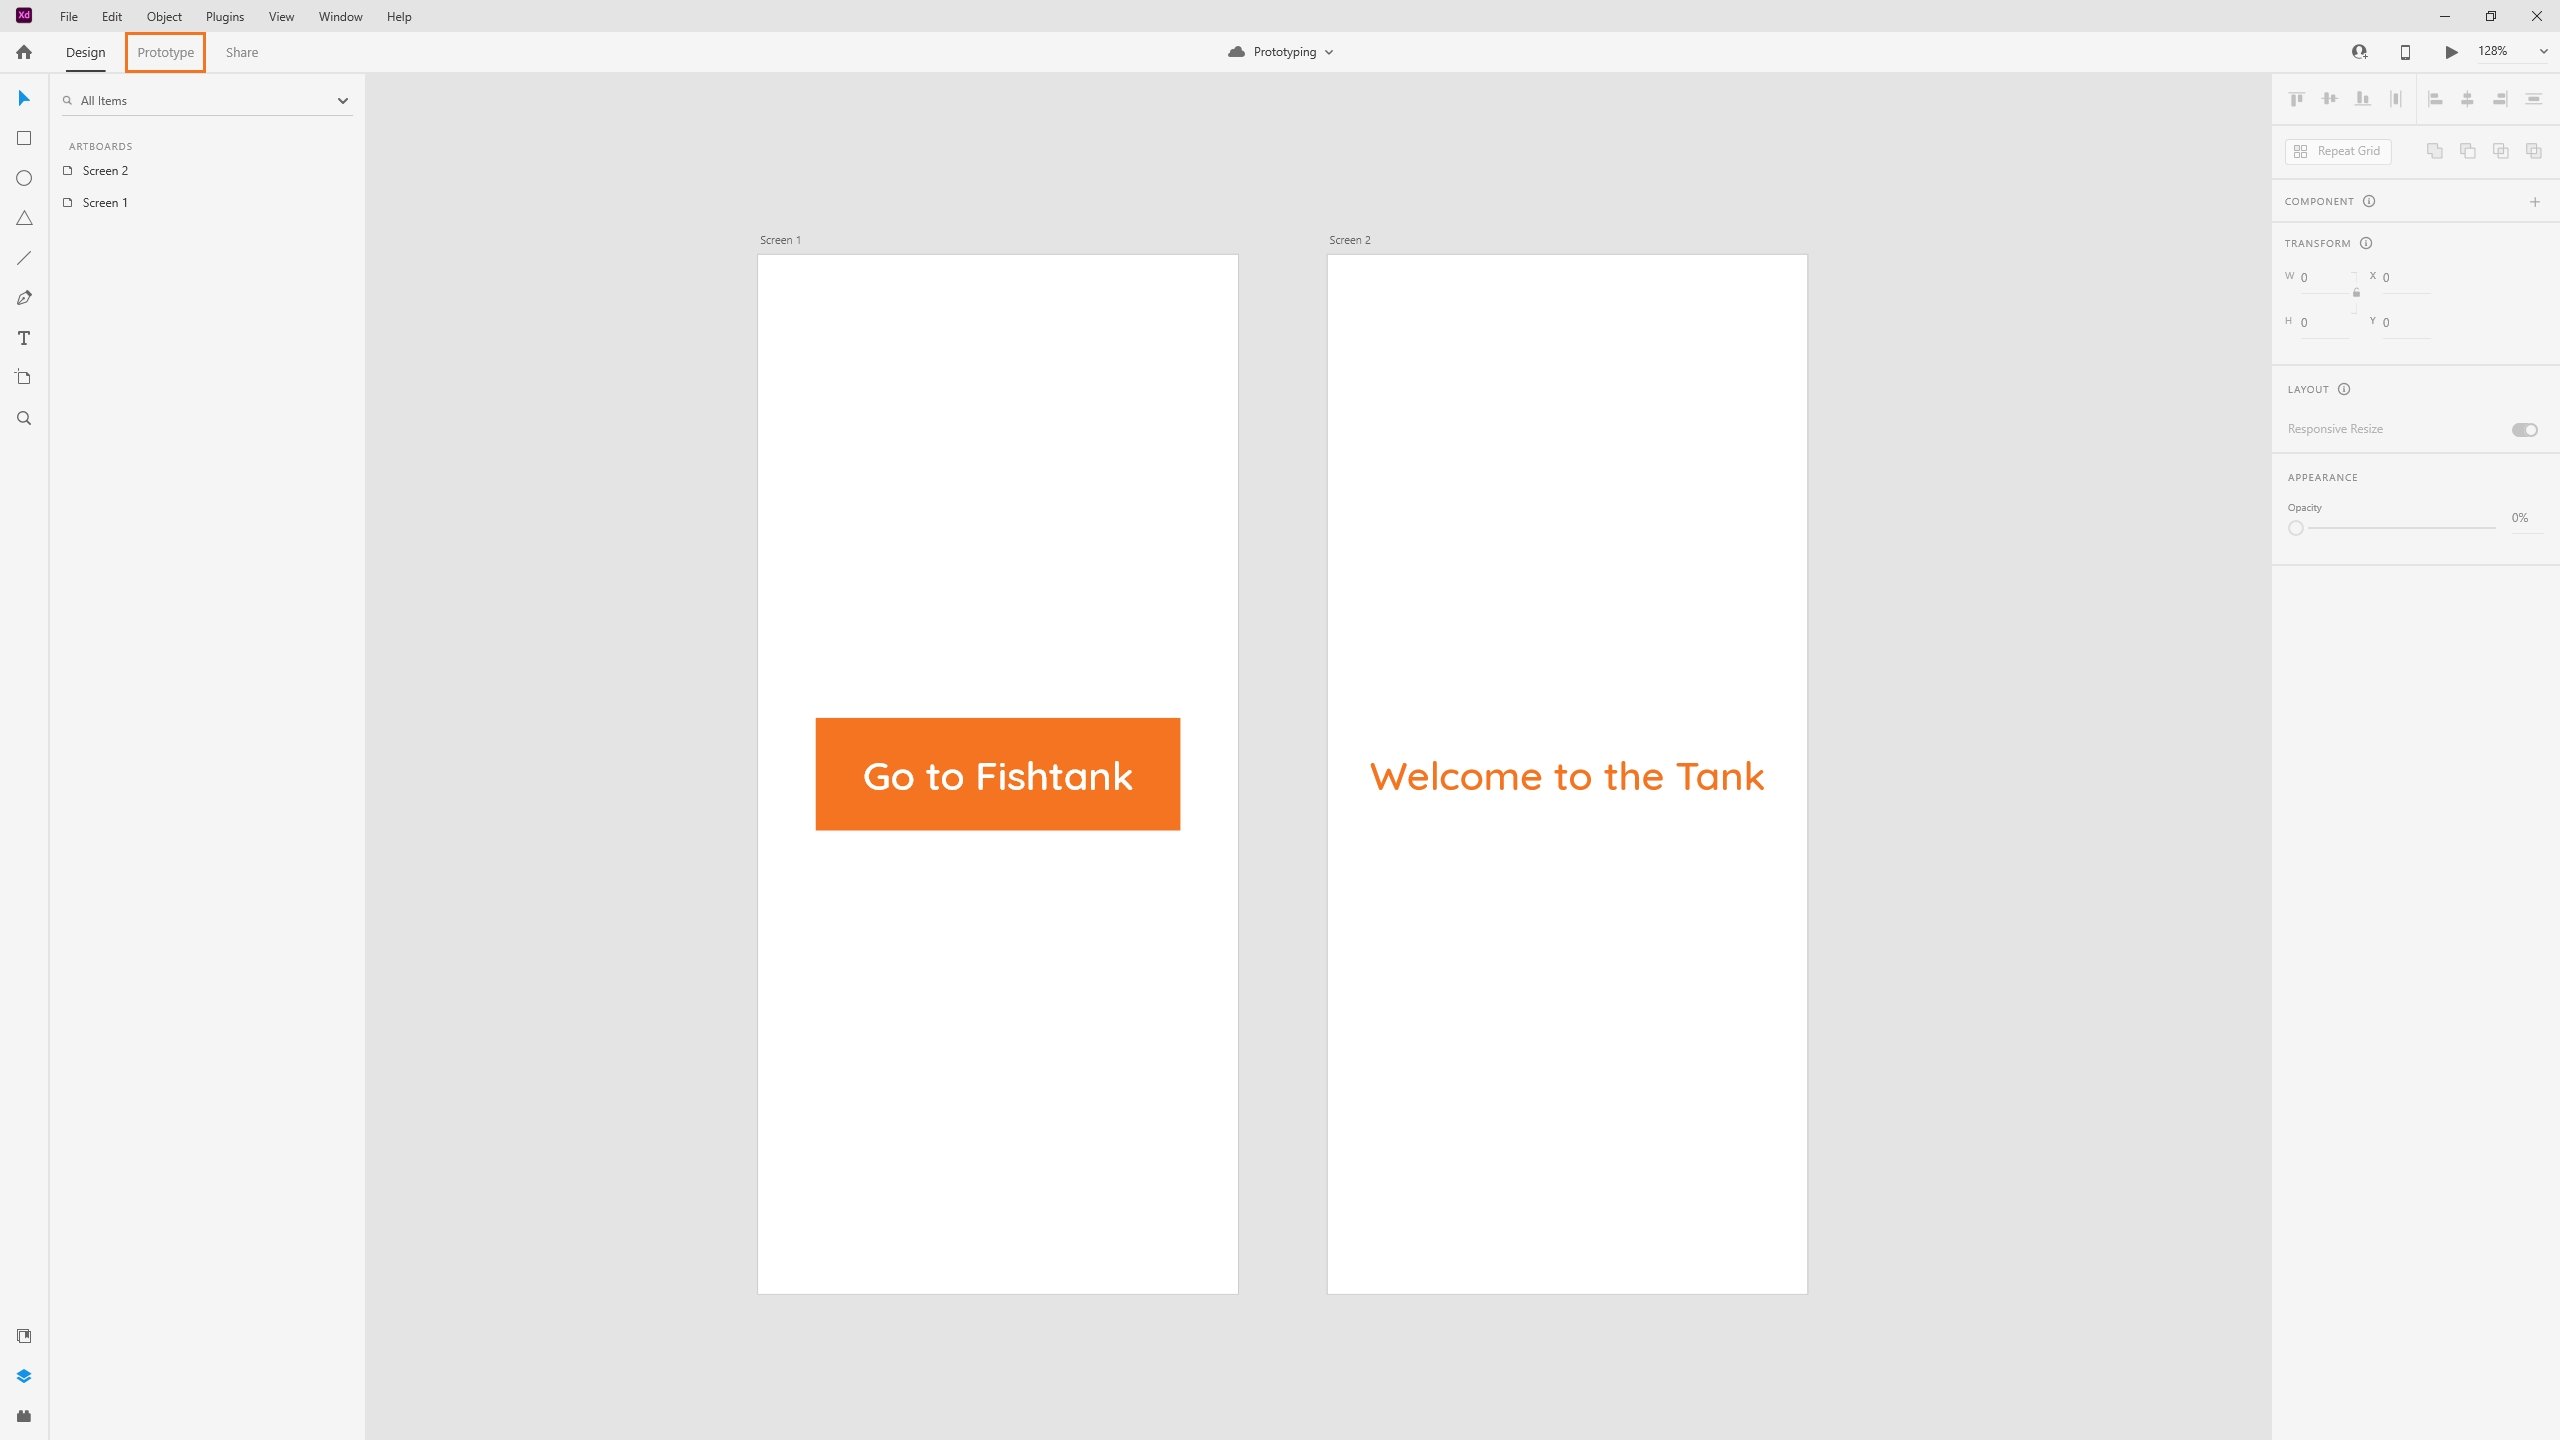
2. Set Up Home
Next is click on the artboard you want to be part of the prototype. You will notice a little home icon that appears at the top left corner of the artboard. You can choose to be the first screen of your prototype or not. If you choose to be your home, it will turn blue. Next time you launch the prototype, that will be your first screen.
As well you can see a title appear called "Flow 1", this one is to give a unique title for your prototype and link.

3. How To Connect
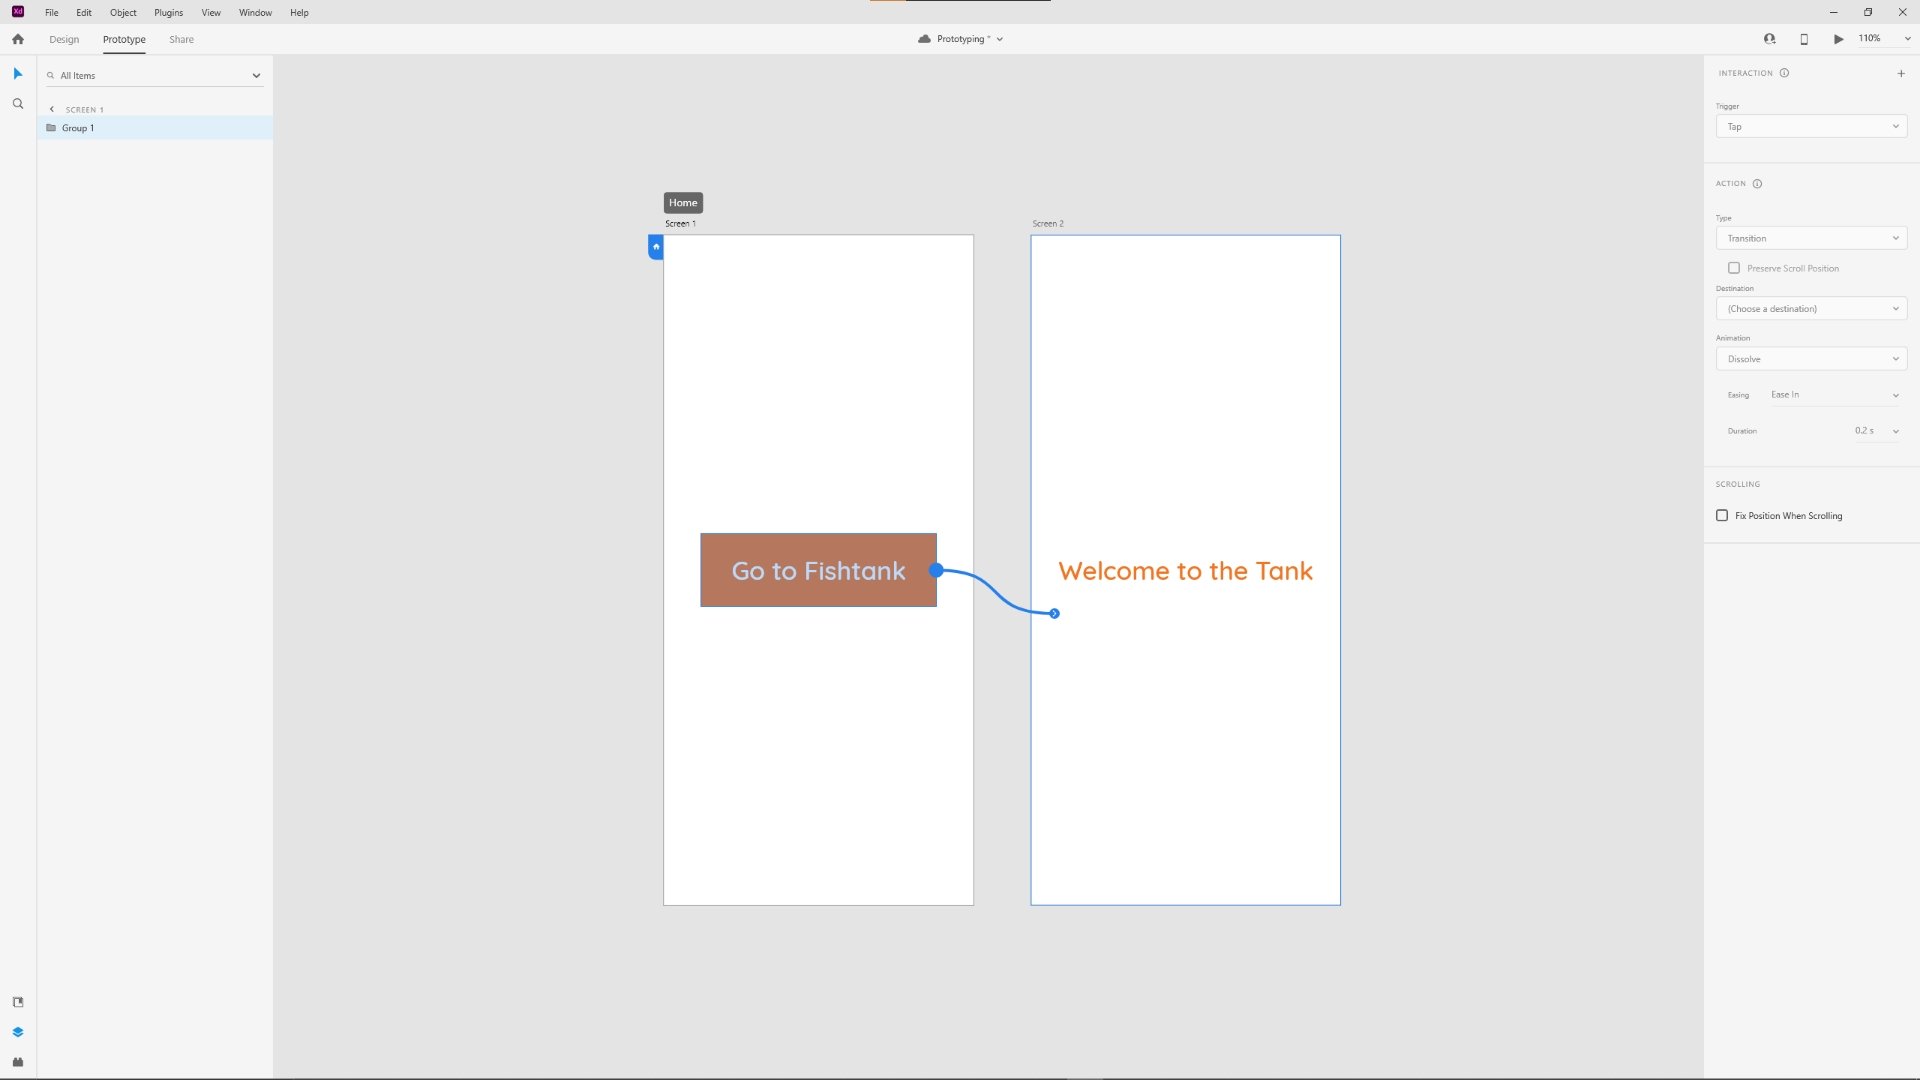
Now we can connect artboards, if you want to try to connect the first screen to the next one and create interaction between the two.
First you will need to select the button by clicking on it directly on your artboard or from the layer panel on the left.
Once you've clicked, the object will be highlighted in blue, and a little arrow handle will be displayed on the right side of it. Once you see that, click on the handle, drag the line to the artboard you like and release the mouse. Congratulations, you now connected your artboard.
4. Set Up The Interaction
At this point, the interaction setting will be displayed on the right side. Let go more in depth on what each one of them does.
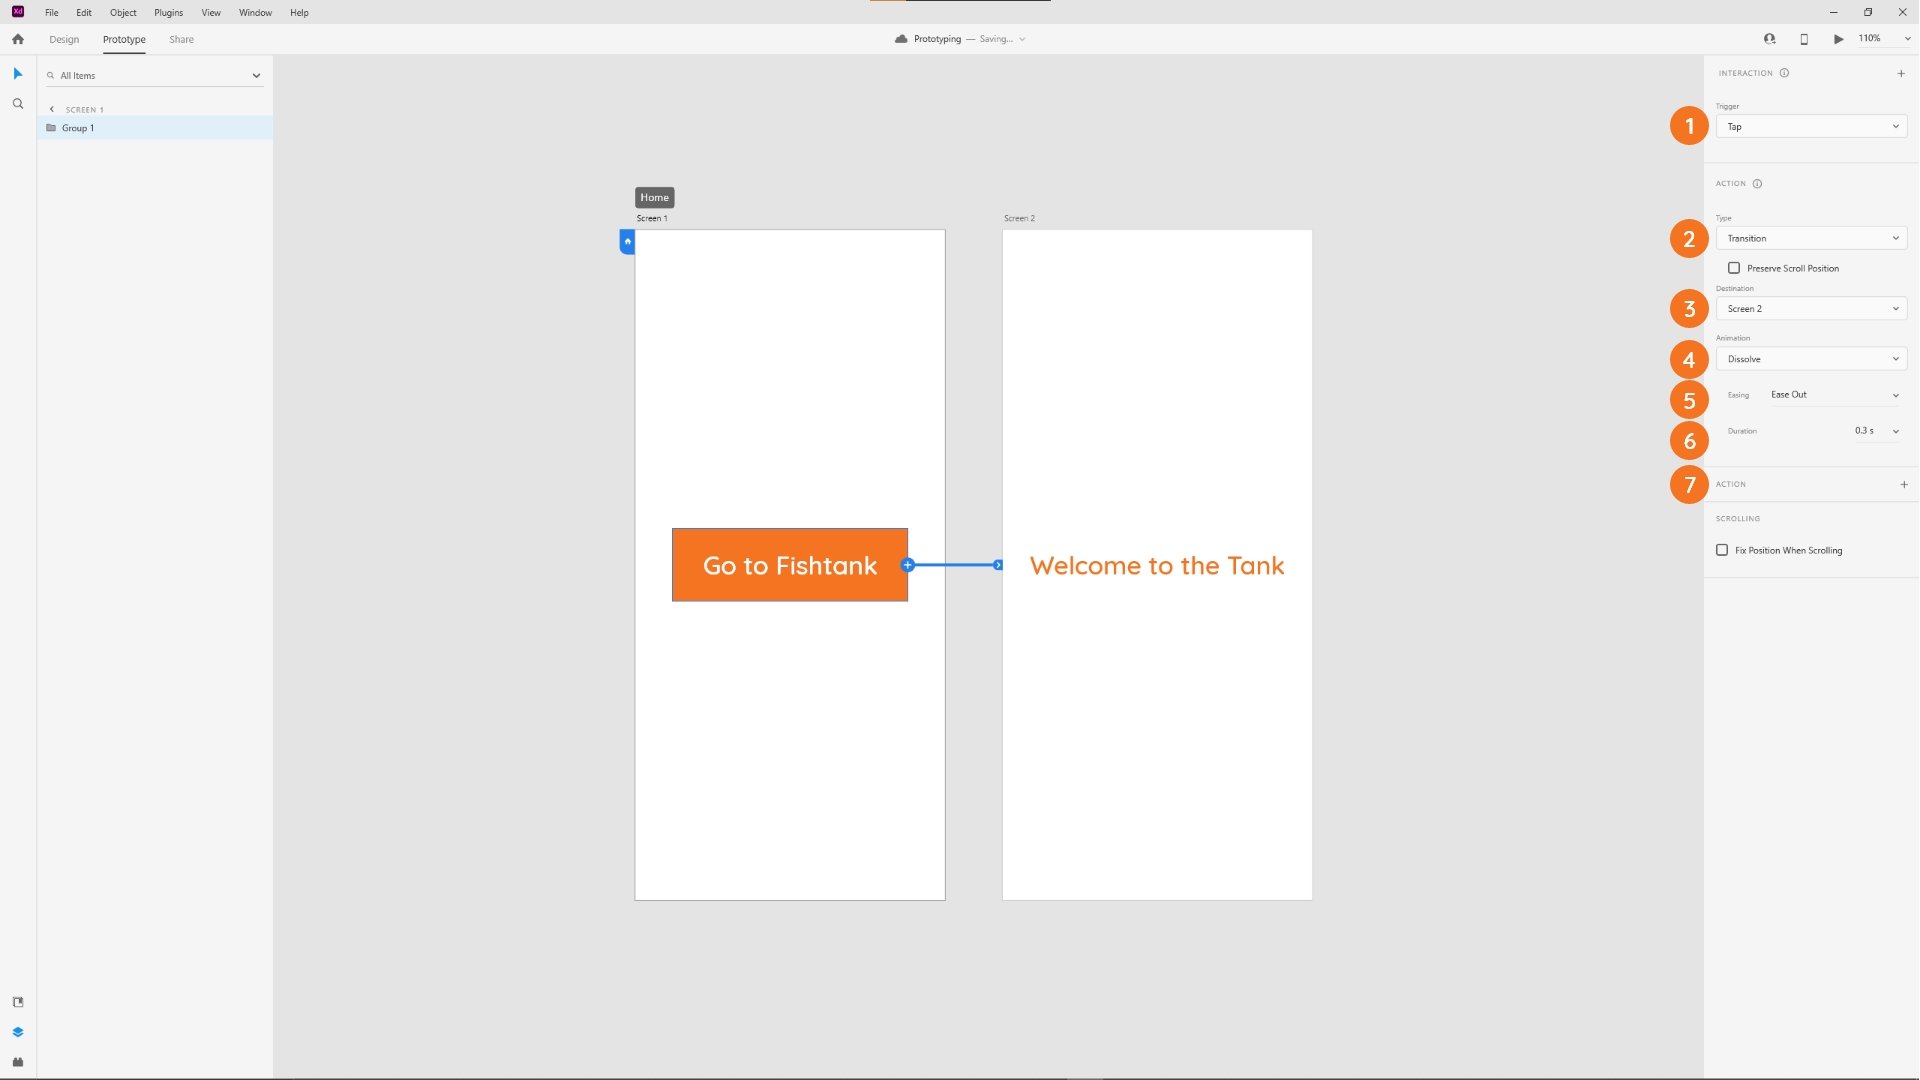
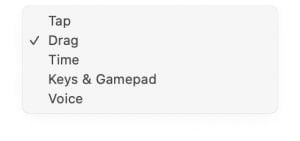
(1) Trigger: This set up the action of your interaction. You can choose between: Tap, Drag, Time, Key & Gamepad and Voice.
You can also do multiple triggers but that would be for next time.
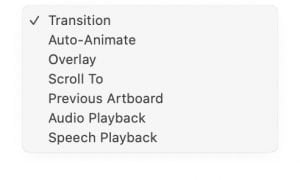
(2) Action Type: Set type of effect that your trigger would activate.
- Transition: choose from a variety of animation options for your interaction.
- Auto-Animate: Adobe XD auto-animates your effect. Create exiting fade-in, fade-out effects, swipe and drag effects, and much more.
- Overlay: create slide effects. Perfect to create drop-down menus, slide-in keyboards, and more.
- Scroll to: create anchor links and easily scroll to a specific section on the artboard.
- Previous Artboard: link an artboard with the previous one.
- Audio Playback: set a specific sound to be played for your interaction.
- Speech Playback: set a specific word or phrase as to be played for your interaction.
(3) Destination: This will be automatically picked once you connect the two artboards.
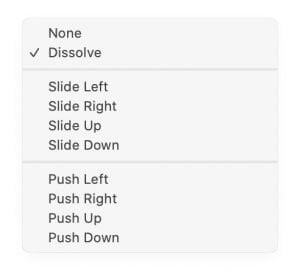
(4) Animation: You can choose from a lot of options what kind of animation effects you would like. If you would like for example to replicate what a hamburger menu does on mobile, then you select "slide right" transition.
(5) Easing: Easing effects: Ease Out, Ease It, Ease In-Out, Snap, Wind Up or Bounce. Feel free to play with it.
(6) Duration: Choose how long the chosen transition between the connected screen will last.
(7) Extra Action: This one if you would like to go more in-dept for using audio playback or speech playback. This action is very good if you would like to replicate what Alexa does or Google Assistant.
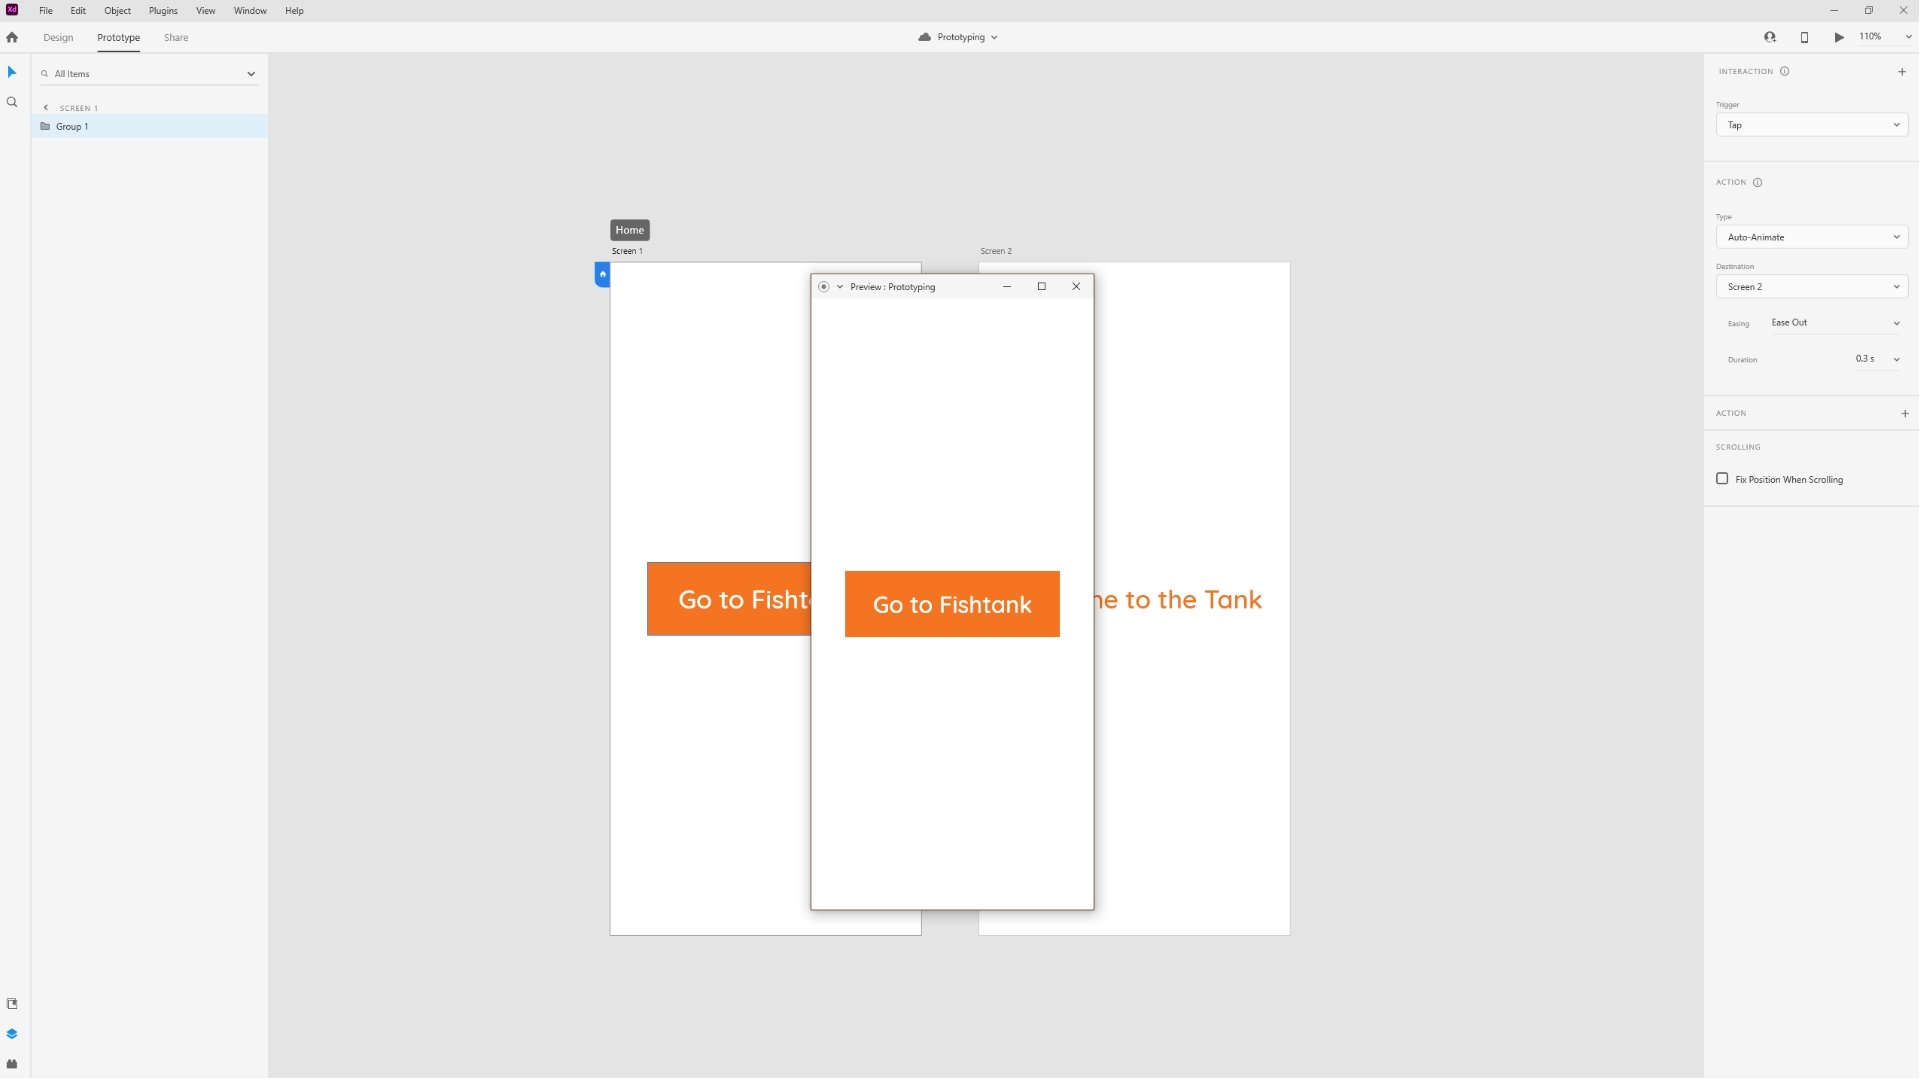
5. Preview Your Prototype
When everything is connected, you can preview the XD prototype you just created by clicking on the "Play" icon at the top right of the screen.
A preview window will pop up and the current artboard will be displayed. You can now click on the object you connected and navigate through your prototype.
Conclusion
You can achieve a lot using the Adobe XD prototyping tool such as how the interaction will be played on your new website or app. I hope you enjoyed this quick beginner tutorial and hope to see you next time on the advanced one.
Enjoy!
👋 Hey Sitecore Enthusiasts!
Sign up to our bi-weekly newsletter for a bite-sized curation of valuable insight from the Sitecore community.
What’s in it for you?
- Stay up-to-date with the latest Sitecore news
- New to Sitecore? Learn tips and tricks to help you navigate this powerful tool
- Sitecore pro? Expand your skill set and discover troubleshooting tips
- Browse open careers and opportunities
- Get a chance to be featured in upcoming editions
- Learn our secret handshake
- And more!

Meet Karol Buratynski
UX Designer
⛰👨💻⚽️
Karol, aka 'K', is a UX Designer with a wealth of knowledge and experience in everything UX related. His focus and passion are to always understand, communicate, and execute on user behaviour through both quantitative + qualitative research and analysis. K aims to bring the design and minimalism process closely together, focusing on creating experiences for the user while taking business and brand needs into consideration from the start. His goal is to always test, learn, and design quality results efficiently. He likes to travel and discover new places with his family.