Importing & Exporting Sitecore Contacts
When moving your marketing automation to Sitecore from another platform, or to market to a list of leads you’ve purchased from another system, you’ll usually have a list of contacts that you want to keep and continue marketing to. Whether you want to create a new list for the contacts you upload, or just upload them to the system, I'll show you how in this blog.
We’ll also go over how to export contacts from a list when you want to review your prospects for reporting purposes, or to use their details with another platform.
Let’s get started.
There are a couple of ways to add contacts to Sitecore.
- Adding contacts to Sitecore’s contact database without adding them to a list
- Adding contacts to a new list that you haven’t created yet
- Adding a new contact to an existing list
Adding Contacts To Sitecore’s Contact Database Without Adding Them To A List
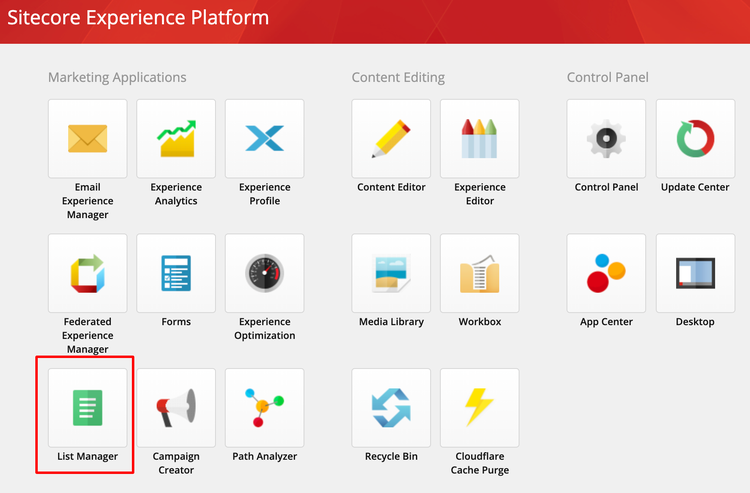
On the Sitecore launchpad, click List Manager.
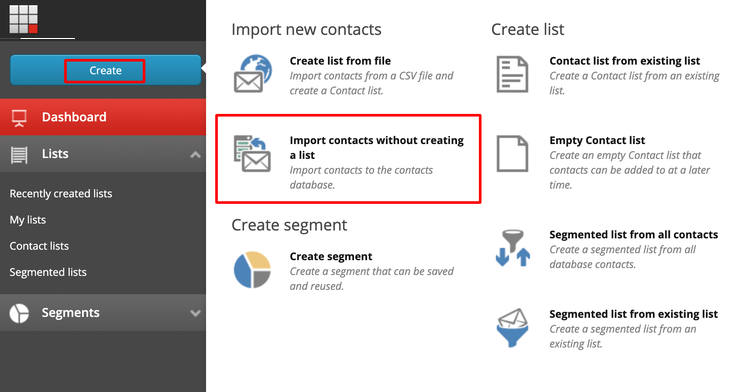
Click ‘Create’, and then ‘Import contacts without creating a list’.
Select browse for a CSV file.
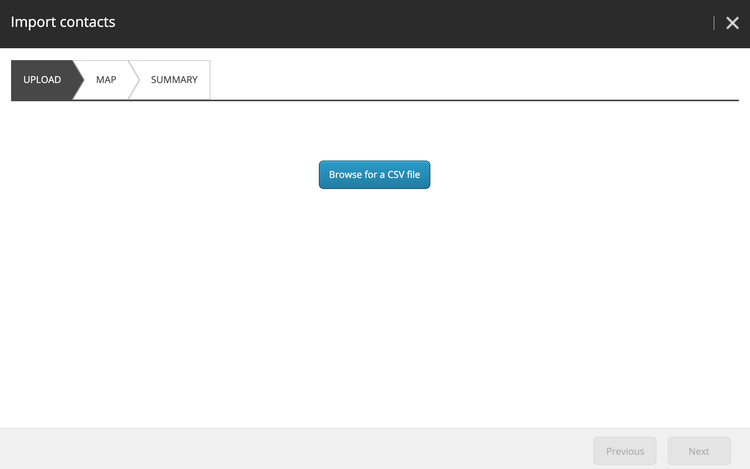
Select your CSV file, and click Open.
Click Upload File.
If you don’t want to use the email address as the contact’s identifier (not recommended), select the first checkbox.
You’ll then see a new field titled Identifier. Click the dropdown and choose what field you’d like to use as the identifier, other than email address. NOTE: I do not recommend this.
To use email address as the identifier field (recommended), don’t select any of the checkboxes.
If you don’t want to use Sitecore’s list manager as the identifier source for contacts, click on the second checkbox: ‘Manually map contact identifier sources. To use the default List Manager identifier source, do not select the check box.’ Next to the new Sitecore field ‘Identifier source’, click the dropdown and select which field you’d like to use as the identifier source for the contacts (not recommended).
Choose which columns in the CSV file you’d like to use for the contacts’ email address, first name and last name.
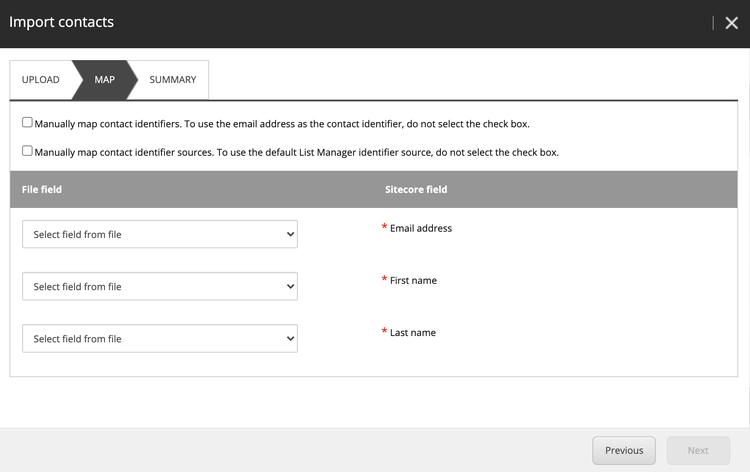
Click ‘Next’.
Then click ‘Finish’.
Adding Contacts To A New List That You Haven’t Created Yet
If you’d like to add contacts to a new list that you haven’t created yet, follow the steps above except choose the option to 'Create list from file'.

When you click Finish, you’ll be taken to a page where you’ll need to fill in the details of your new list.
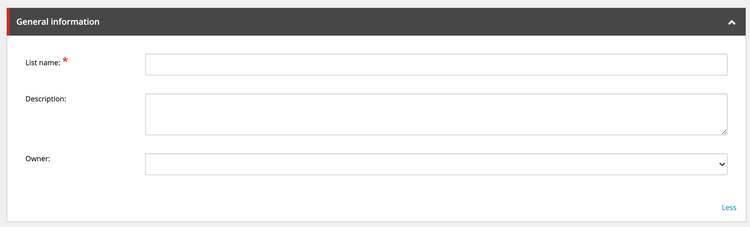
Choose a name for your list, add a list description and select the owner. Then click Save.
Adding A New Contact To An Existing List
Unfortunately there isn’t a way to add contacts to an existing list in Sitecore, in bulk. You have to add them individually.
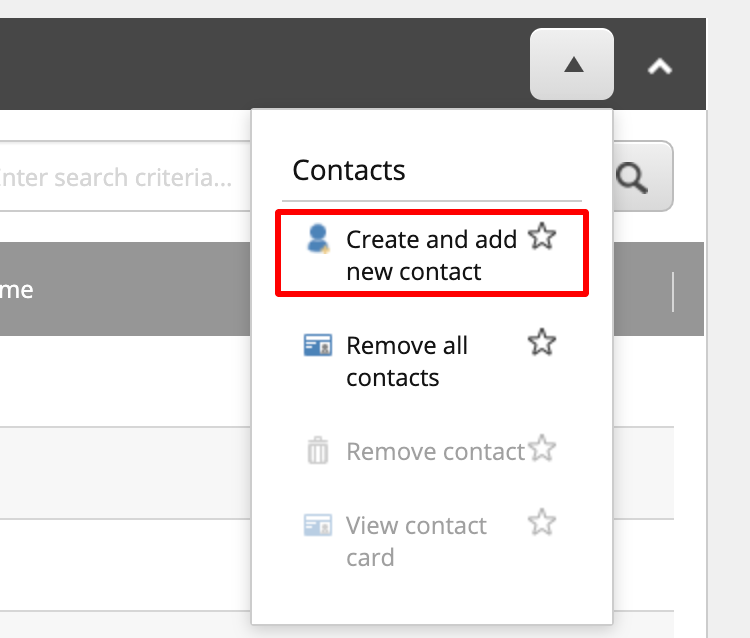
To add a new contact to an existing list in Sitecore, click List Manager from the Sitecore launchpad.
Select the list you’d like to add a new contact to.
Under Contacts, click the dropdown arrow and select ‘Create and add new contact’.
If you don’t want to use the email address as the contact’s identifier (not recommended), select the first checkbox.
You’ll then see a new field titled Identifier. Click the dropdown and choose what field you’d like to use as the identifier, other than email address. NOTE: I do not recommend this.
To use email address as the identifier field (recommended), don’t select any of the checkboxes.
If you don’t want to use Sitecore’s list manager as the identifier source for contacts, click on the second checkbox: ‘Manually map contact identifier sources. To use the default List Manager identifier source, do not select the check box.’ Next to the new Sitecore field ‘Identifier source’, click the dropdown and select which field you’d like to use as the identifier source for the contacts (not recommended).
Write/paste in the contact’s email address, first name and last name.
Click Save.
The new contact should now be in the list.
Exporting Contacts From A List In Sitecore
From the Sitecore launchpad, click List Manager.
Select the list you’d like to export.
Click on the grey Actions button in the top right.
Click Export Contacts.
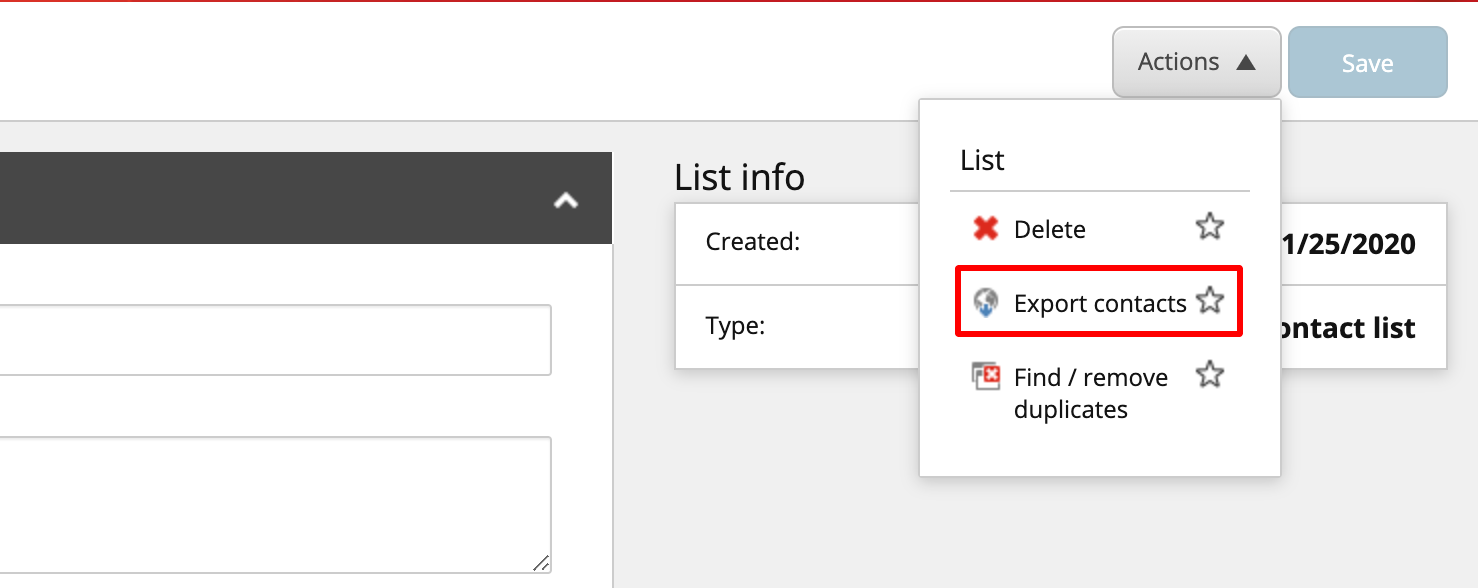
This should export a CSV file of the contacts in the list at the time of exporting.
Wrap Up
I hope this blog was useful to you. If you have any questions, or if there's anything I can help you with, please reach out to me via Twitter @natmankowski, or join my Facebook group for Sitecore marketers and content authors. I love helping other Sitecore users, so please don't be shy!
👋 Hey Sitecore Enthusiasts!
Sign up to our bi-weekly newsletter for a bite-sized curation of valuable insight from the Sitecore community.
What’s in it for you?
- Stay up-to-date with the latest Sitecore news
- New to Sitecore? Learn tips and tricks to help you navigate this powerful tool
- Sitecore pro? Expand your skill set and discover troubleshooting tips
- Browse open careers and opportunities
- Get a chance to be featured in upcoming editions
- Learn our secret handshake
- And more!
