New Features And Functionality With Sitecore 10.1
Sitecore recently announced the newest version of the Digital Experience Platform, version 10.1.
Sitecore 10.1 brings a host of new features and functionality to help brands deliver personalized experiences faster than ever before.
The release builds on the innovations delivered in 10.0 and delivers feature-packed punches that both Marketers and IT teams will love.
You can install Sitecore 10 using Docker, Kubernetes, and Powershell scripts.
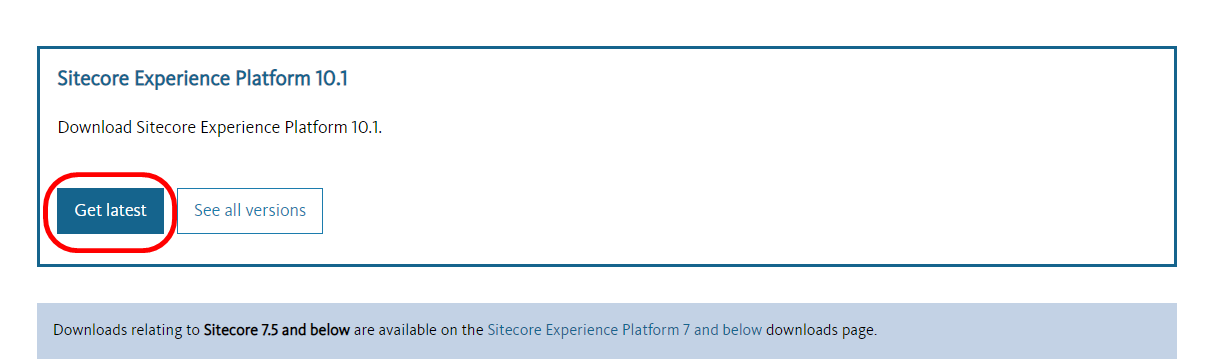
I am installing Sitecore 10.1.0 using Sitecore Installation Assistant (SIA). Please follow the steps below:
11 Easy Steps To Install Sitecore 10 Using SIA
1. Install SQL Server 2017 or 2019 and SQL Server Management Studio (SSMS). You can skip this step if you already have the required SSMS on your machine.
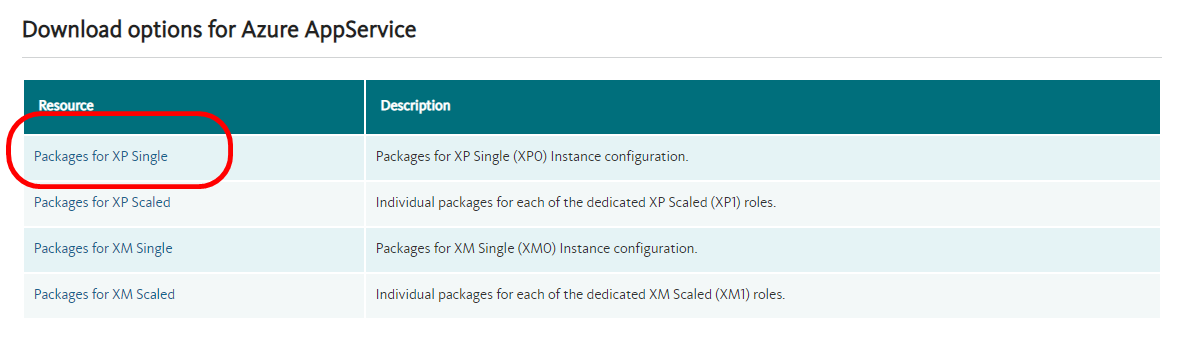
2. Download Packages for XP Single from https://dev.sitecore.net.
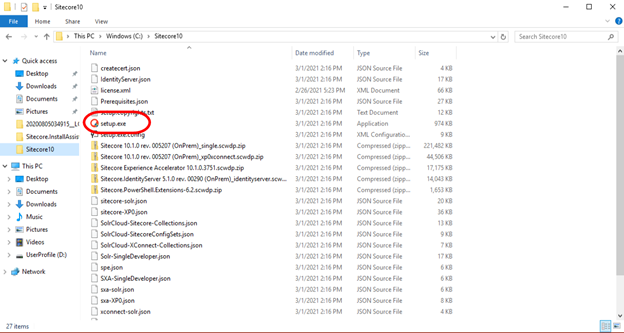
3. Extract the content of the zip. Run the setup.
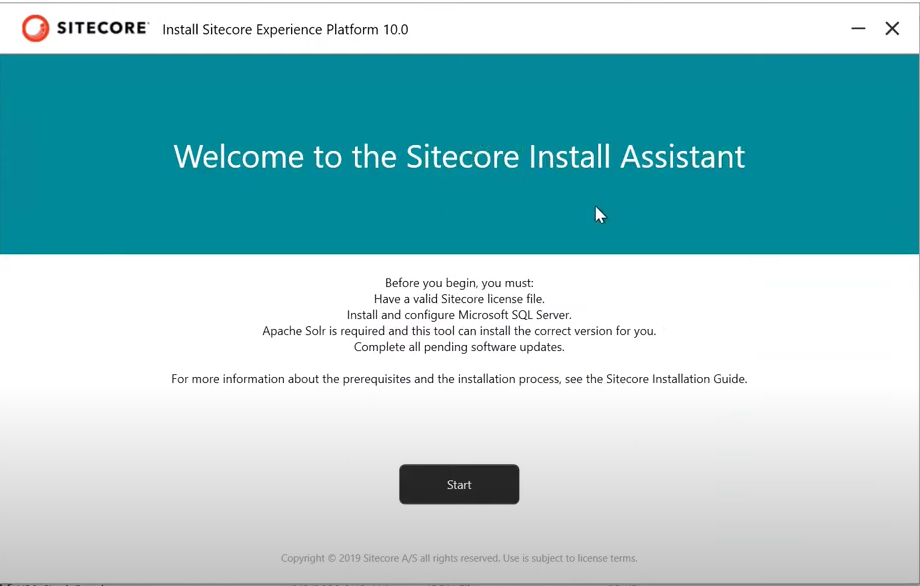
4. On the Welcome screen, click Start to begin the setup.
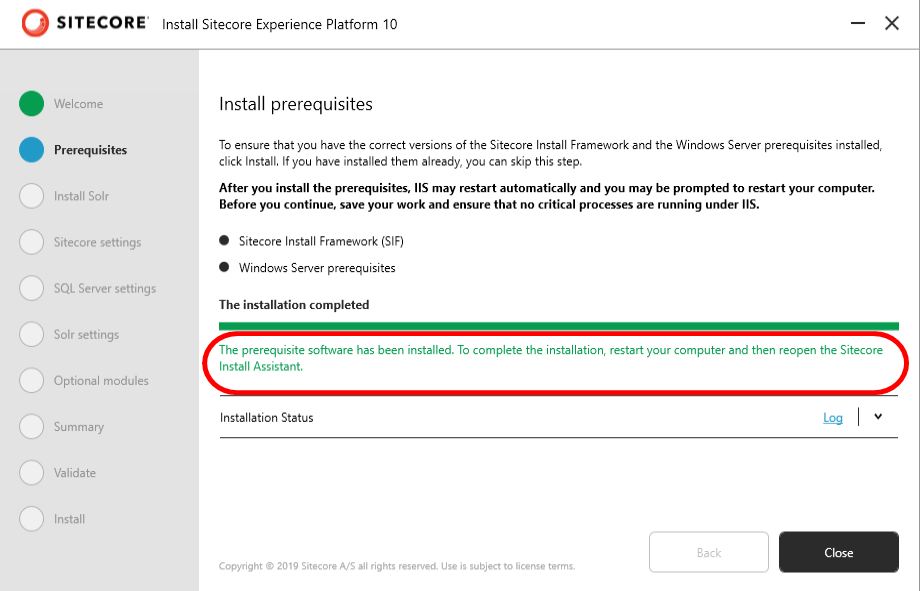
5. Install the pre-requisites. It will install .Net Framework 4.8.0, Windows Server prerequisites including IIS and other modules.
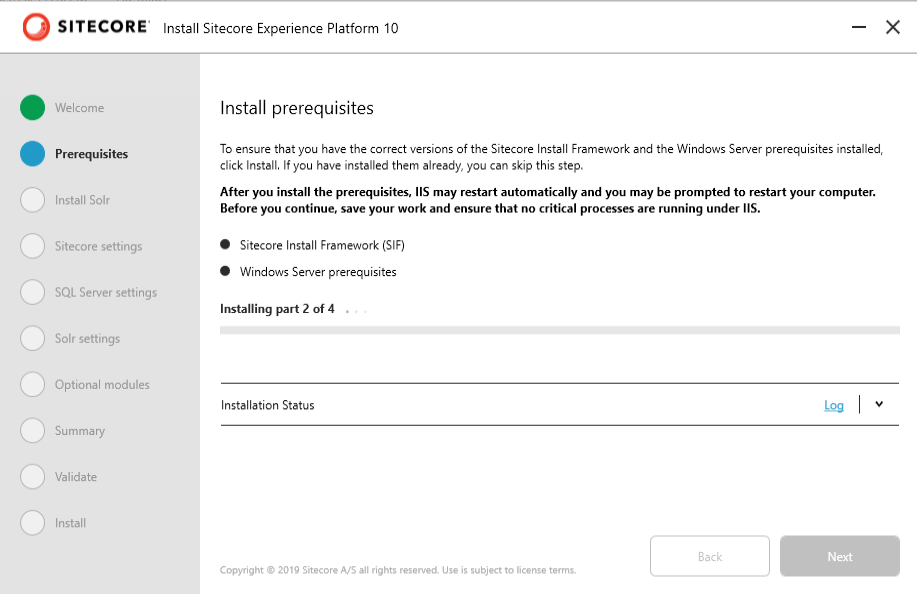
Once the prerequisites are successfully installed, you have to restart the machine.
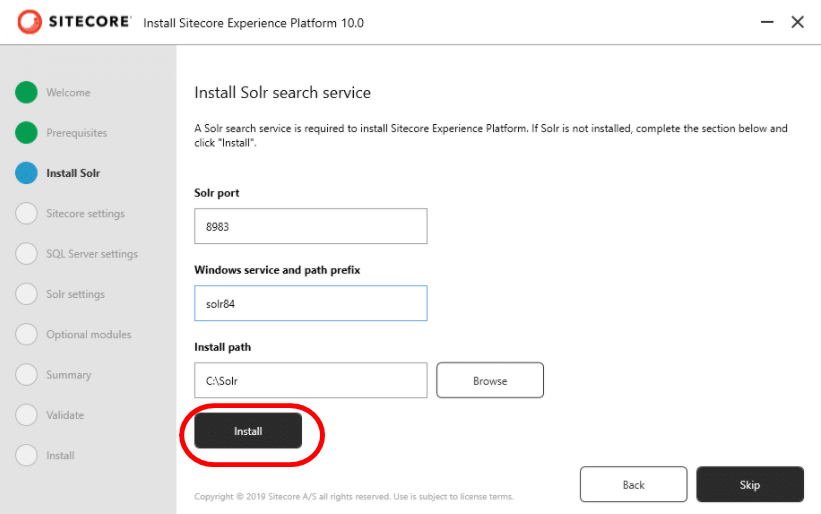
6. Install Solr search service. Sitecore 10 needs SOLR 8.4.
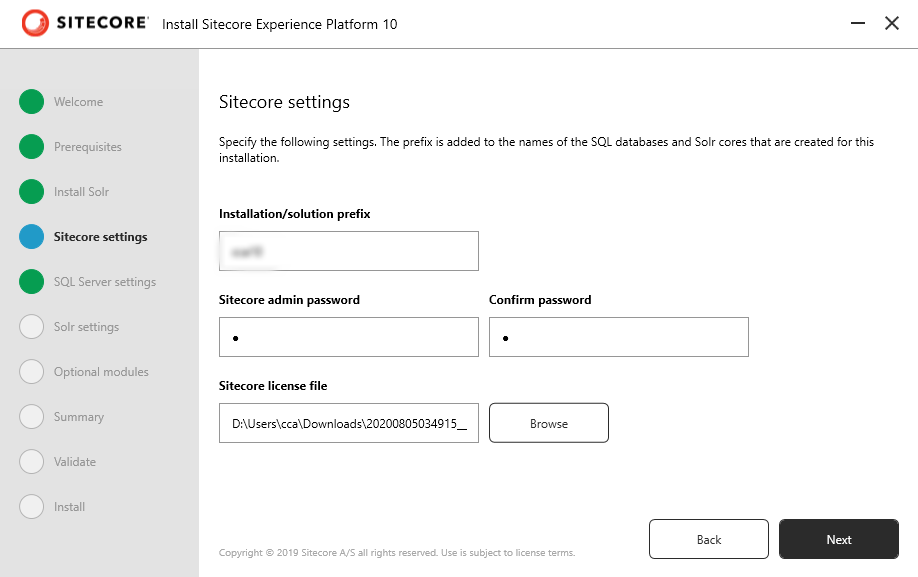
7. After SOLR is installed, enter the Sitecore settings i.e. admin password and provide a license file.
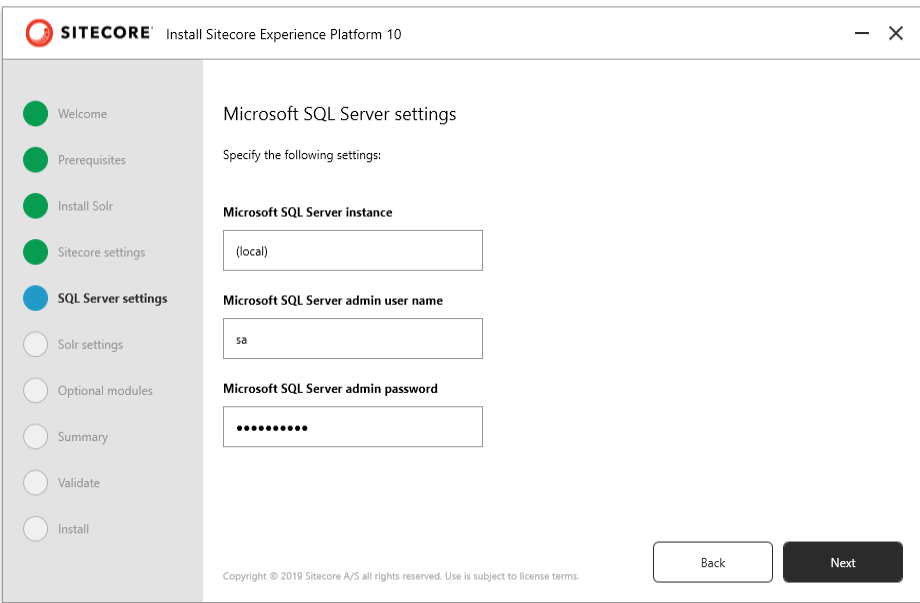
8. Provide the SQL server settings i.e. SQL server name, admin username, and password.
9. Provide the SOLR details – service URL, root path where the cores should be created and SOLR service name.
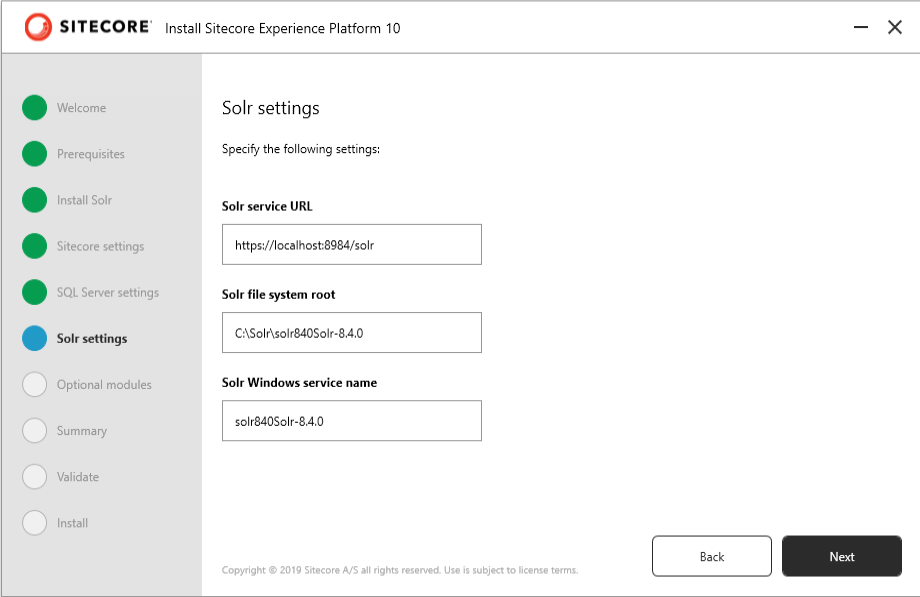
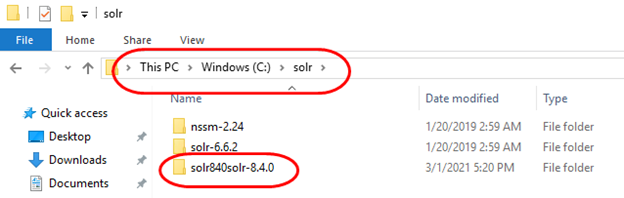
For Solr file system root .
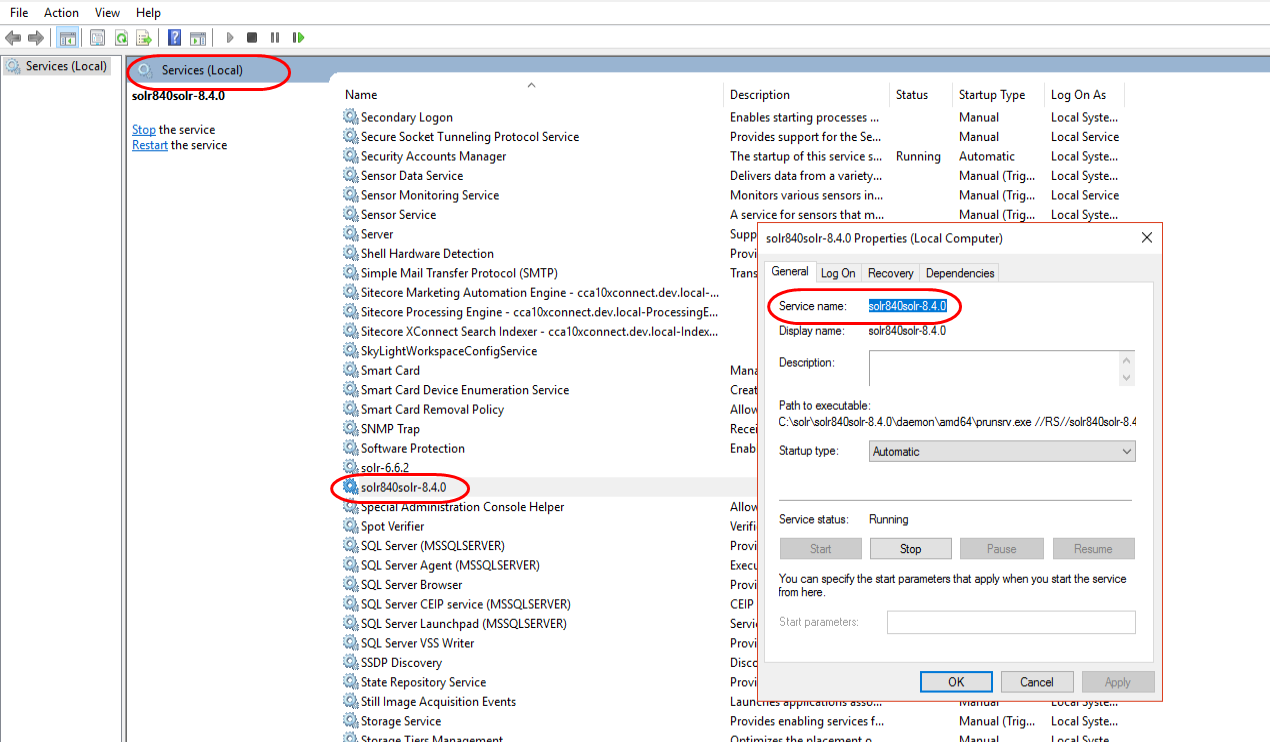
For Solr Windows service name, Go to Services and look for the service name.
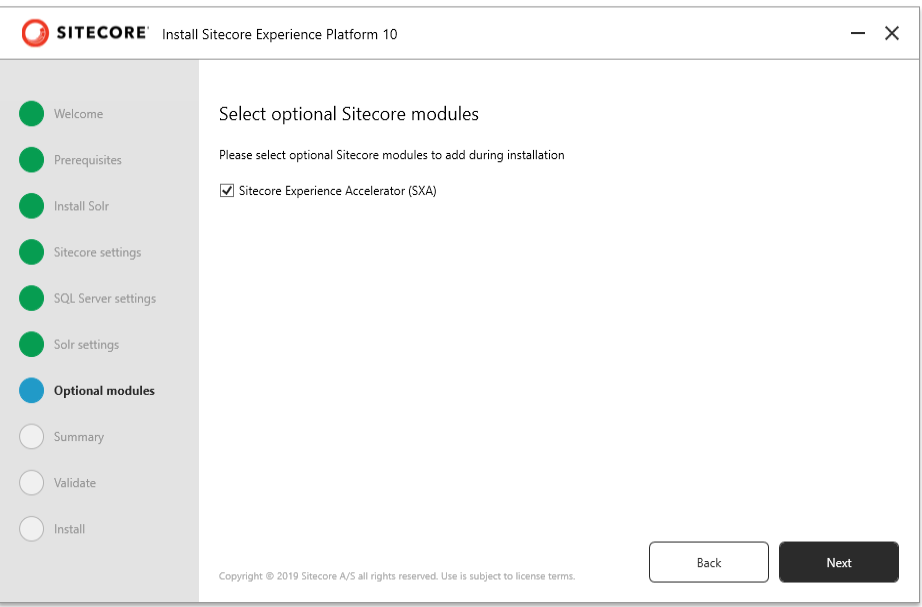
10. Optional, select Sitecore modules (SXA).
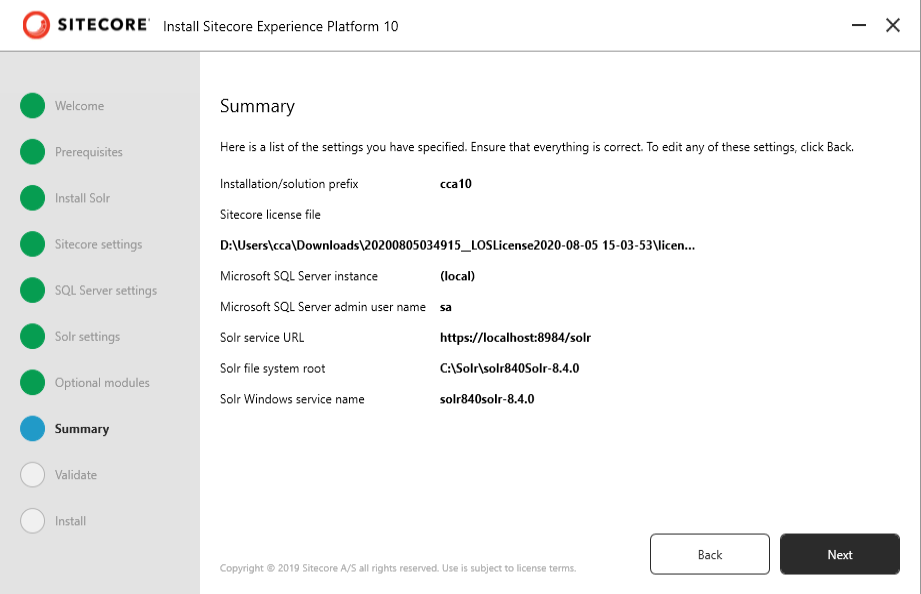
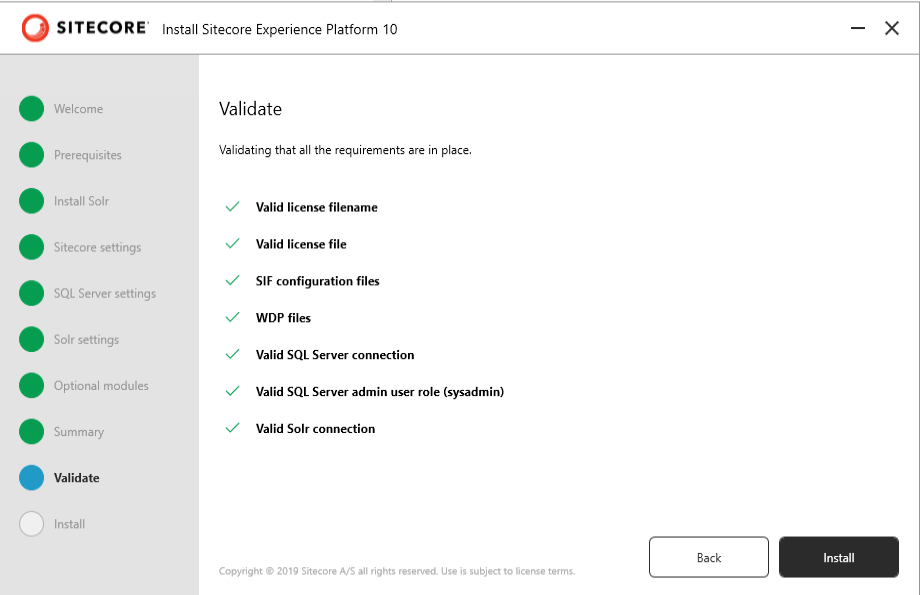
11. Review the summary and click next and Install.
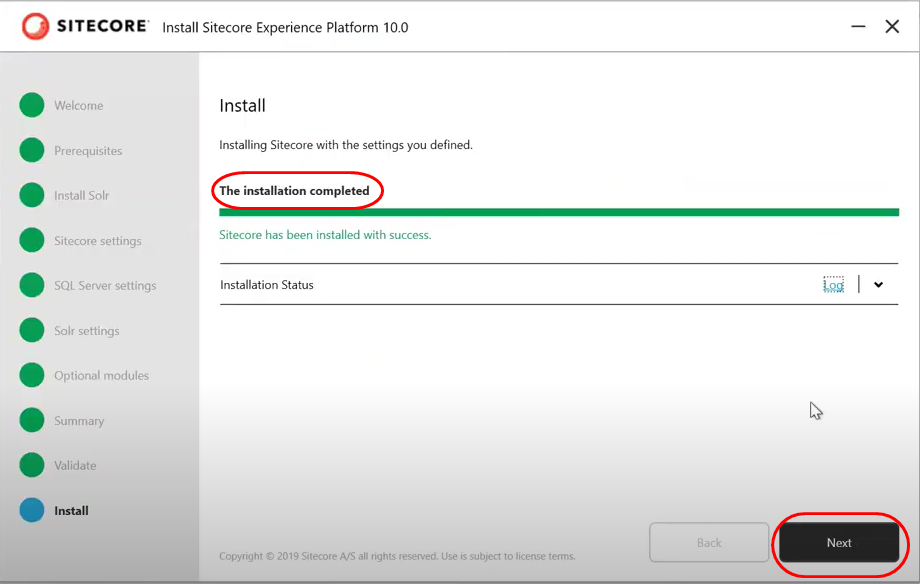
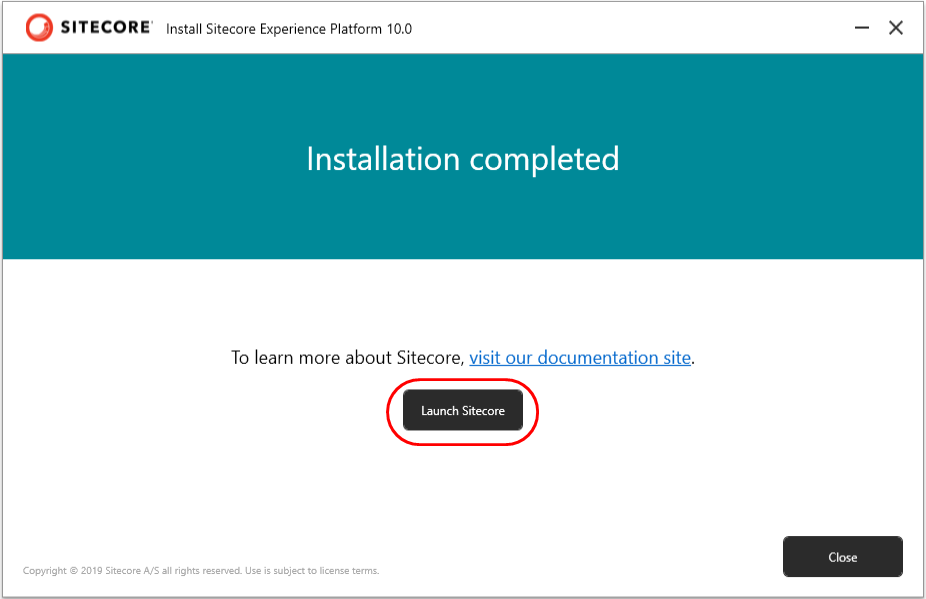
You are done, SIA takes care of everything to successfully install Sitecore 10 on your machine.
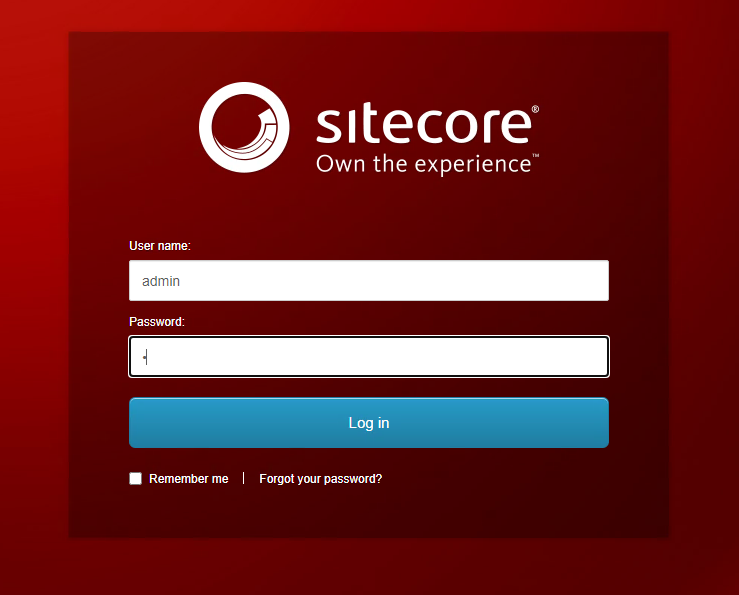
Now login into Sitecore using the administrator password given in step 7.
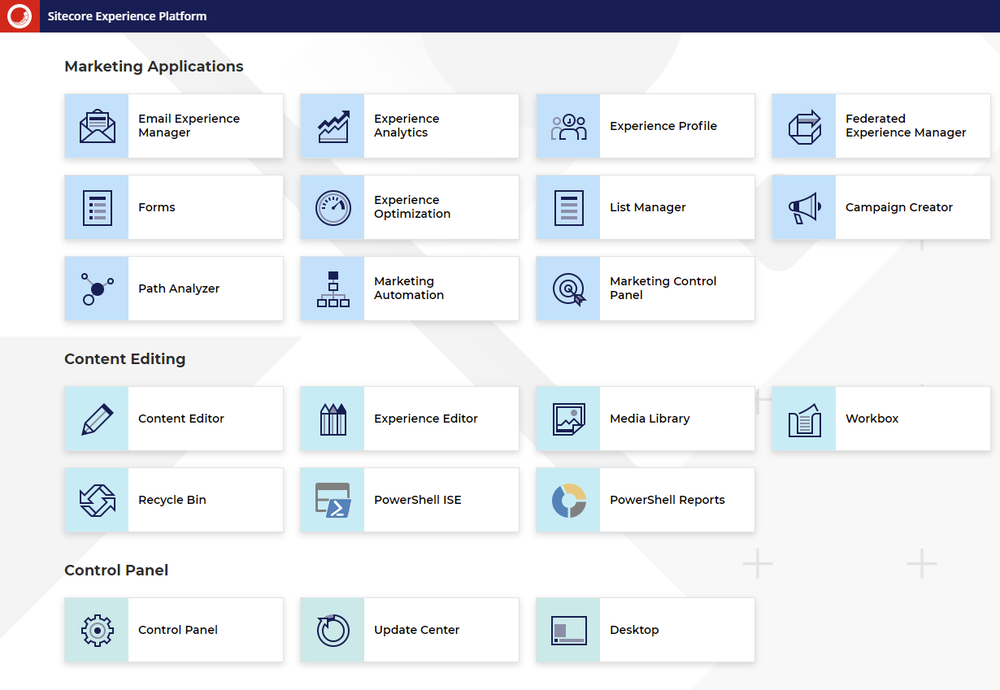
Now you will be able to see the Sitecore 10.1 dashboard.
👋 Hey Sitecore Enthusiasts!
Sign up to our bi-weekly newsletter for a bite-sized curation of valuable insight from the Sitecore community.
What’s in it for you?
- Stay up-to-date with the latest Sitecore news
- New to Sitecore? Learn tips and tricks to help you navigate this powerful tool
- Sitecore pro? Expand your skill set and discover troubleshooting tips
- Browse open careers and opportunities
- Get a chance to be featured in upcoming editions
- Learn our secret handshake
- And more!
